Dollar Tree, Easter, Home Decor, Spring
DIY Dollar Tree Wood and Glass Cross
Mar
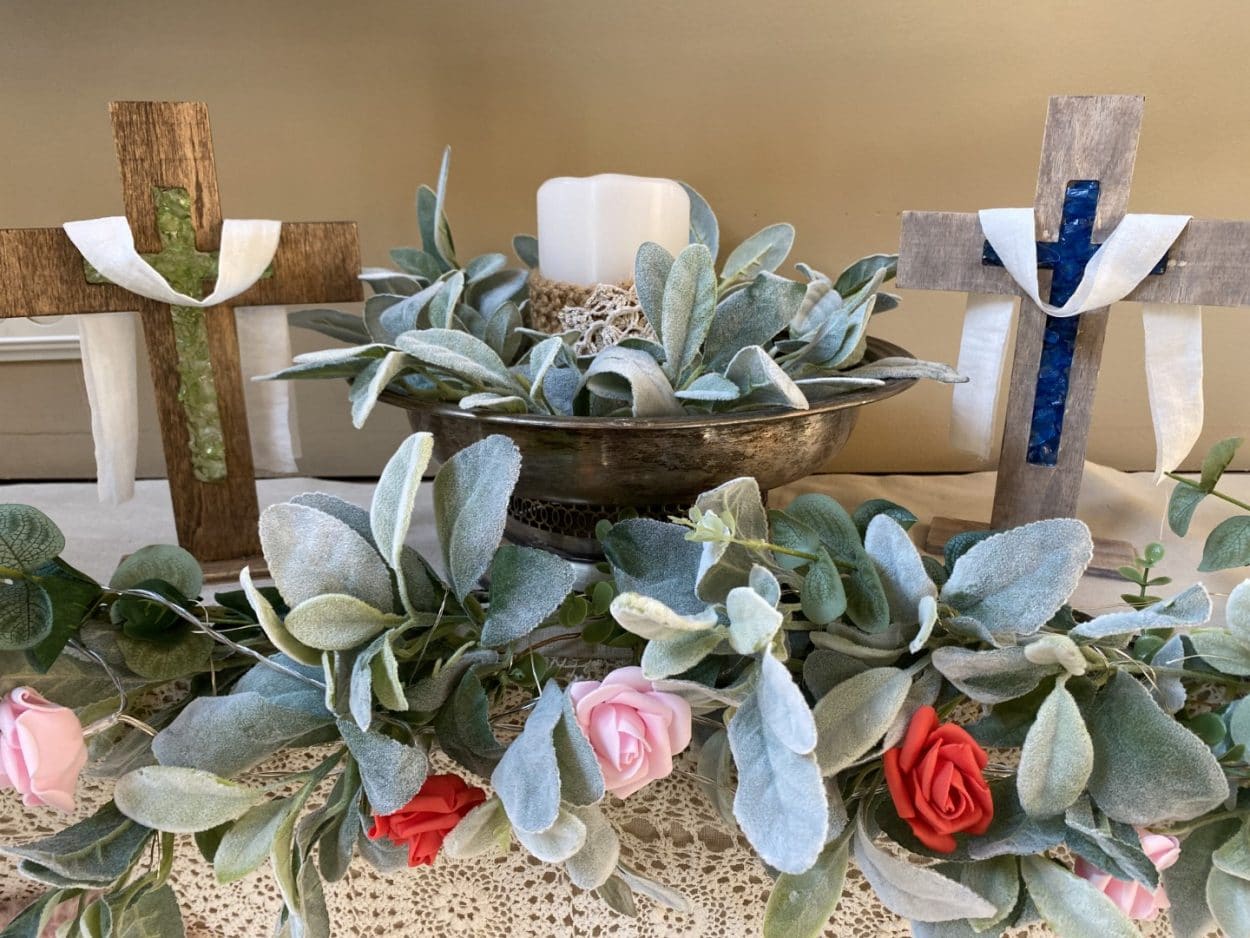
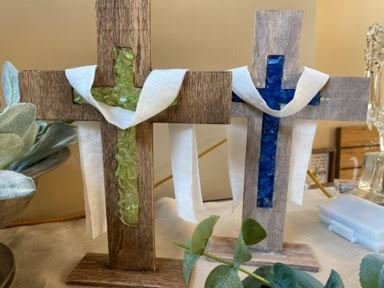
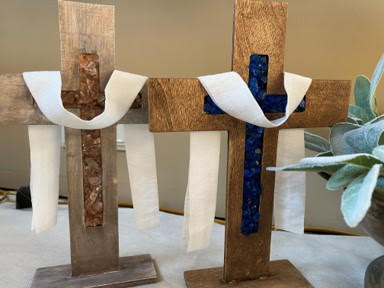
I can’t believe Easter is only two weeks away. I am still crafting for Easter lol. I haven’t even decorated yet I better get busy. Are you decorating for Easter? The cross I have made using Dollar Tree items would be a beautiful addition to your Easter décor or for everyday. I was shopping in Dollar Tree and I came across these unfinished wood crosses that had a cutout in the center I didn’t know what I was going to do with them but I had to get them. I decided I wanted to make the middle look like stained glass. In the beginning I was going to try and use cellophane wrap but then I seen bags of beautiful crushed glass at Dollar Tree and that was just the answer I was looking for.
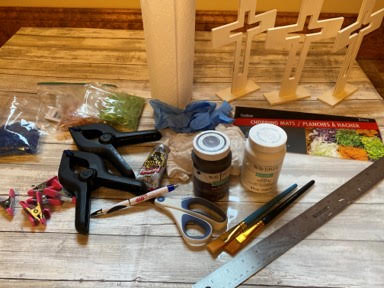
Here is a list of what you will need:
- Wooden Cross with cutout center (Dollar Tree)
- Colored Crushed Glass (Dollar Tree)
- Cutting Mat (Dollar Tree)
- Ribbon or Fabric in White or Purple
- Ruler
- Ink Pen
- Scissors
- Gorilla Clear Grip Adhesive
- Waverly Antiquing Gel
- White Chalk Paint if you want to whitewash
- Paintbrush
- Rag
- Paper Towel
- Rubber Gloves
- Fine Grit Sandpaper
- 6 Mini Clamps (Dollar Tree)
- 2 Large Clamps
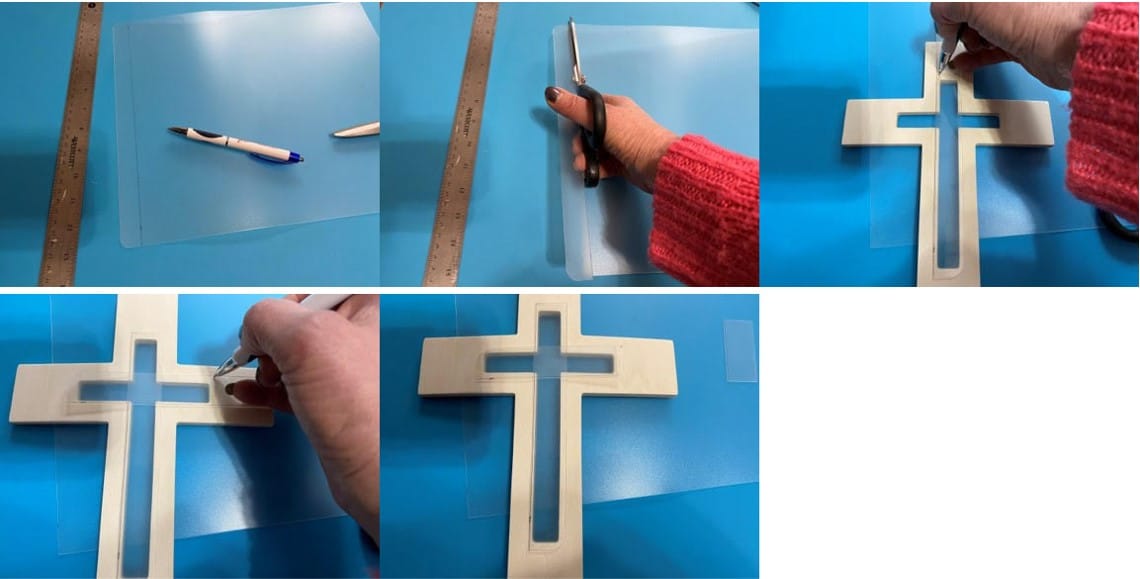
Preparing the Backing
On the shorter side of the chopping mat measure and mark ¾” wide strip and cut. You will only need one strip. Lay the strip down the middle of the opening and mark at the top where you need to cut the strip. You only want a little overhang at the top and bottom of the opening. Next place the excess piece you just cut off across the opening going across. Mark where you will need to cut. Again you only want a little overhang on each side. Set your two pieces aside until later.
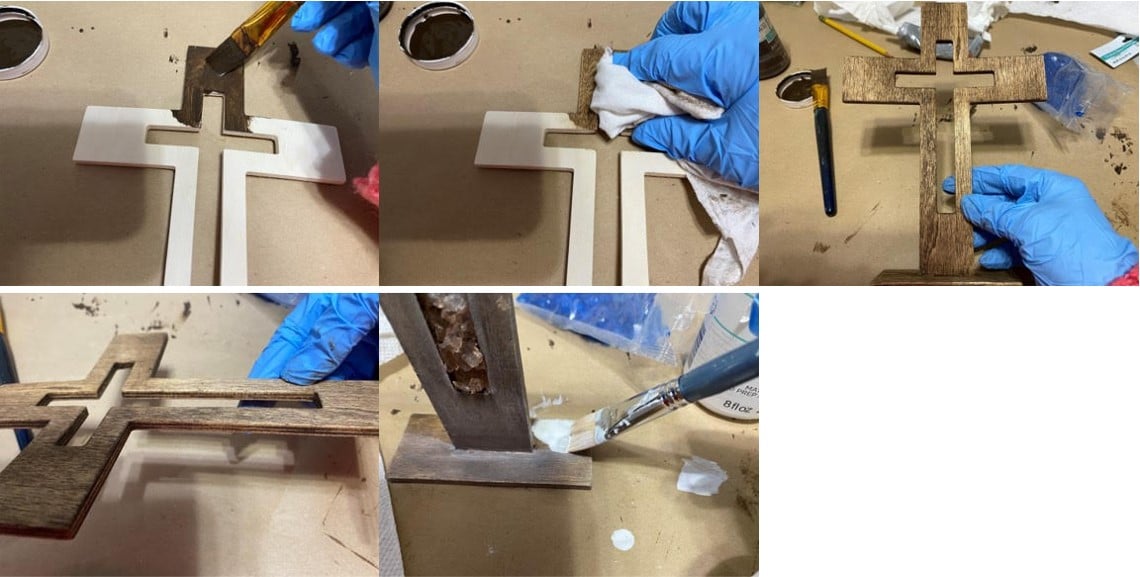
Staining and White Washing
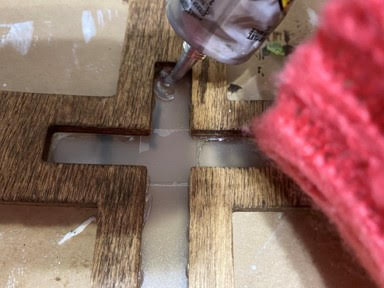
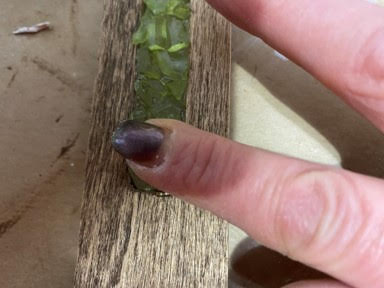
The first thing you need to do is give the cross a good sanding with a fine grit sandpaper. The wood is soft so do not use a rough sandpaper. Make sure you wear a pair of rubber glove while staining. I used a Wverly antiquing wax to stain the cross but you can use a regular stain if you would like. Using a paintbrush apply the antiquing wax to part of the cross then wipe off with a rag. Continue applying the wax and wiping off until you have done the whole cross and the bottom stand. Make sure you also stain the inside of the cutout. If you would like to also white wash over the stain mix some chalk paint and water apply with a brush and wipe off with a paper towel or rag. In the photo below you will see I have the crushed already glue in before I white washed you want to white wash before adding the glass.
Attaching the Backing
Now that you have stained the cross it is time to adhere the backing that you prepared earlier. Add a line of gorilla clear grip adhesive all around the outer edge of the long middle section of the cross cutout. Do not worry if glue goes into the cutout section you don’t want a lot of adhesive on the cross itself. Glue down the long plastic strip. Place two small clamps on either side of the bottom half of the strip. This is going to help the strip adhere to the wood. Next add the adhesive to the outer edge of the small cutout going across. Glue down the small strip then place a large clamp on both sides of the small strip. Finally add a small clamp to both sides of the strip at the top of the cross cutout. Set aside for about 15 minutes or so to the adhesive time to set up.
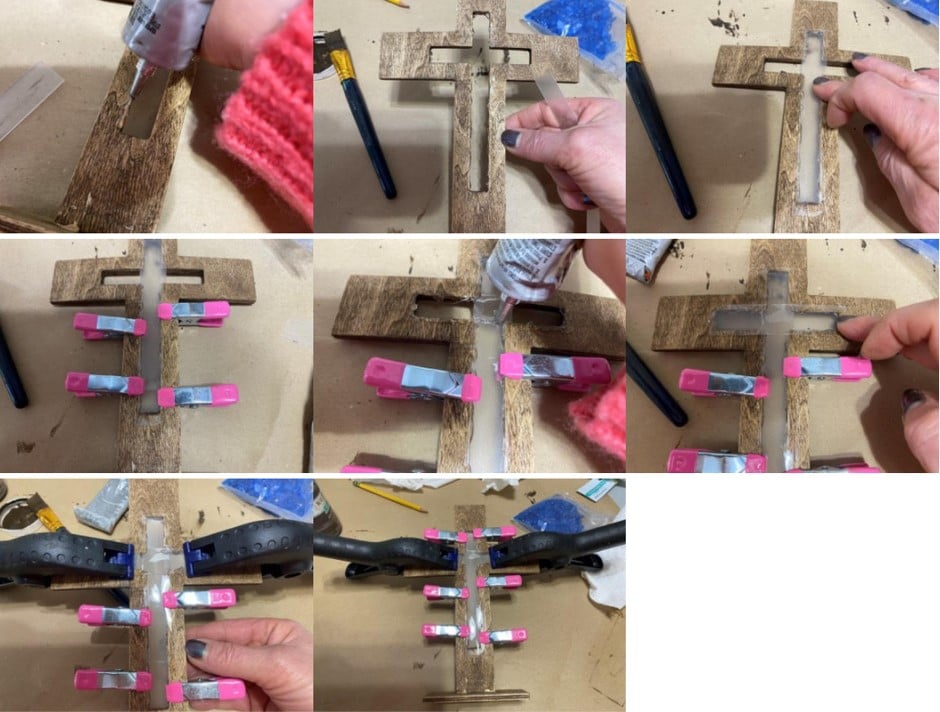
Adding the Crushed Stone
Using the gorilla clear grip adhesive you are going to fill in the opening. It doesn’t have to get filled to the top but be generous with the adhesive. Next add the crushed glass one section at a time. Press down on the glass. You may need to find some small pieces to fill in spots. Continue adding the crushed glass a section at a time until the area is all filled in. Let lay flat until the adhesive sets around 20 minutes or so.

Adding the Sash
I used a soft polyester ribbon to make the sash. I only had a white or I would have used purple for Easter. Cut a 16” long piece of ribbon I believe mine is 2 ½” wide. I folded the ribbon in half then ironed. Lay the ribbon over the cross with a scoop in the front.
Beautiful cross. I hope to find them at my local Dollar Tree
That is beautiful
My comment is on the craft with sea glass paint cloche. The pink knob from hobby lobby…how did you remove the screw. Thanks in advance.
Beautiful!!! Not able to find the cross or glass in my Dollar Tree. Had seen the glass before you made the cross but had no idea what to do with it. Will keep checking. Would love to make this even though Easter is over.