Easter, Home Decor, Spring
DIY Fabric Chick Ornies
Mar
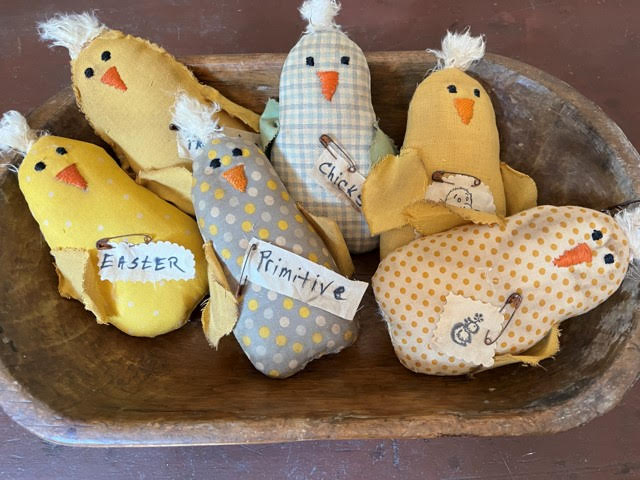
I am so happy it is finally March which means Spring is right around the corner. One of my followers here at The Crafty Decorator sent me a photo of some chicks and asked if we could make these so I just had to make a pattern and create these adorable chick ornies. I just love how they turned out. These little chicks make an adorable bowl filler or you can just add a jute hanger on the back for an ornament to hang on your tree.
Materials You Will Need
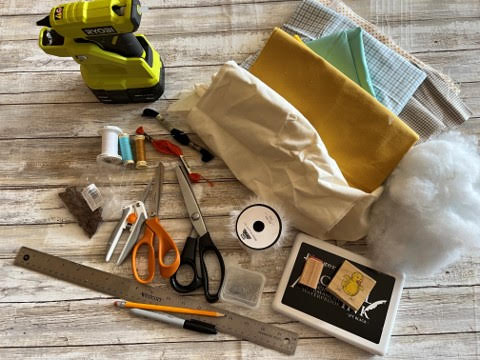
- Fabrics of your choice
- A piece of muslin fabric
- Polyester Fiberfill
- Sewing Machine
- Needle and threads to match fabric
- Embroidery Thread in the colors orange and black
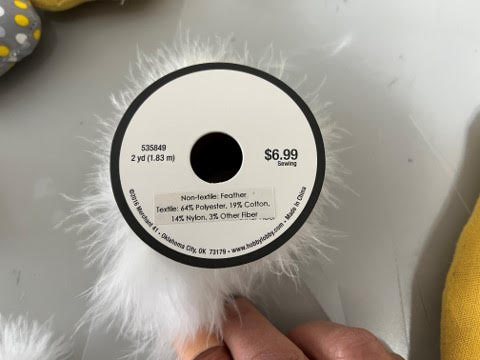
- Boa Trim or you can use faux fur in white
- Scissors
- Pinking Shears
- Sewing Pins
- Ruler
- Pencil
- 1” Rusty safety pins
- Black Sharpie or stampers and ink pad to make tags
- Hot glue gun and glue sticks
Making The Chick Body
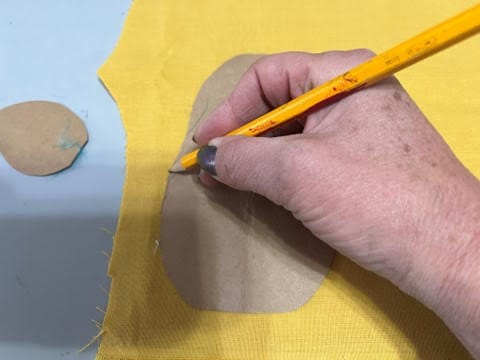
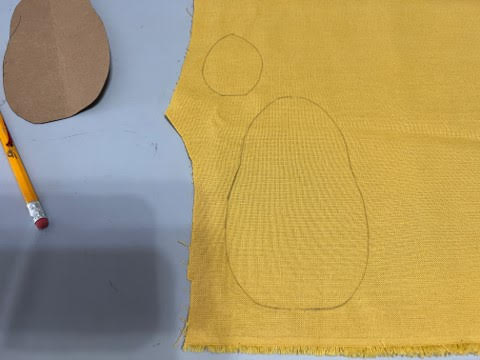
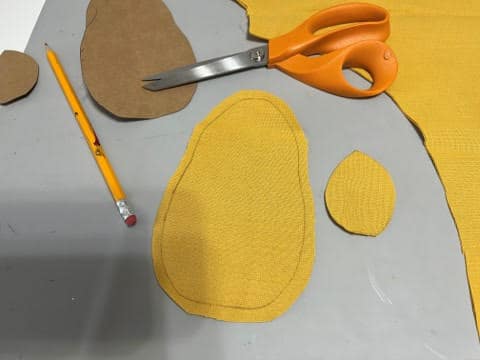
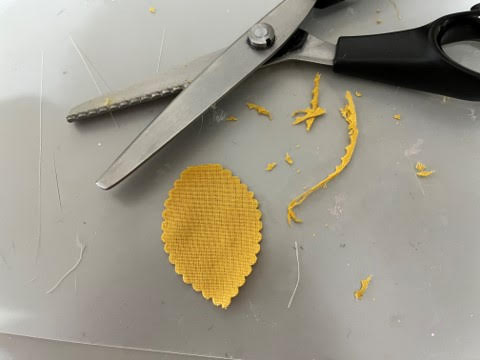
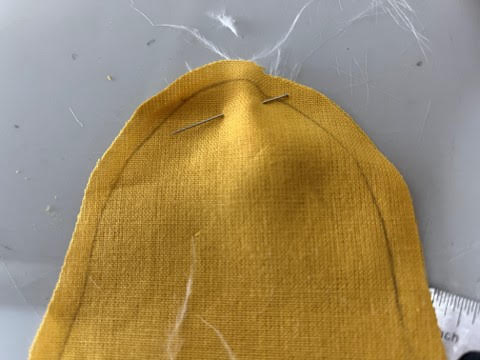
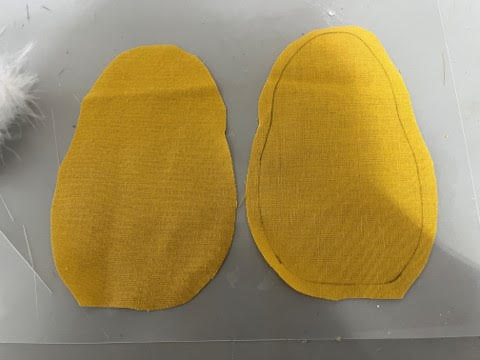
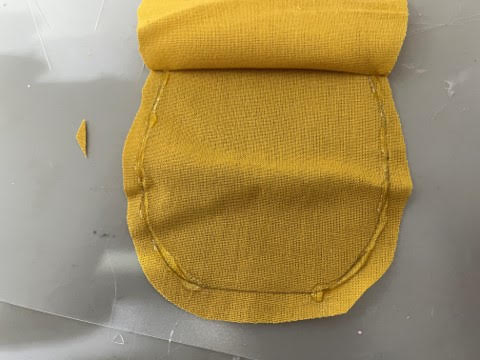
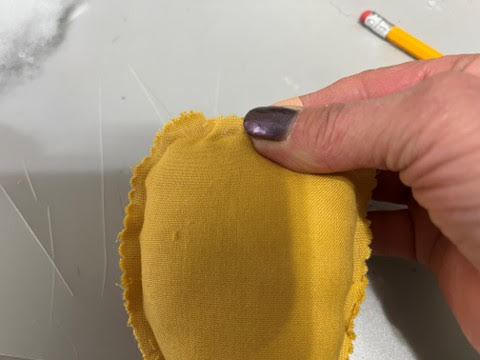
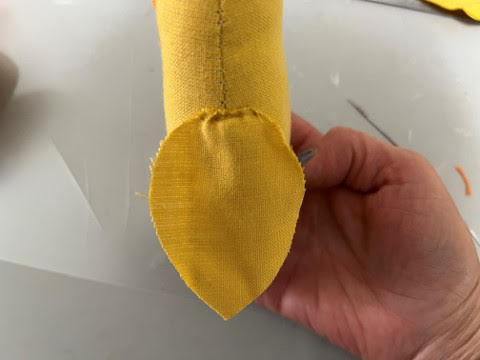
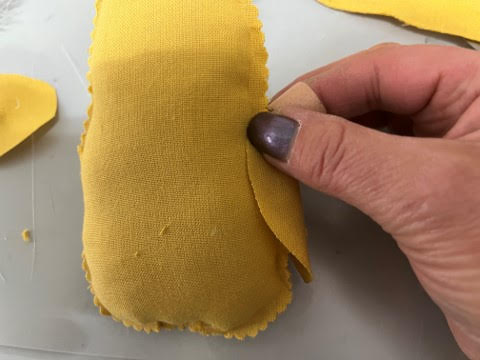
The first thing you will need to do is print and cut out the fabric chick ornie pattern. Trace the chick body on a double layer of fabric then cut out about a ¼” away from the trace line, if you are using a printed fabric face the print side inwards and trace on the back of the fabric. Trace the wings on a double layer of fabric then using pinking shears cut out on the trace line, set the wings aside for now.
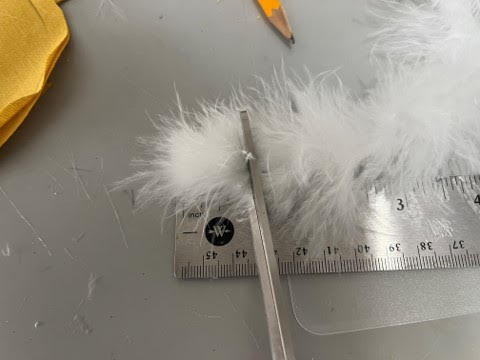
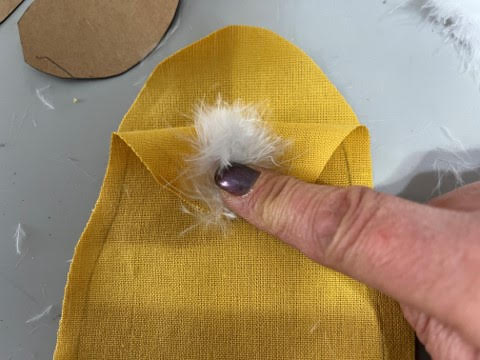
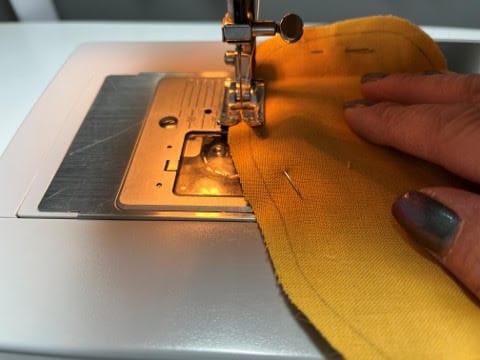
To sew your chick start by cutting a 1” piece of boa trim place between your two pieces of fabric at the top of the head in the middle where indicated in the pattern. Make sure the end of the piece of boa is above your trace line. Pin the boa in place using a sewing pin then pin your two pieces of fabric together. Sew your chick body on the sewing machine using the trace line as the sew line and make sure you leave the opening at the bottom of the chick where indicated on the pattern.
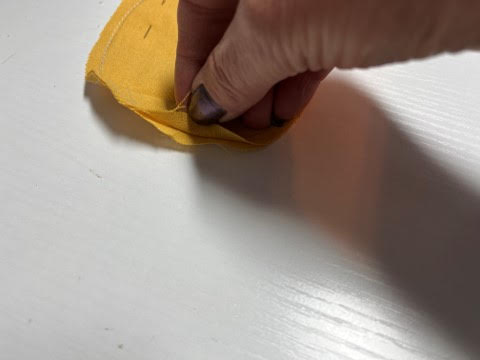
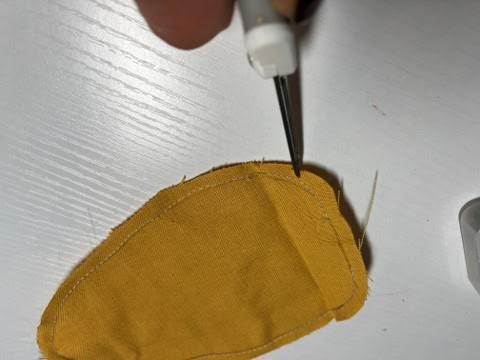
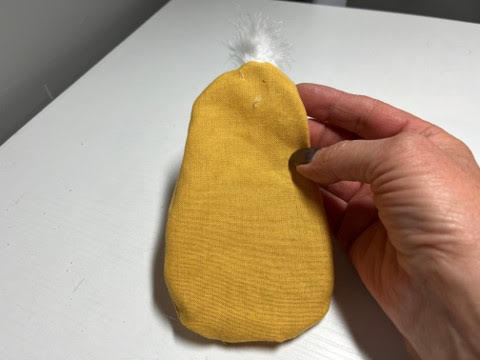
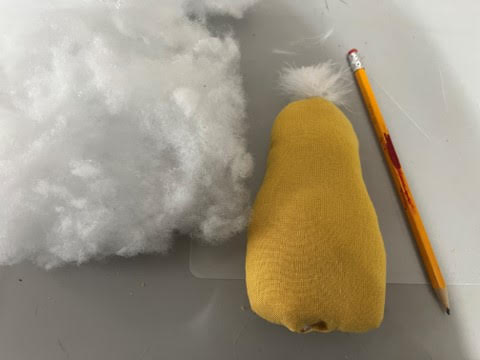
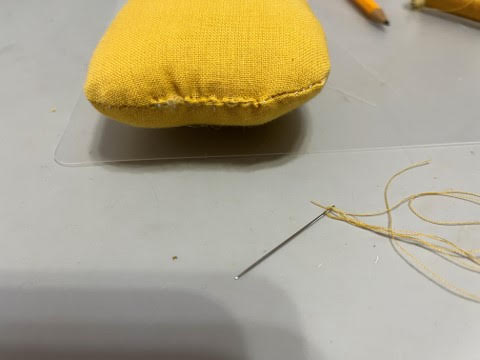
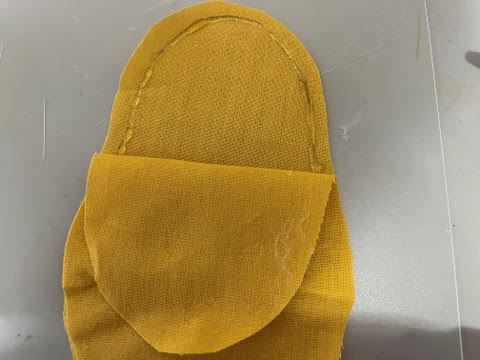
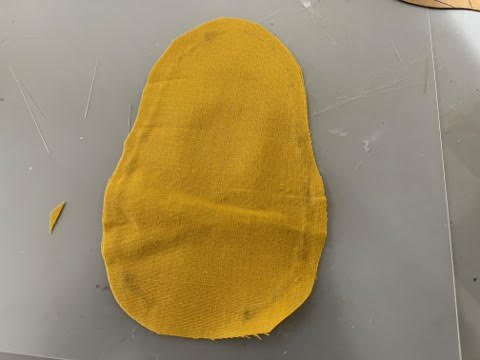
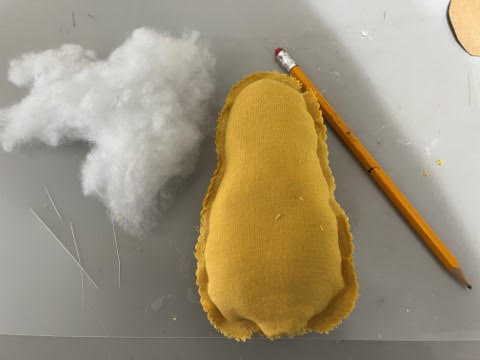
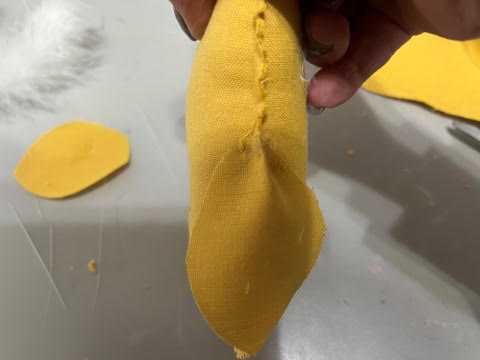
Remove your sewing pins, make little snips with your scissors around all curves this will help with any puckering of the fabric when you turn right side out. Next turn right side out and stuff firmly with your polyester fiberfill. I like to use the eraser end of a pencil to push my stuffing in. Sew the opening closed with matching tread and needle.
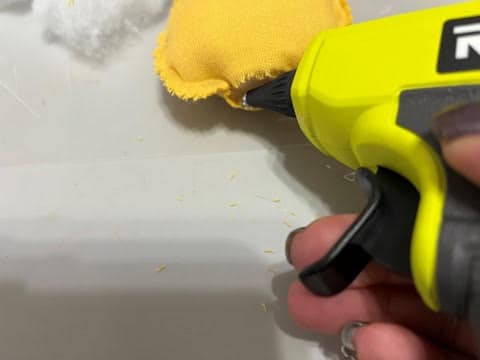
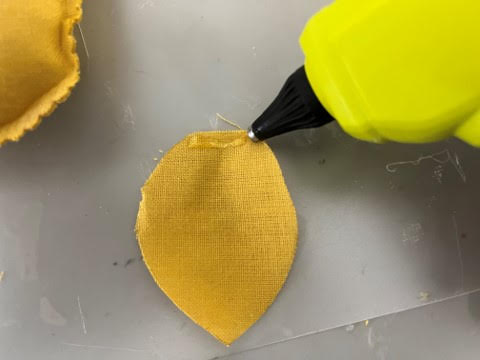
To glue your chick body after tracing and cutting out your body and wings as instructed at the beginning of this blog, separate your two body pieces then place the body piece with your trace line on top of the second piece of the body. Fold down the top piece of fabric about half way add a line of hot glue onto the trace line then glue down the top piece. Next fold up the bottom of the top piece add a line of hot glue onto the trace line making sure you leave an opening at the bottom where indicated on the pattern, glue down the top piece of fabric.
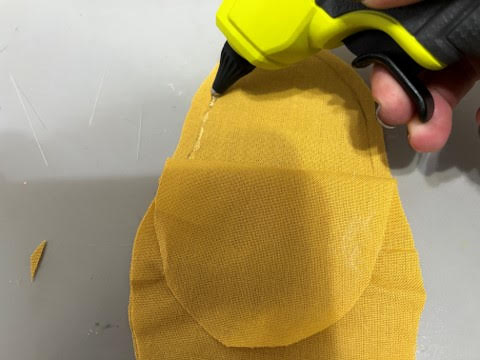
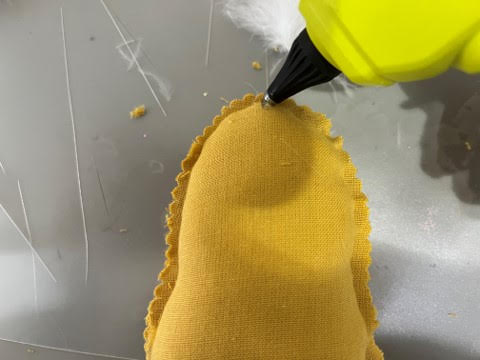
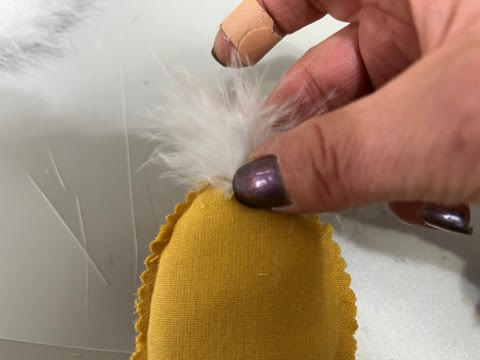
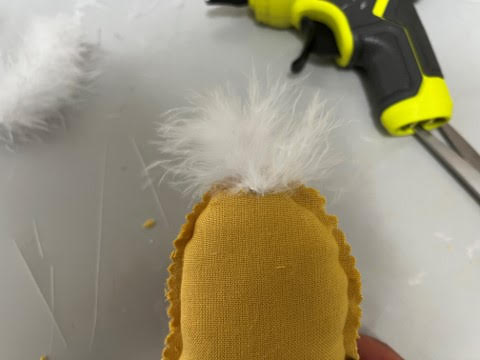
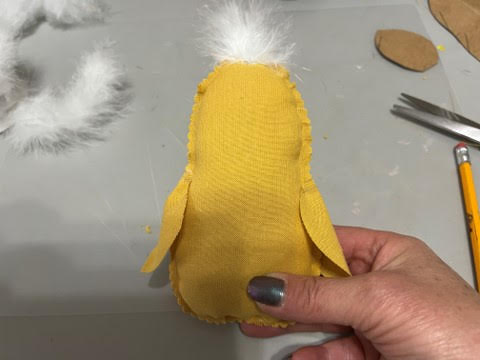
Using pinking shears trim around your chick body but not to close to the glue line. Stuff with your fiberfill then glue the opening closed. After your chick is stuffed your may want to trim around the chick body again. Next cute about a 1” piece of the boa trim add a little hot glue to the top of the chicks head in the middle where indicated on the pattern then glue the boa in place.

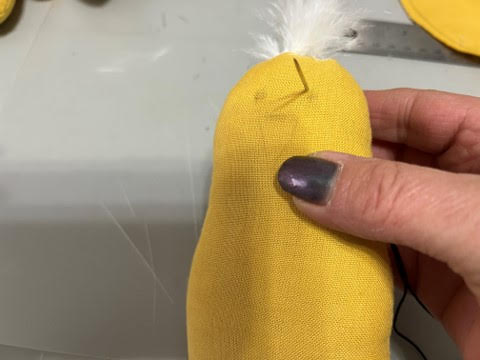
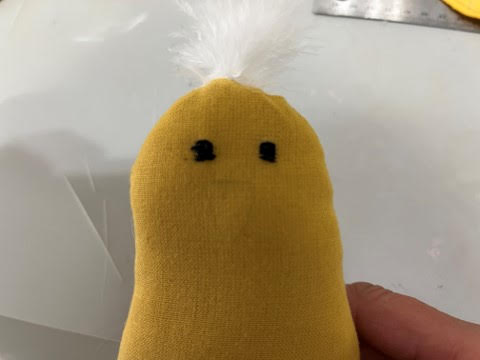
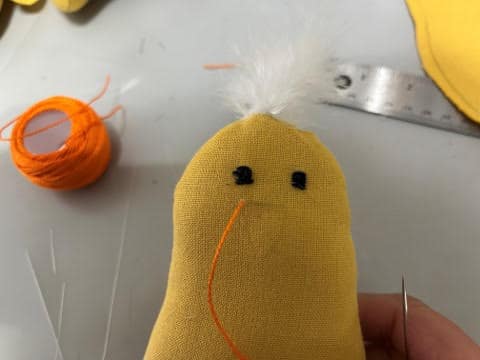
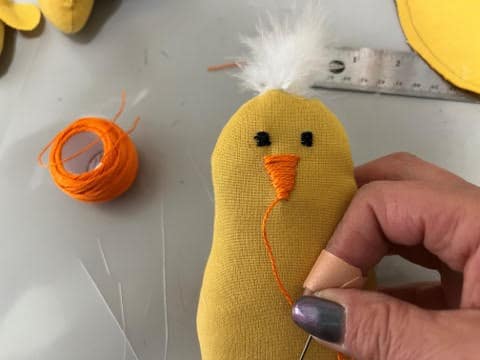
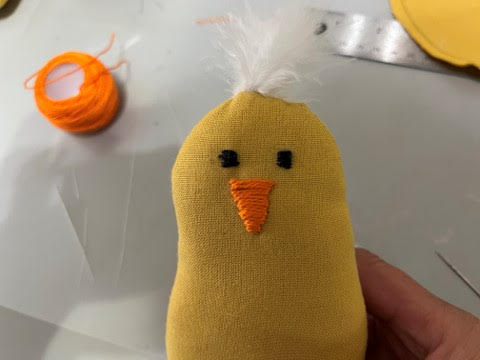
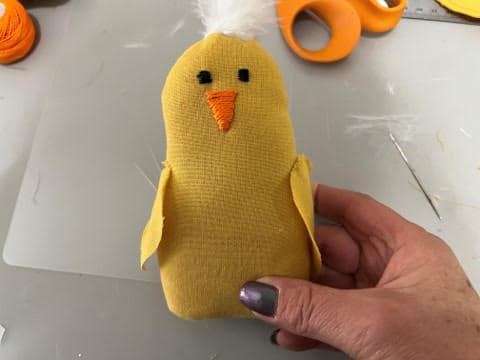
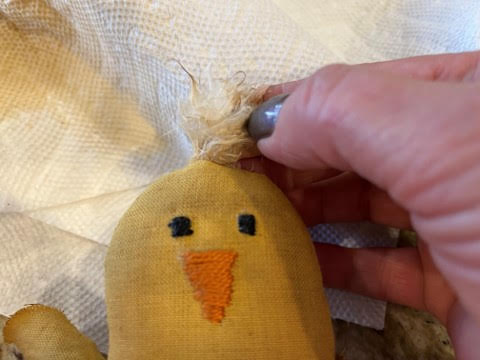
Adding The Face
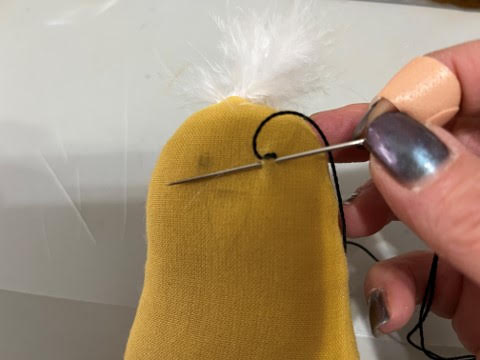
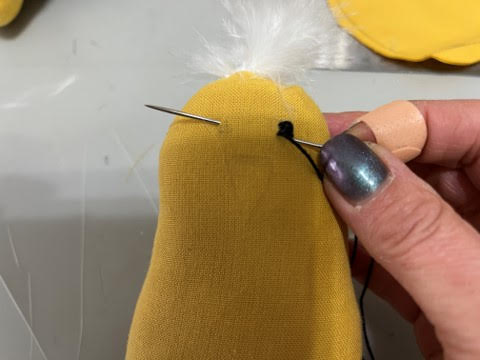
Using a pencil lightly draw on the chicks eyes and beak. For the eyes you will be using 3 strands of black embroidery thread and a needle. Insert the needle through the back of the head to the front at the top of one eye pulling your knot through the back of the fabric. Stitch the eye, when you are on your last stitch bring the needle under the fabric and up through the top of the other eye. Stitch on the second eye, when you are on the last stitch bring your needle up to the back of the head at the top knot and trim of excess.
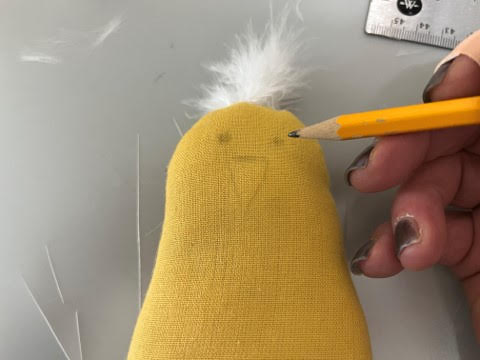


For the beak you will be using 3 strands of orange embroidery thread and a needle. Insert the needle through the back of the head coming out the front at the top of one side of the beak. Stitch on your beak, when you are on the last stitch bring the needle up to the top back of the head knot and trim off excess.
Attaching The Wings
To sew on the wings take one wing place where indicated on the pattern then stitch on using matching color thread and needle. Repeat this step to the other side with second wing.
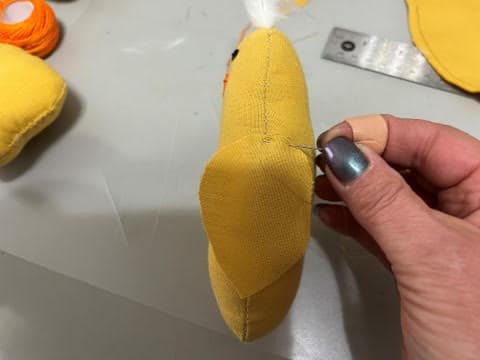
To hot glue on the wings add a line of hot glue to the top of the wing and glue in place where indicated on the pattern.
Repeat this step with the second wing on the other side of the chick.
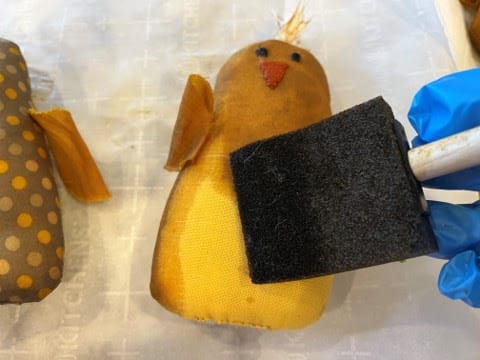
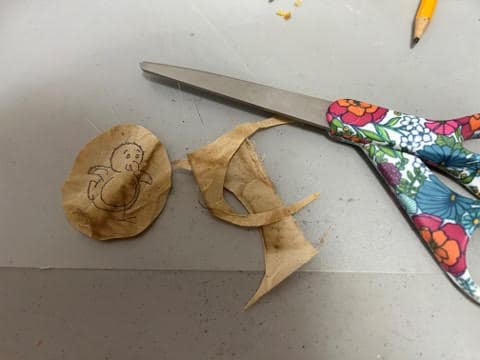
How To Coffee Stain Your Chicks
If you would like a primitive look you can coffee stain your chicks. I have a recipe for a coffee stain mixture in my blog titled how I color and coffee stain fabric. Wearing a pair of rubber gloves and using a sponge brush cover your chick with the coffee stain mixture. I did not want my chicks to dark so I blotted them with paper towel to remove some of the coffee. Place your chicks on a parchment lined cookie sheet then you can let them dry naturally or you can place them in a 225 degree oven to dry making sure you check them every 5 minutes or so until dry. If you have hot glued your chicks you can NOT put them in the oven you will need to let them dry naturally. You will also want to coffee stain a piece of muslin at this time for the tags.
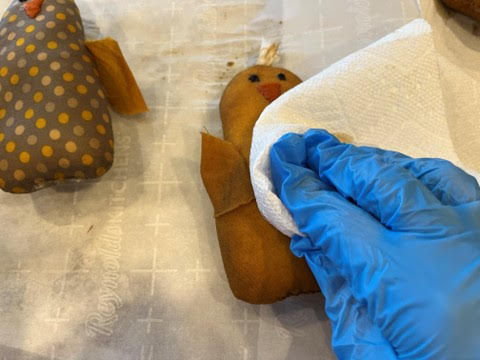
After your chicks have dried you will want to us your fingers or a hairdryer to fluff up the little hair lol. The wings may be a little to wrinkled if so you can use a small craft iron to iron them out.
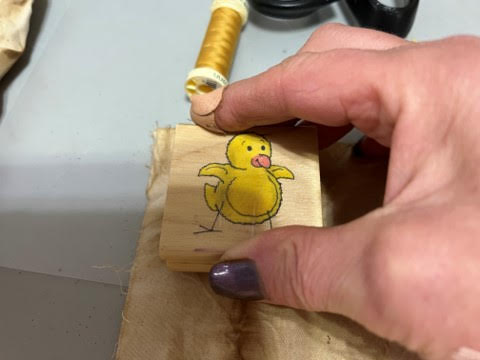
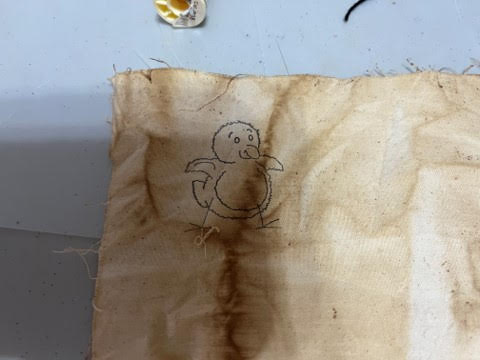
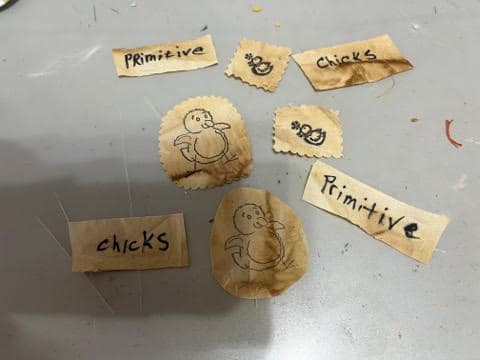
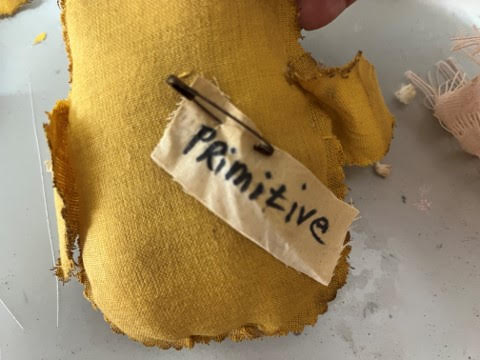
Making And Attaching The Tags
I coffee stained my muslin to make the tags but you do not have to coffee stain the muslin. You can use stampers and a ink pad or just a black sharpie to make your tags. I used two cute little chick stampers I had and a black sharpie to write my words. After either stamping or writing on your muslin cut them out then pin each one to a chick using 1” rusty safety pins. Using rusty safety pins is optional you can use a regular safety pin also. If you are looking for rusty safety pins I sell them in my online store.
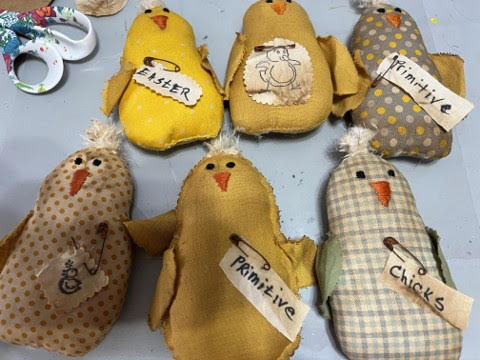
You are now done I hope you enjoyed making these adorable fabric chick ornies. Place them in a wooden bowl or add a hanger to the back of them and use them on your Easter Tree.
You are so creative and talented, Miss Sherry. These are adorable!
Thank you!
I purchased the Natural Dried Sweet Anne on 2/21/22
Is there away to prevent the buds from falling off. They are everywhere. I can not even touch them or move the vase they are in when the buds fall off and spread (sprinkle) everywhere.
Please help !
Thank you
Cathy Durak
Absolutely adorable 🐥 I will definitely be making them.
I would love my free flag pin!❤️🤍💙❤️🤍💙