Fall, Home Decor
DIY Fabric Squirrel
Aug
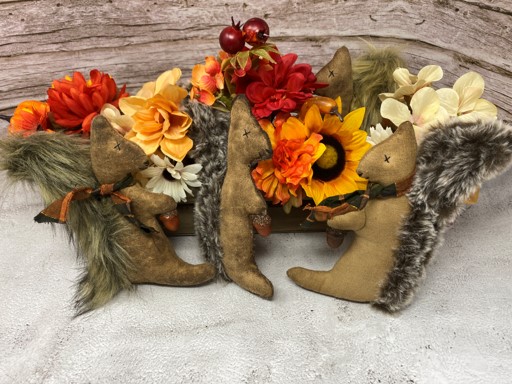
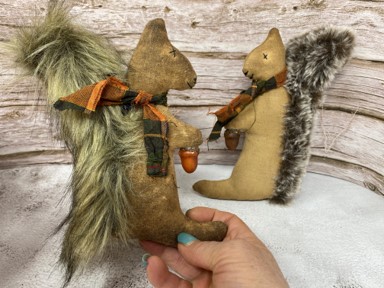
I was asked by one of my followers to create something for fall besides pumpkins. I decided to do a squirrel I haven’t seen anyone making squirrels and I though it would be fun and different. You can really use these adorable squirrels for Spring, Summer and Fall. I just love how they turned out and don’t worry if you do not sew I also show how you can make them using a hot glue gun.
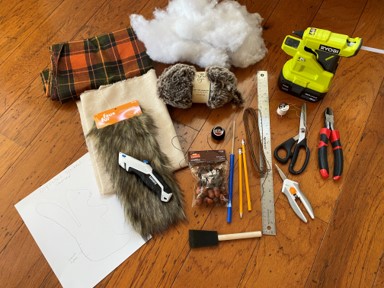
Materials You Will Need
- Squirrel Pattern
- Sewing Machine
- Osnaburg Fabric
- Faux Fur
- Fur The Moment Yarn by Yarn Bee in the Color Chocolate Brown
- Acorns
- Polyester Fiberfill
- Cream Thread and Needle
- Black Quilters Thread or Embroidery Thread and Needle
- 18 Gauge Wire
- Wire Cutters
- Scissors and Detail Scissors
- Ruler
- Pencil
- Utility Knife
- Hot Glue Gun and Glue Sticks
- Foam Brush
- Coffee Stain Mixture
Sewing The Squirrel
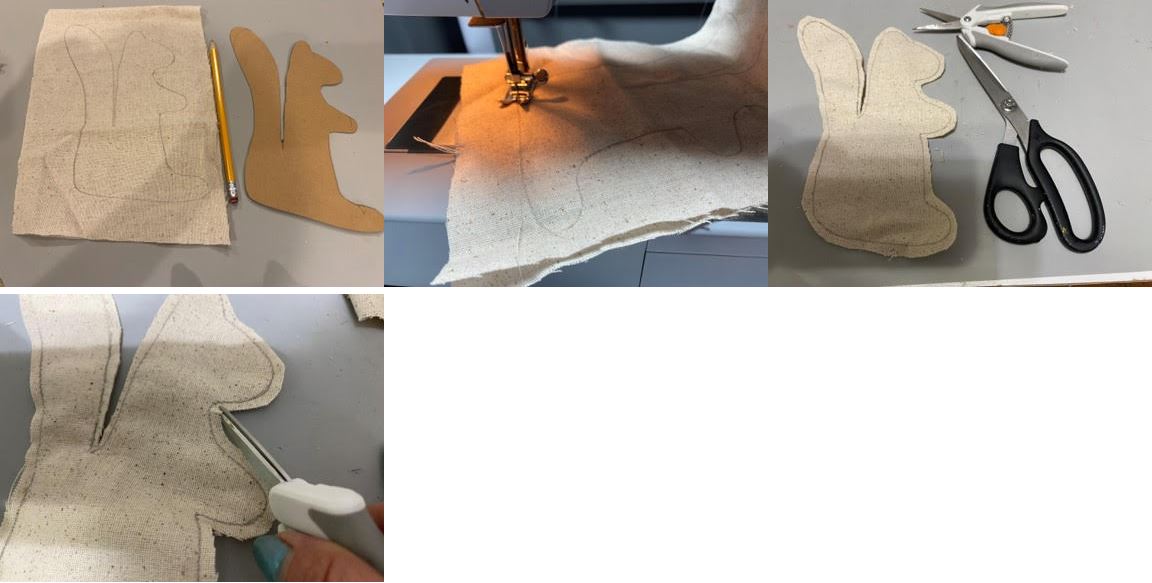
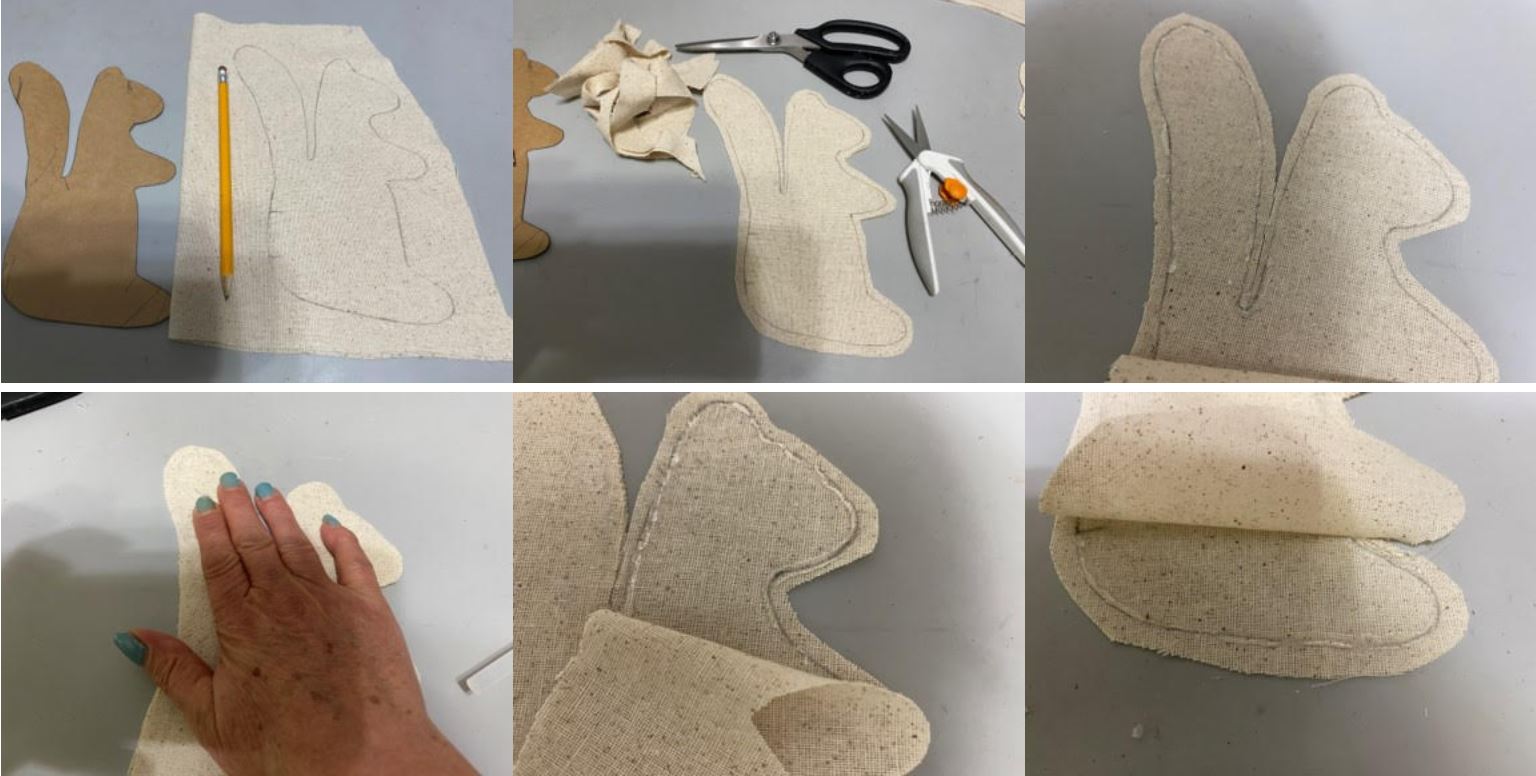
The first thing you will need to do is print and cut out the squirrel pattern. On a double layer of Osnaburg Fabric trace your squirrel pattern onto the fabric. Using a sewing machine and the trace lines as the sew lines sew your squirrel leaving open where indicated on the pattern. Next cut out the squirrel about a ¼” away from your sew line, use the detail scissors to cut between the ears, then clip all the curves making sure you do not cut your stitches. This will help stop any puckering when you turn RSO.
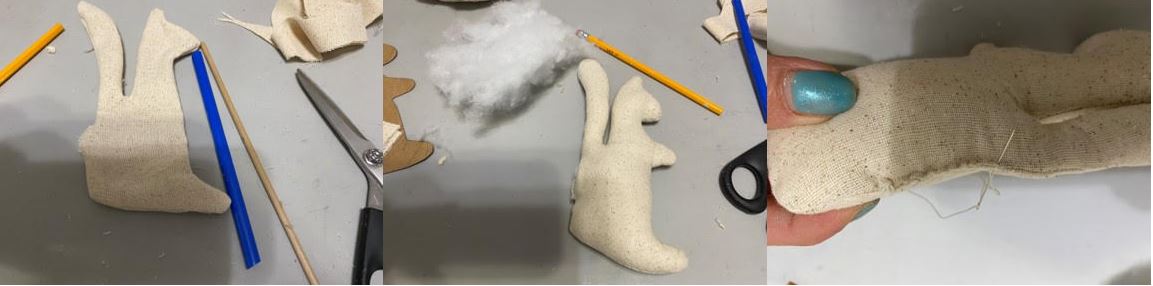
Turn right side out then start lightly stuffing the tail you do not want to much stuffing in the tail because you will be adding wire in the tail later. Stuff the rest of the body firmly then using cream thread and a needle sew closed.
Gluing The Squirrel
The first thing you will need to do is print and cut out the squirrel pattern. Trace the squirrel onto a double layer of osnaburg fabric. Cut out the squirrel about a ¼” away from the trace line. Separate the two pieces lay down the piece with the trace line then the second piece on top lining them up. Fold down the tail add a line of hot glue around onto the trace line then glue down the top piece. Next fold down the head add hot glue and glue down. Continue gluing the two pieces of fabric together making sure you leave open where indicated on the pattern.
Next lightly stuff the tail then continue to stuff the body a little firmer then the tail just be careful not to over stuff or you will break the seams open. After you have the squirrel stuffed add a line of hot glue to the opening and glue closed. Using scissors trim around the squirrel cutting off excess fabric but not to close to the seams. Use the detail scissors to cut between the ears..

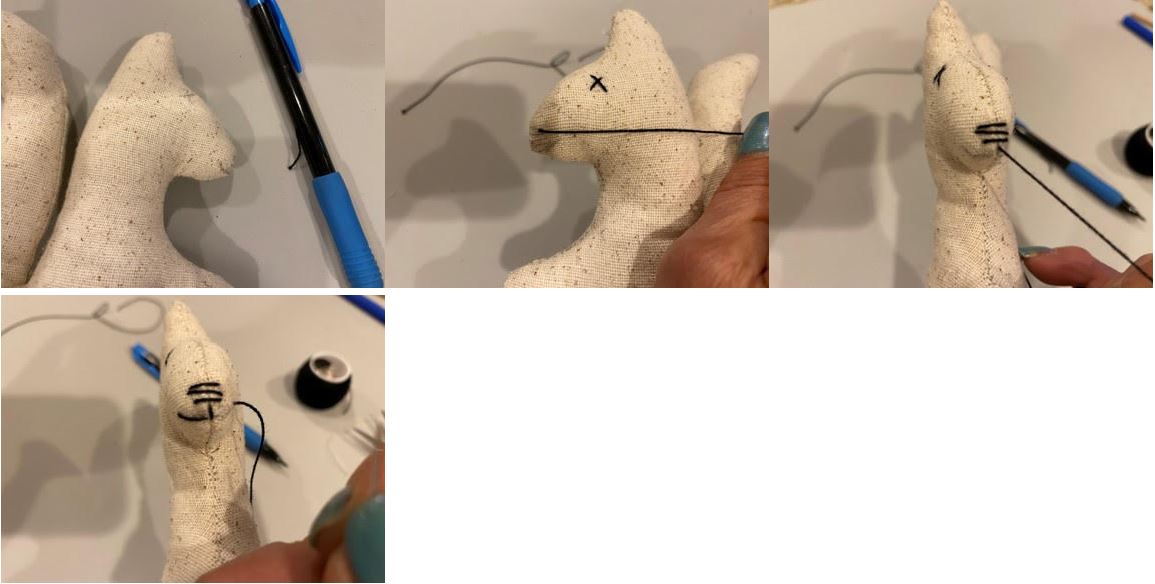
Adding The Eyes, Nose and Mouth
Using a pencil draw on where the eyes, nose and mouth are to go using the pattern as the guide. Next using black quilters thread or embroidery thread stitch on the eye’s, nose and mouth.
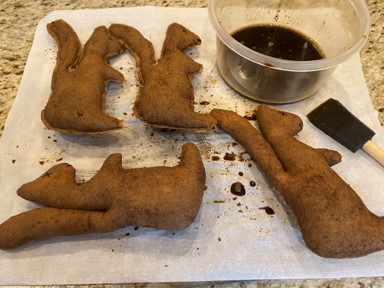
Coffee Staining (Optional)
Coffee staining the squirrel is optional but I have to tell you they will smell so good if you do coffee stain them. If you would like to use my coffee staining recipe you can find it on my blog under Sherry’s shortcuts. Place your squirrels on a piece of parchment paper then using a sponge brush cover them with the coffee stain mixture. Let dry. If you have sewn the squirrels you can dry them in a 210 degree oven. Place them on a parchment lined cookie sheet and place on the middle rack of the oven make sure you check them every five minutes or so and turn them so they do not burn. If you have glued your squirrels do not put them in the oven! You can let them dry in the sun if you are lucky enough to have a warm sunny day lol. You will also want to cut your strips of fabric for his scarf and coffee stain them also.
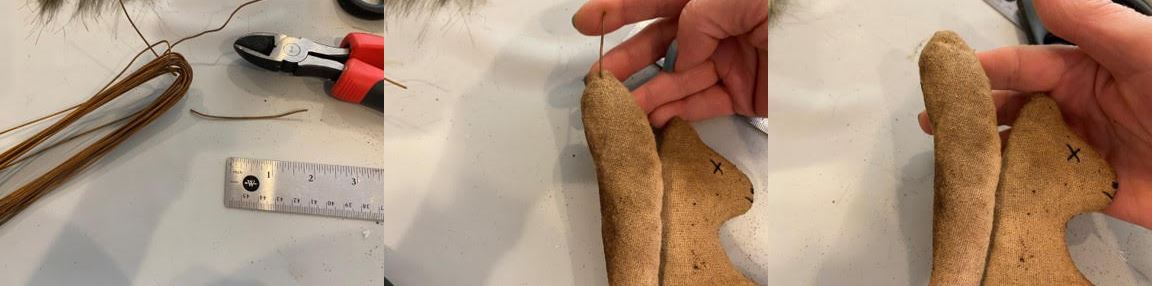
Adding The Wire
Cute a piece of 3” 18 Gauge wire. Insert one end into the top of the tail then keep pushing the wire down into the tail until the wire is all in the tail.
Adding The Yarn For The Tail
If you would like to use the yarn for the tail take the end of the yarn place it at the bottom of the squirrel lining it up with the space between the tail and the body. Add a drop of hot glue where you have the end of the yarn and glue the end of the yarn in place. Next a line of got glue up the body attach the yarn then bring the yarn between the tail and body around to the backside. Add hot glue down the body then attach the yarn. Add glue to the bottom of the squirrel glue on the yarn then add glue up the body attach yarn bring the yarn between the tail and body around to the back. Next you are going to keep gluing the yarn from front to back without going through the tail and body you are going to stop right under where the tail starts. Keep gluing on the yarn until you have the bottom of the squirrel covered. Once you have the bottom covered you can know start covering the tail the same way until it is all covered then cut and glue down the end of the yarn. Now you can bend back the tail giving it a curve.
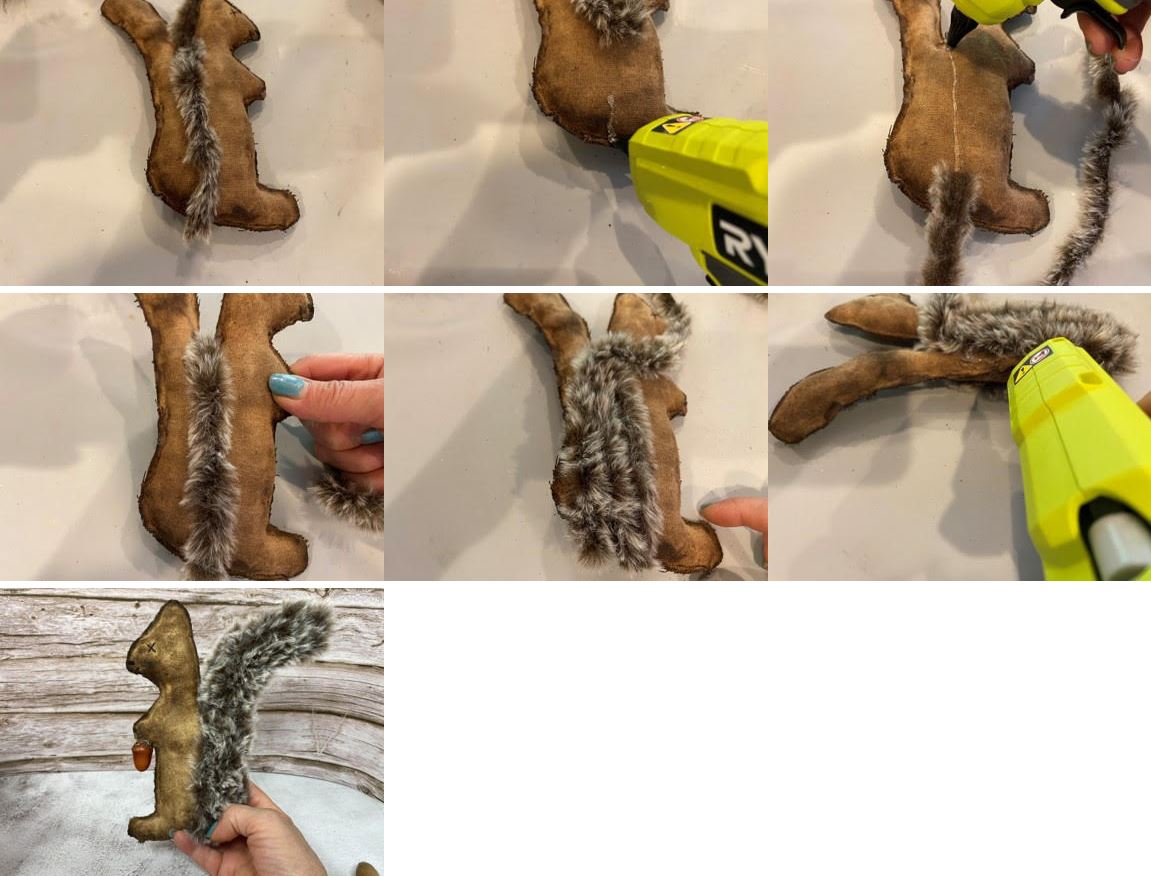
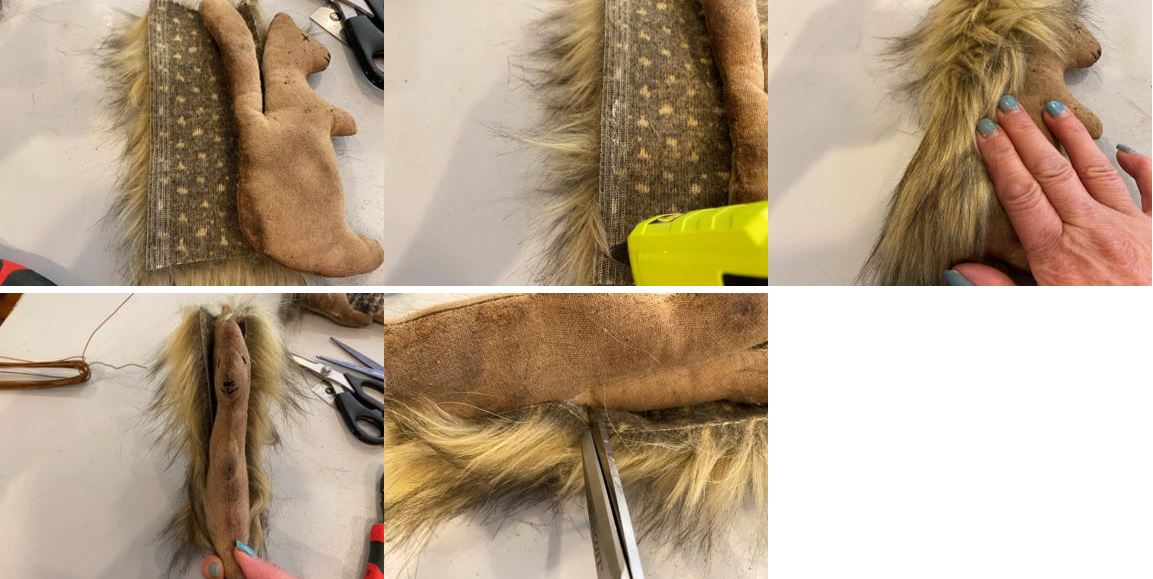
Adding The Faux Fur For The Tail
Start by measuring and marking your piece of faux fur 7 ¾” long and 3 ½” wide then using a utility knife cut your piece of fur on the back side. Lay the piece of fur down longways then place the back end of the squirrel in the middle of the fabric. The sides of the fur should be in the middle under the space between the body and tail. Add a line of hot glue to one side of the fur stopping when you reach the bottom of the tail. Repeat this step to the other side of the squirrel. Now using scissors make a small cut on both sides of the fur at the bottom of the tail so the fur will be easy to wrap around the tail.
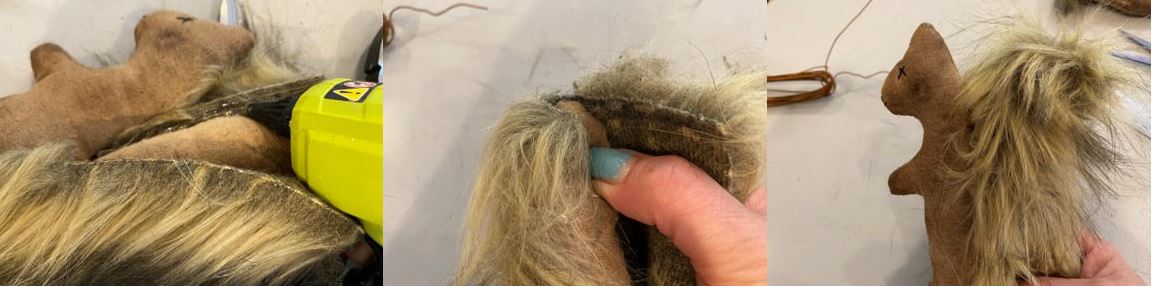
Add hot glue to one side of the fur up the tail then glue down to the tail making sure you are pulling the fur all the way to the top tip of the tail. Next repeat this step to the other side of the fur. Your tail is now finished and you can now bend the tail to give it a curl.
Adding The Finishing Touches
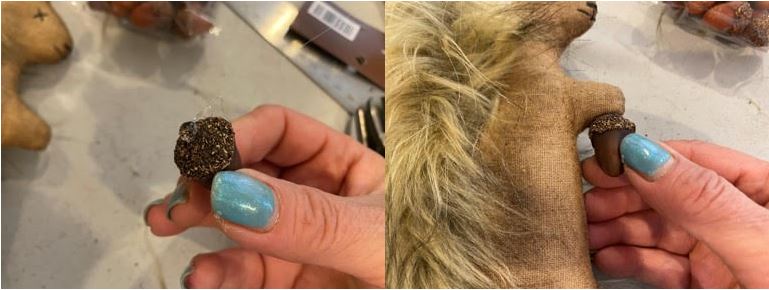
If you would like to add an acorn to his paw, I purchased mine at hobby lobby in the fall section. Add a drop of hot glue to the top of the acorn and glue to the bottom of hand. Take a strip of the fabric you coffee stained and tie it around his neck.
I hope you enjoy making these adorable squirrels and use them in your home décor. They will look great in a dough bowl or in a tree if you keep one decorated all year. I think my next project will be acorns to go with the squirrels so make sure you come back and check out my blogs.
Love your crafts. Watch you all the time. I’m 61 and disabled with lupus. From Abbeville, sc 29620. My name is Debra Wilson
Thank you so much you are so sweet.