Flowers, Home Decor, Spring
DIY Flower Pillow
May
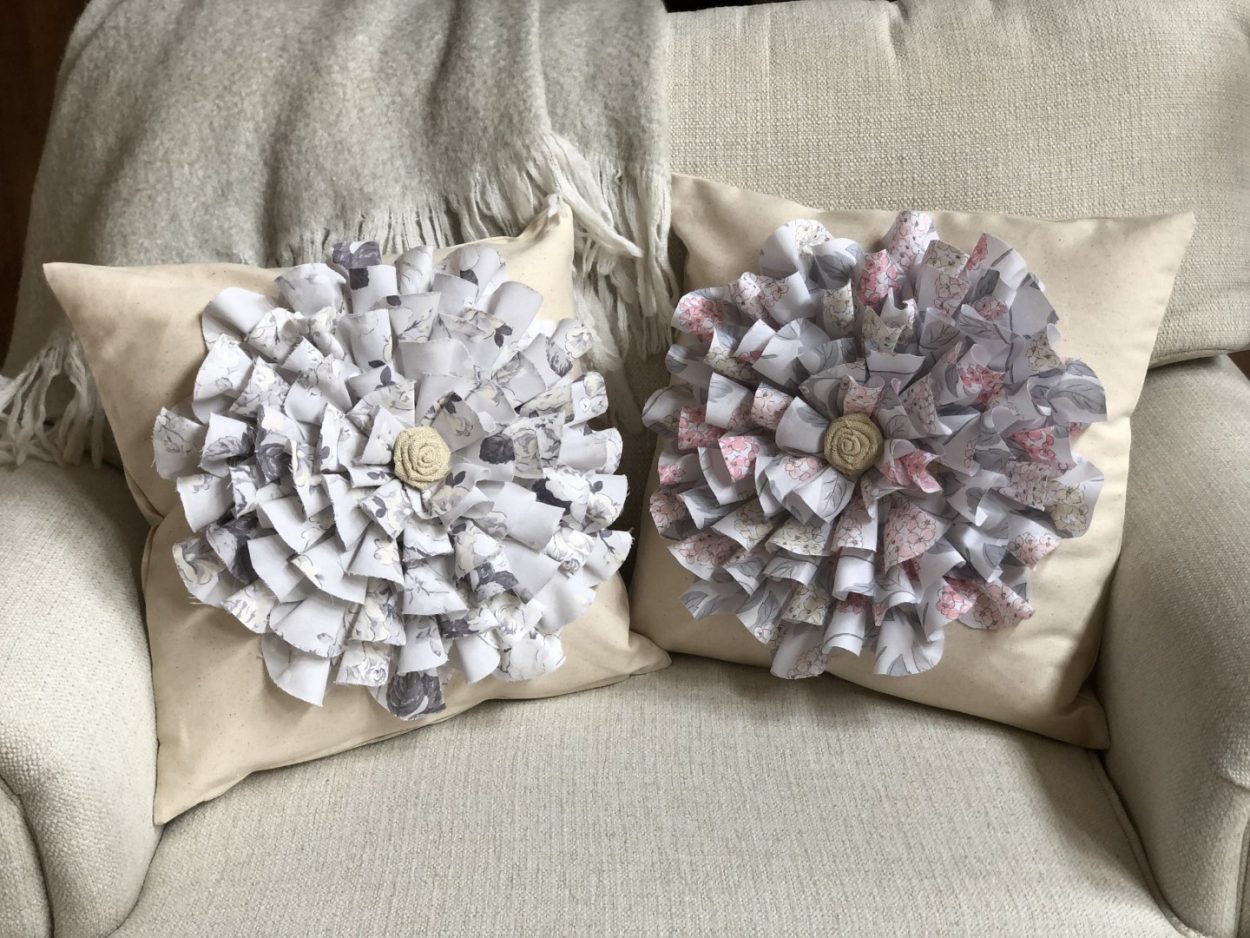
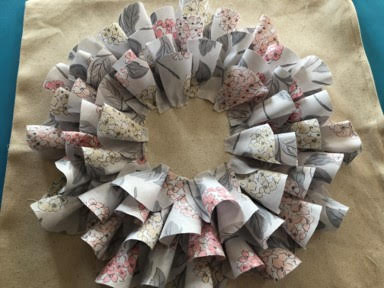
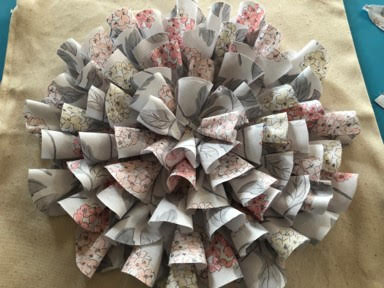
Did you know just changing out your throw pillows can give your room a fresh new look?After a few months I am always wanting to give my living room or bedroom a fresh look, the easiest way to do this on a budget is by creating your own throw pillows, this flower pillow is simple and beautiful. Before you start making this pillow I would like to explain a few things, my directions are a base for you to create your flower pillow.It is going to depend on what size circle you use and how you end up spacing out your petals, you may need more or less petals, I have made six pillows so far using a five inch circle on all of them and I ended up needing more petals and an extra row on two of them because my spacing was different so I don’t want you think you are doing something wrong, it will look just as beautiful if you end up with 11 or 13 petals in a row. I will talk about this more in the directions below.
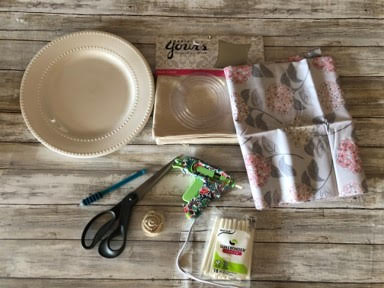
Here is a list of what you will need:
- 18×18 Pillow Cover (I purchased my from Hobby Lobby)
- 18×18 Pillow Form
- 1 Yard of Fabric
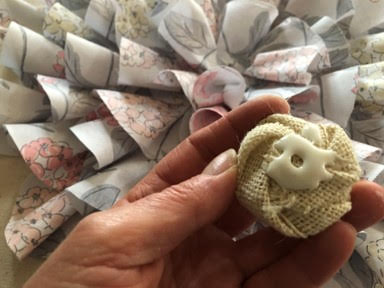
- Embellishment for the center
- Hot Glue Gun
- Surbonder Fabric Hot Glue Sticks
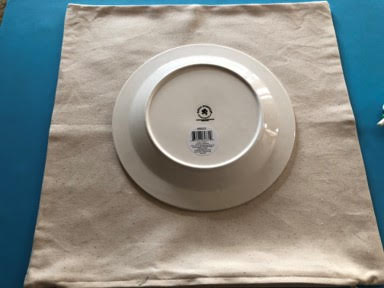
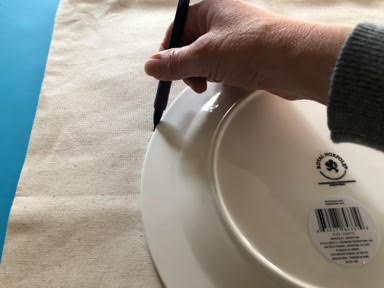
- Dinner Plate
- Scissors
- Pencil
- Five Inch Circle
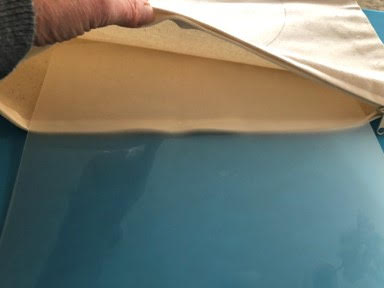
- Piece of Plastic or Carboard to Insert into Pillow
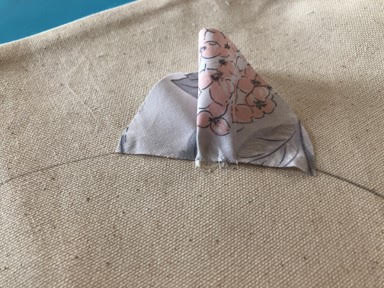
Cutting the petals
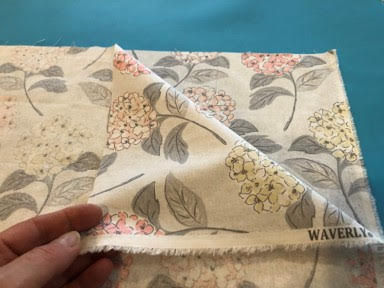
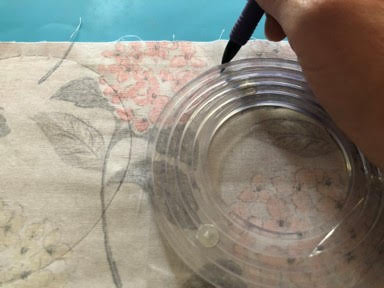
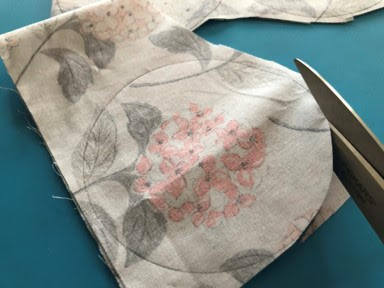
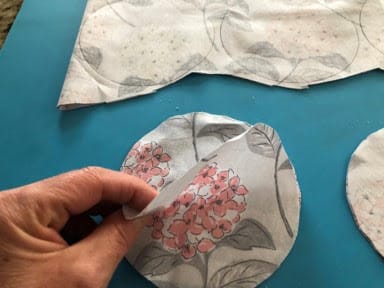
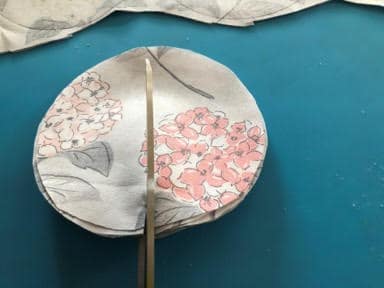
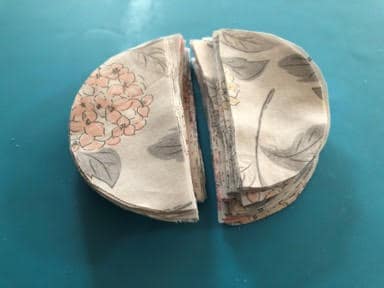
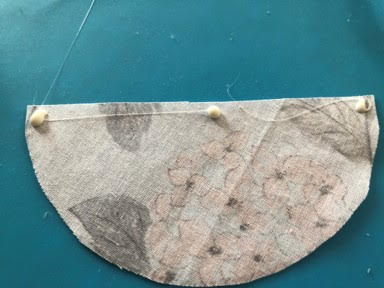
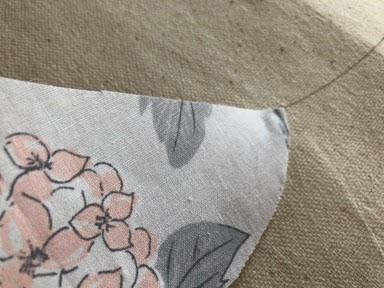
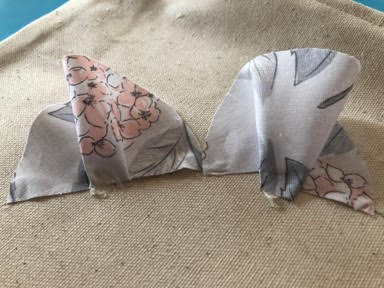
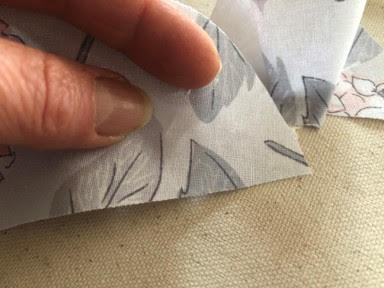
The first thing you will need to do is Iron your fabric and your pillow cover. Fold your fabric in half with the print facing in, place your 5” circle onto the fabric and trace 20 circles onto your fabric then cut them out, you may need to go back and trace and cutout more circles depending on what size circle you use and how you space your petals. Now that you have your circles cut out you should have 40 circles, place six circles on top of each other with the print facing up, make sure your print is all going the same way, now cut the circles in half. Finish cutting the rest of the circles six at a time.
Preparing the pillow cover
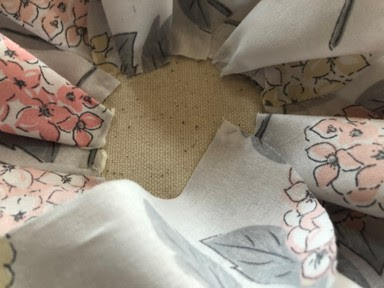
Start by laying the dinner plate in the center of your pillow cover and trace, this circle will be where you are going to lay your first row of petals. Next place your piece of cardboard or plastic inside your pillow cover, this is just in case the glue goes through the fabric.
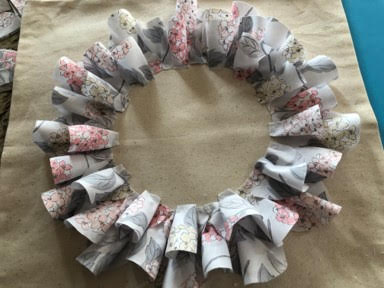
Attaching the first row of petals
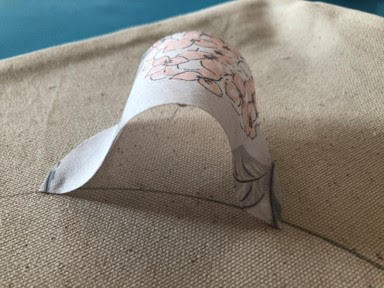
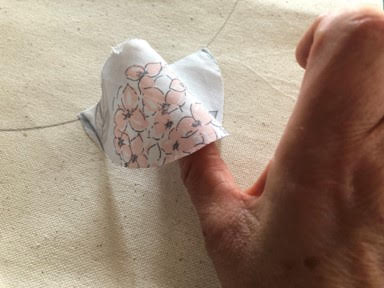
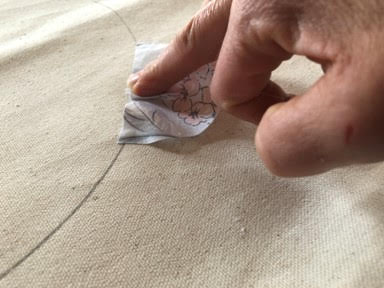
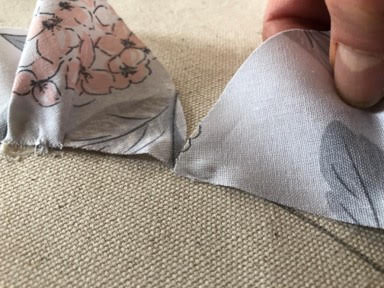
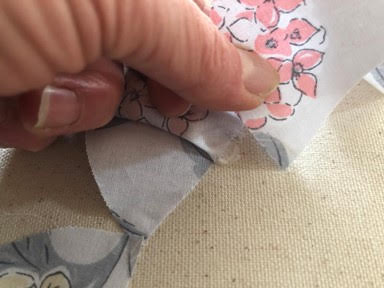
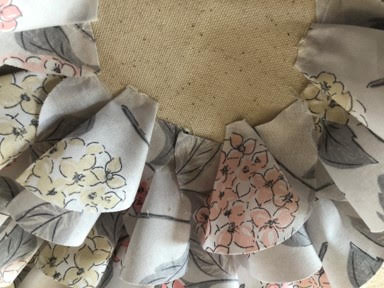
For the first row you will be using 13 petals, each half circle is one petal, don’t worry if you use less it will all depend on how you space the ends of your petal, I didn’t measure my space I just spaced the two ends at what I thought looked like 3 inches, one pillow I made I used 13 petals for the first row and the second pillow I made only took 11. Take your first petal and place it print side down, now add a drop of hot fabric glue in the middle and each end of the flat side of the petal then place one end on the circle and about 3” inches over place your other end, you should now have a loop in the middle of your fabric, take your thumb and place in the loop facing the outer edge of your pillow cover, using your other fingers fold in the other end of the loop and glue down. Next take a second petal add your glue to the back flat side and place your first end touching one end of the first petal, place your second end about 3” over then place your thumb in the outer side of the loop and using your other fingers fold in the other end of the loop and glue down. Continue gluing your 13 petals all around the circle.
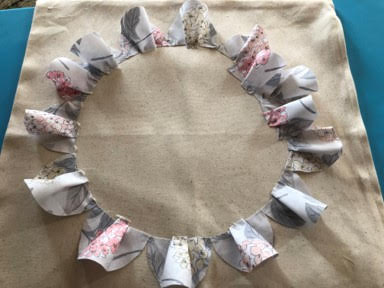
Adding the second row of petals
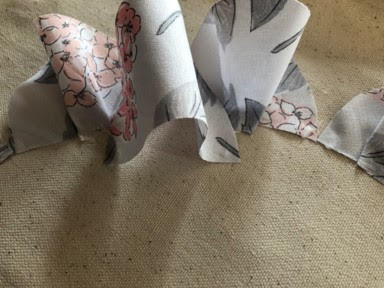
To start the second row take a petal add the fabric glue to the back of the petal as you did to the petals in the first row, next about a half inch down from the middle of the pleat in a petal in your first row place one end of your petal then place the other end a half inch down from the middle of the pleat of the next petal in the first row, attach the loop as you did in the first row. Take a second petal add glue and attach one end touching the end of the petal you just attached then glue the second end about a half inch down from the middle of the pleat of the next petal, glue down loop as you have done before, continue gluing your petals around in a circle the same way. You should end up with the same amount of petals in the second row as you had in the first row. The petals in rows 3 and 4 are started and done the same way as row 2, you should also end up with the same amount of petals for row 3 and 4 as you did in rows 1 and 2.
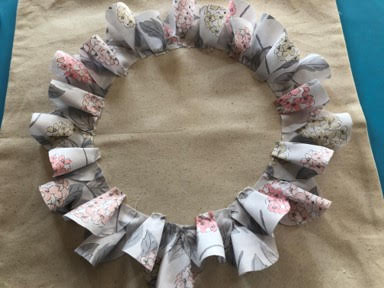
Row five
If you had 13 petals in rows 1 through 4 you will be using 7 petals for row 5, if you had 11 petals you will be using 5 or 6. First apply glue to the back of one of the petals and a half inch down from the middle of the pleat of a petal in the fourth row place one end of your petal then skip a whole petal and place the other end about a half inch down from the center of the pleat of the third petal in the fourth row, attach the loop as you have been for all the other petals. Next take a second petal add the fabric glue and place one end of the petal touching the end of the petal you just attached, skip a petal and attach the other end a half inch down from the middle of the pleat of the third petal in the fourth row then attach the loop. Continue to attach petals around until the row is complete.
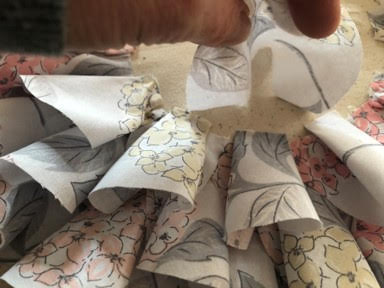
Row six
You will be attaching the petals the same way you did in rows 1 through 4. Add fabric glue to the back of a petal about a half inch down from the center of a pleat of a petal in row 5 place one end of the petal then place the other end a half inch down from the middle of the pleat of the next petal in row 5. Attach the next petal by adding glue to the back and placing one end touching the end of the petal you just attached and then glue the other end a half inch down from the middle of the pleat of the next petal in row 5, continue gluing down petals until the row is complete, you should have the same amount of petals in row 5 and 6.
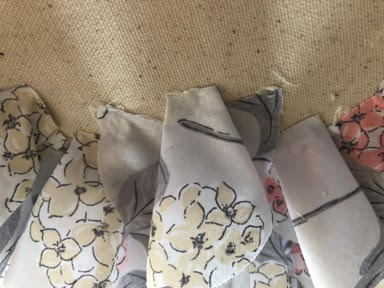
Row seven and eight
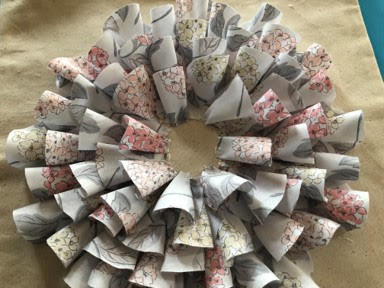
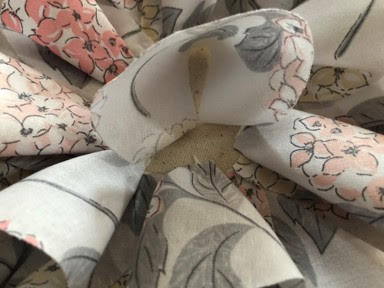
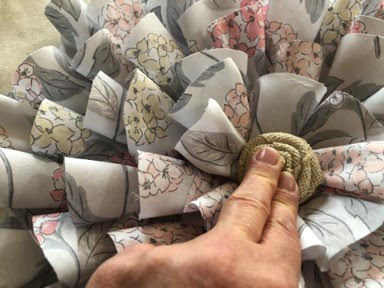
In row seven you are going to add four petals just as you did in row five, skipping a petal in-between when you are gluing down the two ends, refer to the directions for row 5. For row eight add four petals as you did in the directions for row 6. Add your embellishment to the middle of your flower by adding glue to the back and placing in the center. All that is left to do is add your pillow form.

Pretty
Very pretty! Ordered some
Pillow covers today, can’t wait to try!
Love those pillows, I can’t wait to shop again, Not much open here!!
I purchased the pillow covers when you first showed it to us. Not a crafter but I really am ready to give it a try. I’m so looking forward to working on it. Wish me luck. Love your site.