Home Decor, Ornaments, Outdoors, Spring
DIY Spring Bird

May
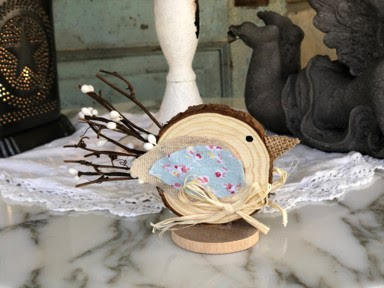
Today was such a beautiful day I decided to get my front porch decorated for Spring.I keep trees up all year on my porch and decorate them for all the season’s and holidays, I wanted to add something besides the flowers to my tree and I remembered seeing a photo of birds made out of wood slices so I headed to my craft room and made these adorable birds.If you don’t keep a tree up all year you will so in the directions below you can also make them to set on a table or in a cabinet.
Here is a list of what you will need:
- Bird Wings and Beak Pattern
- Wood slice 2.8 inch (Amazon)
- 2” Wood Circle (This is for the free standing bird)
- Twig Garland (you can also use small twigs from your yard)
- Pipe Berries
- 2 Different Fabrics
- Paper Backed Burlap (Sold with the Scrapbooking Paper)
- Twine
- Black Craft Paint
- Colored Craft Paint (Which ever color you would like to paint your birds)
- Paintbrush
- Glue Gun and Glue Sticks
- Scissors
- Wire Cutters
- Pencil
- Razor Blade
- Ruler or Tape Measure
- A Piece of Raffia
Print out pattern
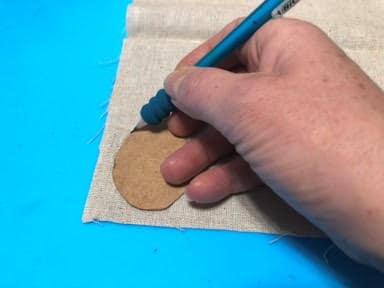
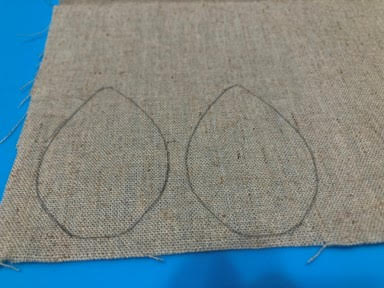
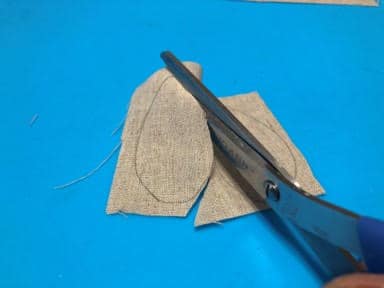
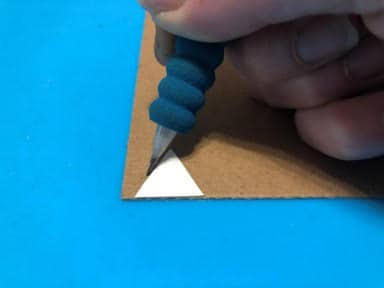
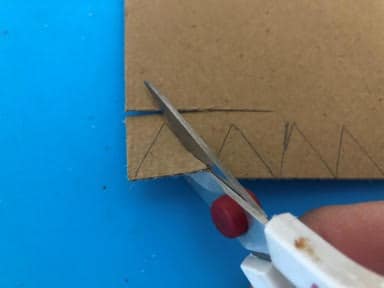
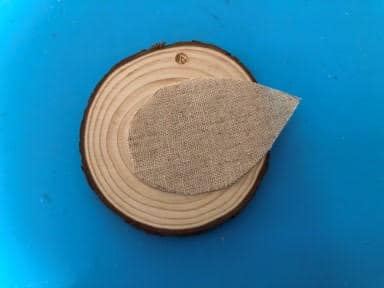
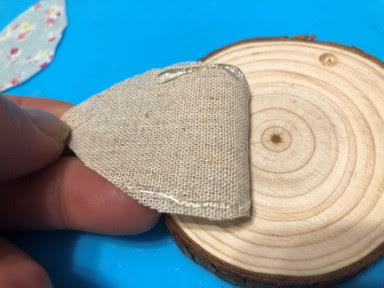
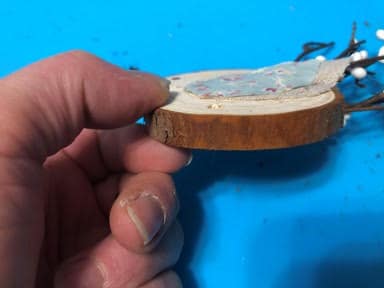
The first thing you will need to do is print out the pattern from the PDF file you just downloaded, then cut out the pattern pieces. Once you have your pattern pieces cut out lay the larger wing onto one of the fabrics you have chosen (this will be the bottom wing), you will need to trace two large wings one for each side of the bird. Next lay the smaller wing on top of your second fabric, you also need to trace two small wings, cut out all four wings. To trace the beak take your piece of paper backed burlap laying it face down, place you beak pattern on top and trace two beaks then cut them out, make sure you cut inside your traced line to prevent the beak from being larger then the pattern beak.
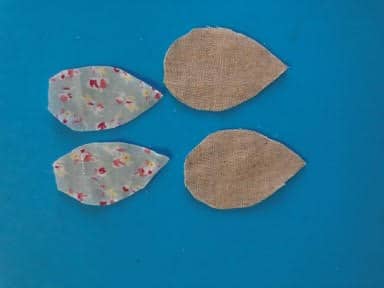
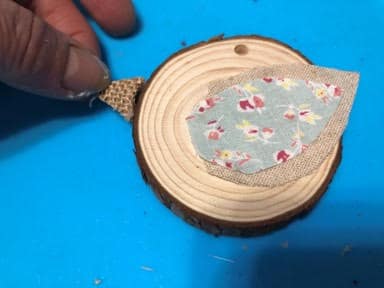
Adding the wings
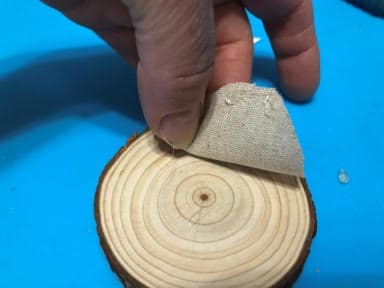
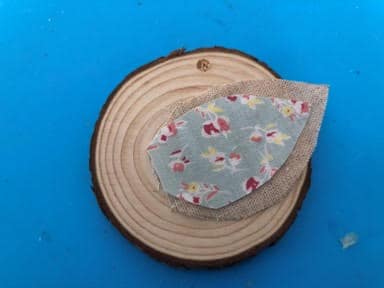
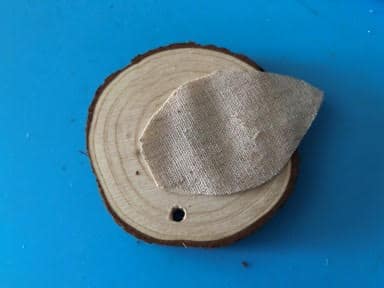
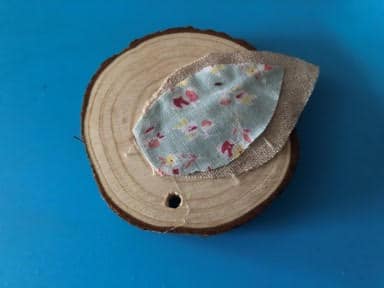
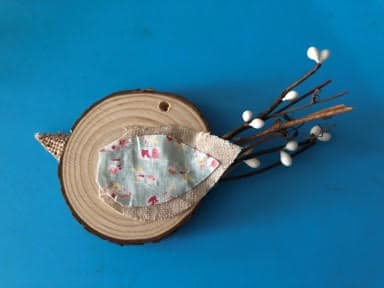
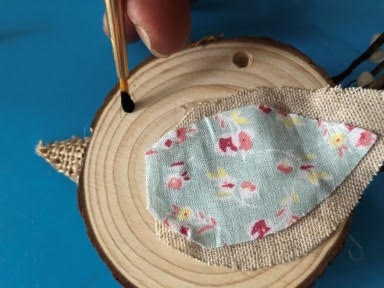
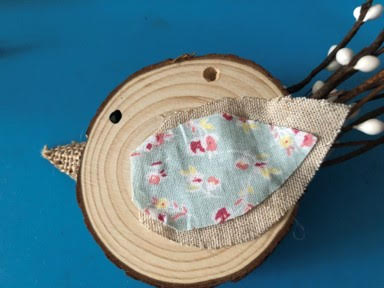
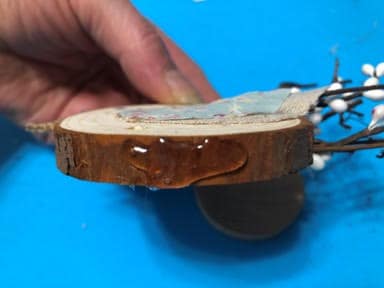
If you would like to paint your bird a color do this before adding the wings, take a small amount of craft paint add a little water and paint both sides of the wood slice, let dry. To make the bird ornament place your wood slice down with the hole at the top, this is where you will add your twine to hang, now take your large wing and place it how you would like the wing to be on your bird. Once you have your wing placed lift up the wider bottom part of the wing add a small amount of hot glue and glue down, now lift the other end of the wing and pull back so you can add small lines of hot glue about half way up to both sides of the wing and glue down. Take your small wing and place the bottom part of the wing on top of the bottom of the large wing, lift the bottom add hot glue to the bottom and glue down now pull your wing back and add a line of glue about half way up on both sides and glue down, repeat these steps to the other side of the bird. If you are making the free standing bird lay your wood slice with the hole at the bottom add the wings using the same instructions for adding the wings to the ornament.
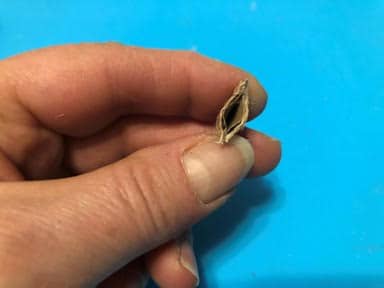
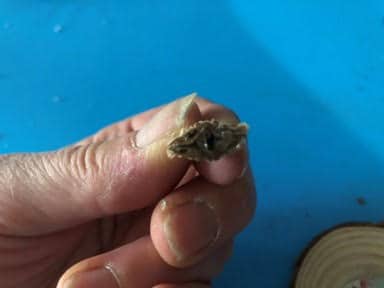
Preparing and adding the beak
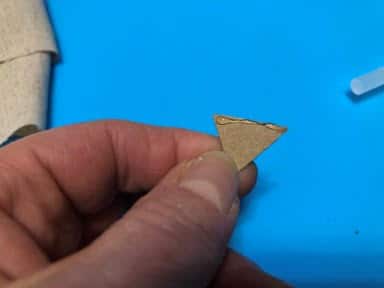
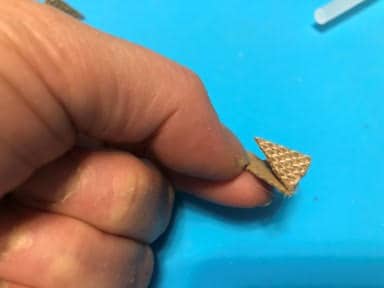
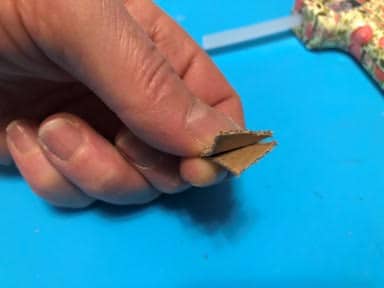
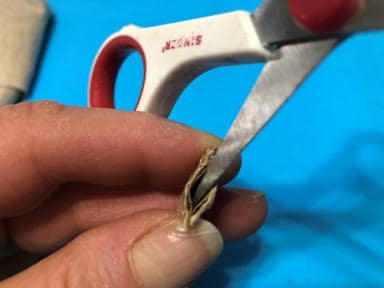
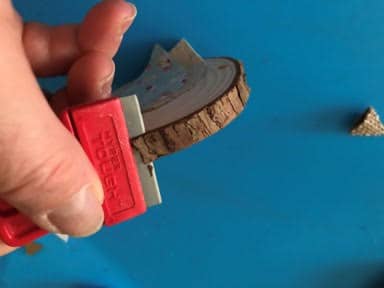
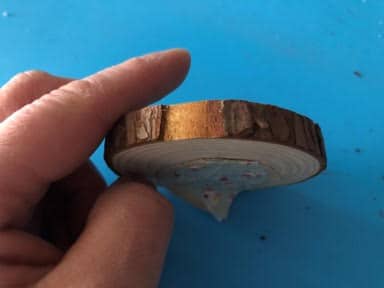
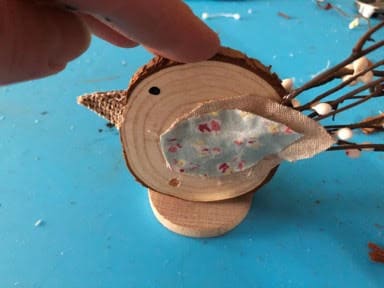
To form the beak take both of your cut out beak pieces and add a small line of hot glue down one side of one of the pieces and glue your second piece to the first, now on the unglued side slightly bend back the top piece and add a small line of glue down the side of the bottom piece and glue the two pieces together. After you have glued the two pieces together take the point of your scissors and insert into the unglued bottom of the beak so you can open the bottom slightly, gently squeeze the two glued sides together to open the bottom more and form a beak. Next take the beak and see where you want to add it to your bird, once you know where you want to add the beak take your razor blade and carefully shave the bark off the area you are adding your beak ,I did not do this the first time and the beak ended up falling off because the bark pulled away from the wood slice, now add hot glue to the bottom of your beak and glue in place holding for a few seconds.

Adding the twigs and berries
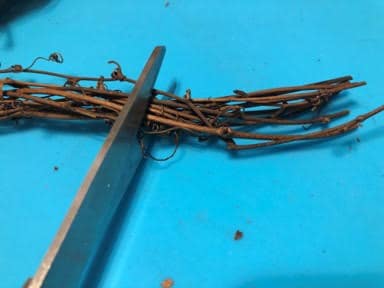
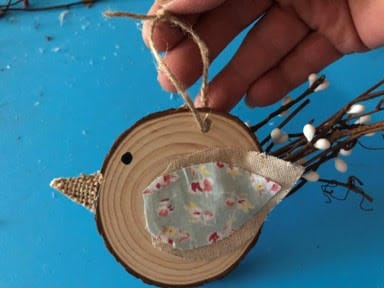
If you are using a twig garland take your scissors and cut across the twigs about 3” from the end, separate the twigs, you may want to cut another bunch it depends on how full you will want the tail, if you are using twigs from your yard cut them to about 3”. Next cut four pip berry stems the same length as the twigs, now lift up the outer end of the bottom wing and insert the twigs and two berry stems one at a time until it is as full as you want it then add a line of hot glue across the part of the twigs and berry stems that are under the wing and glue the wing down over the stems. Check to see if you need to add any more glue to the sides of the bottom wing to make sure wing pocket holding the twigs is glued closed. Repeat these steps and add the twigs and berries to the other side of the bird.


Adding the eyes and twine/stand
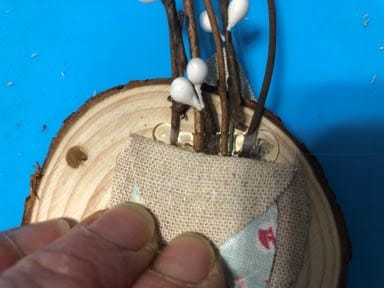
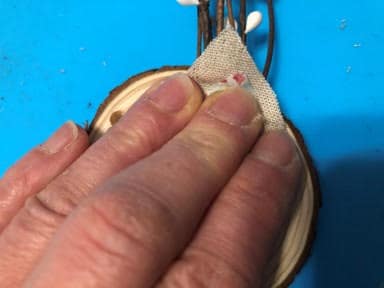
Using your black craft paint dip a small paint brush and add the eye to both sides of your bird, I added the eye a little ways in and up from the beak. Cut a piece of twine, feed one end through the hole then tie both ends making a hoop to hang the bird, cut off excess twine. When making the free standing bird you will need to use the razor blade and remove some of the bark from the bottom of the bird add hot glue and glue to the center of the 2” wooden circle. To cover the hole at the bottom make two small bows out of Raffia and hot glue over the hole on each side.

Thank you for the pattern to download etc. I appreciate this and the pictures and blog help me out some.
This is such a cute craft
Thank you for the pattern to download etc. I appreciate this and the pictures and blog help me out some.
I can’t get the other message to delete. Mamie & Alma are the same person …. me.
I am called by both names so sometimes I enter it one way then another. Sorry for the goof.
I think I am Alma on Barb’s pg.
I have been making your birds most of the day. Love them but having trouble making the beaks. Since I can’t go shopping for the beak material I have been trying other options and they all failed but I will continue trying since I can’t have birds without beaks. I love the way you posted your projects. The blog is very easy to follow and find which item I want to make very easily. I am an avid follower of Barb and that’s I how found you. Your crafts are wonderful and my next project is sunflowers! I am making so many things and am having a hard time finding a place to put them but every day another wonderful one comes out and screams for me to make it. Keep up the great work.
Love this little bird think I’ll try one out of different media. Maybe all fabric. Thank you for the great idea.
I painted mine and they’re adorable! Thanks for sharing your talent!
I love this little bird ,so adorable. Would be fun to make
Thank you for posting it
I want to definitely do this bird diy. So cute
I’m so in love with this little bird, I will be making a few for my little tree 🌳. Thank you dt or the inspiration Sherry. 💞