Flowers, Home Decor, Spring
DIY Sunflower Stem
May
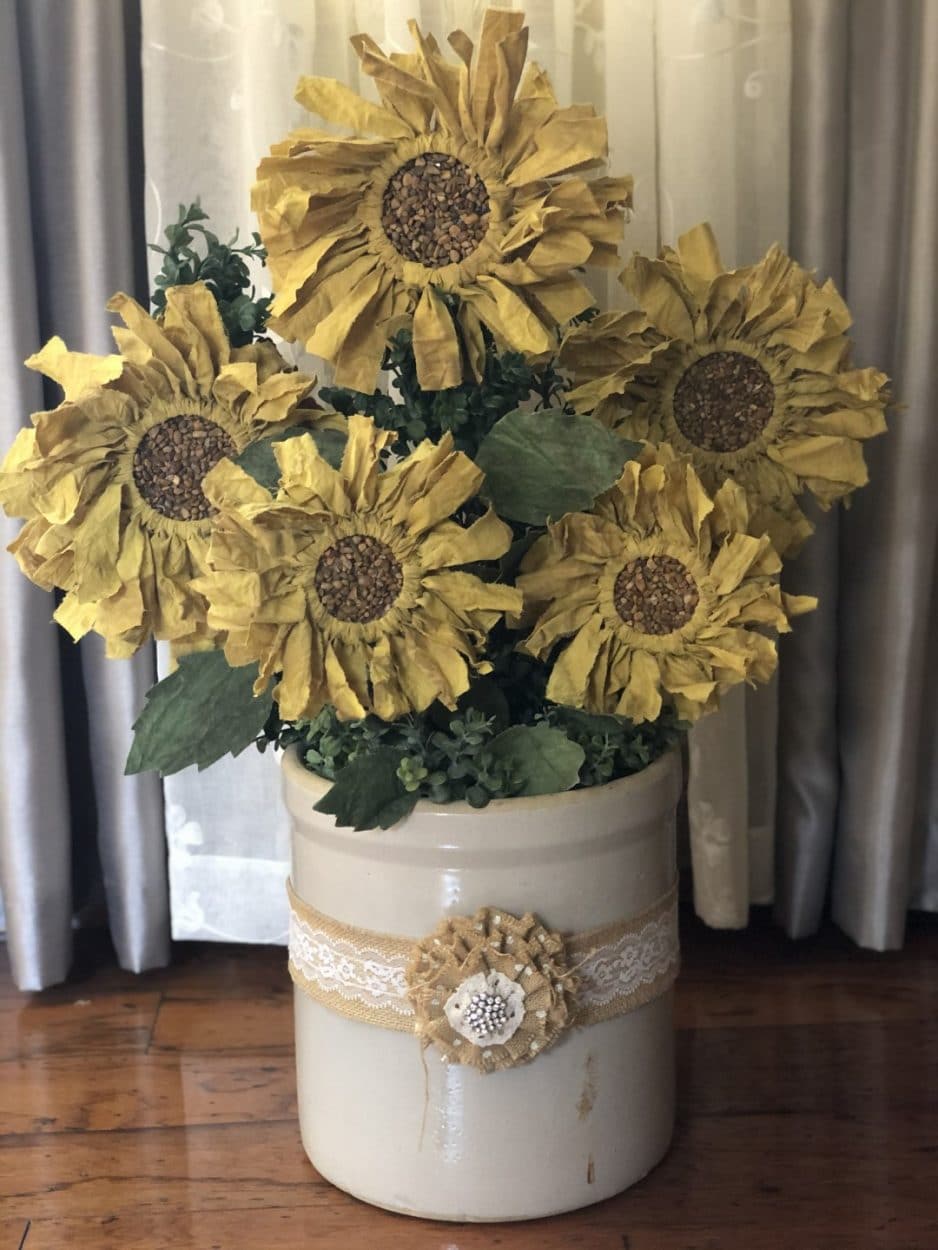
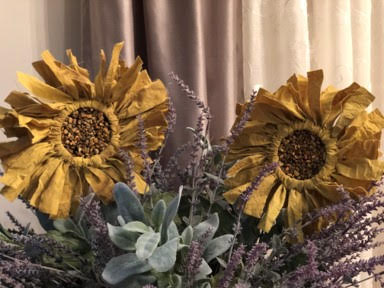
Are you creating décor for your home?If not you are missing out in making your home feel special and unique.There’s no better feeling then creating your own home décor, have you ever had anyone over to your home and they ask you where you got an item because they just love it, I have and it is the best feeling knowing you were the one who made it and no one can just run out and purchase the item.Crafting décor is a fun and unique way to make your home your own, just like the sunflowers in this DIY I think they came out beautiful and every time I look at them they make me smile.
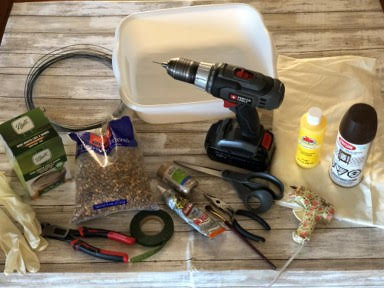
Here is a list of what you will need:
- Sunflower Leaf Pattern
- Muslin Fabric
- Wide Mouth canning jar lids and rings (Large Flower)
- Regular canning jar lids and rings (Small Flower)
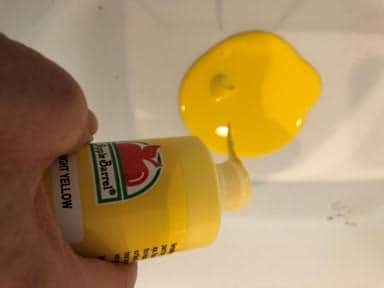
- Yellow Craft Paint
- Green Craft Paint
- Brown Craft Paint
- Coffee Stain Mixture (Recipe below)
- Basin
- Rubber Gloves
- Paintbrush
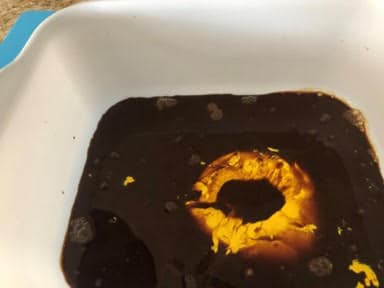
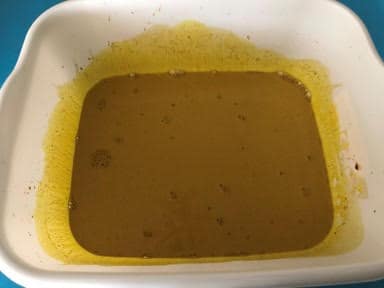
Coffee Stain Recipe:
- 2 Cups Water
- ½ Cup Instant Coffee
- 2 Tablespoons Vanilla
- 2 Teaspoons Ground Cinnamon
- 1 Teaspoon Ground Nutmeg
Bring the water to a simmer then add the remaining ingredients and stir, remove from stove and let cool down.
- Glue
- Fish Gravel (Brown and Tan Mix)
- Green Floral Tape
- Scissors
- Hot Glue Gun
- Surbonder Fabric Hot Glue Sticks
- Pencil
- Hot Glue Gun and Glue Sticks
- 14 Gauge Wire
- 16 Gauge Wire
- Wire Cutters
- Needle Nose Pliers
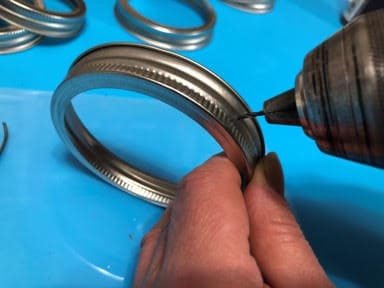
- Drill and Drill Bit (3/32)
- Ruler
- Needle and Thread
Painting and staining fabric
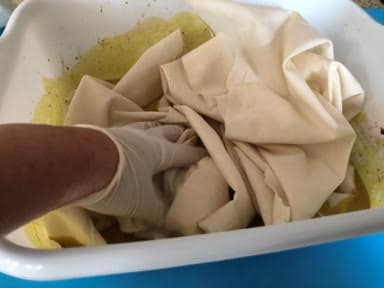
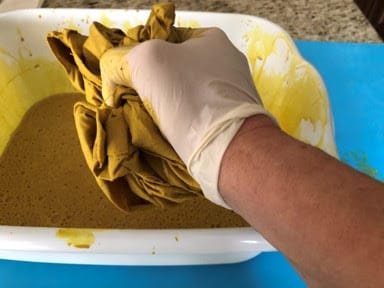
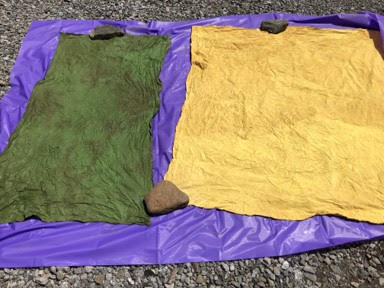
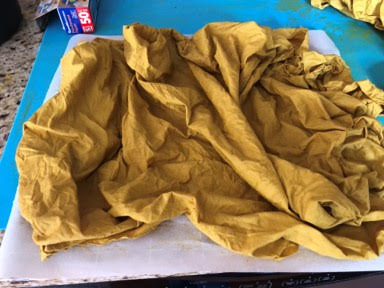
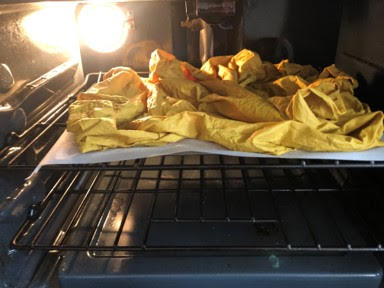
Start by pouring 4 ounces of yellow craft paint into your basin next add half your coffee stain mixture and stir well scrapping the paint from the bottom as you stir, if you would like the mixture more yellow just add some more paint and stir. Once you achieve the color you would like put on your rubber gloves and add your muslin, I used 1 ¼ yards of muslin which gave me enough to make 3 large and 2 small sunflowers, you will need to keep rearranging and ringing out the fabric until the fabric is all covered with your mixture. Now that your fabric is covered with your mixture and you have rung it out you can lay it outside to dry, make sure you flip your fabric over after awhile or one side will be darker then the other. If it is not a sunny day you can dry the fabric in the oven, line a cookie with wax paper then place your fabric on the cookie sheet and dry in a 200 degree oven make sure you check on it about every 10 minutes or 15 minutes and rearrange the fabric so all the fabric will dry.
To color the fabric for the leaves I poured about 2 ounces of forest green craft paint then added a small amount of coffee mixture at a time until I achieved the color green I wanted, then I added about ½ yard of muslin to the mixture and dry.
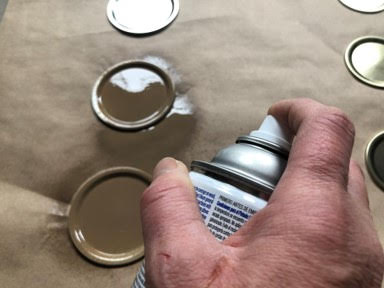
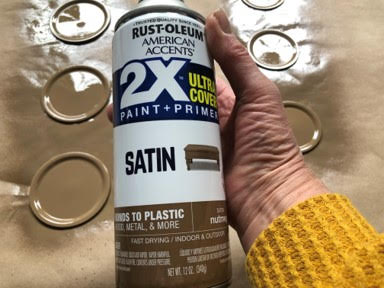
Preparing the rings and lids
In a well ventilated area paint the front of the canning jar lids let dry then paint the back of the lids. While your lids are drying drill a hole in the side of the rims, I used a 3/32 drill bit to be able fit the 14 gauge wire through. If you would like to make the small flower for an ornament you will not have to drill a hole.
Cutting the fabric
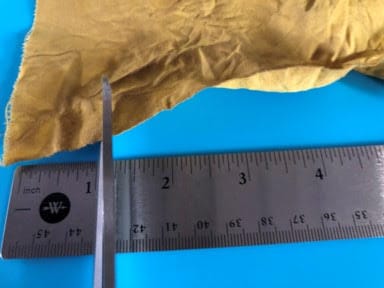
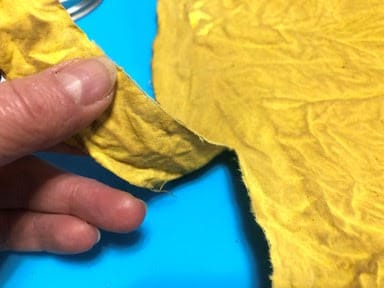
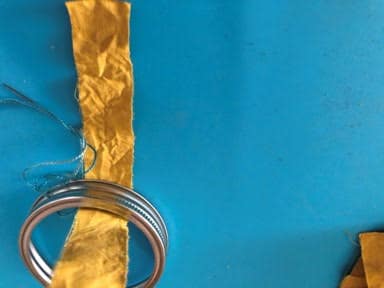
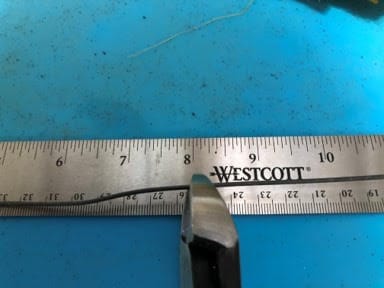
Once your fabric has dried you are going to make small 1 inch wide cuts across the top of your fabric then starting at the end take your first cut and rip your fabric going downwards this will give you a 1 inch wide strip of fabric continue ripping strips of fabric at each small cut you made. Once you have all your strips you are going to measure and cut them, if you are making the large flower you will need to cut 34 – 9” strips, if you are making the small flower you will need to cut 24 – 7 ½” strips.

Tying the fabric
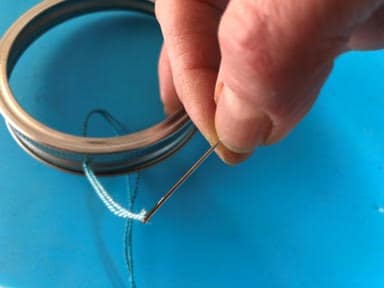
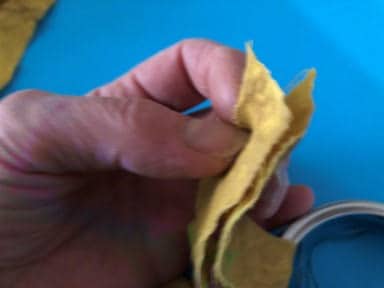
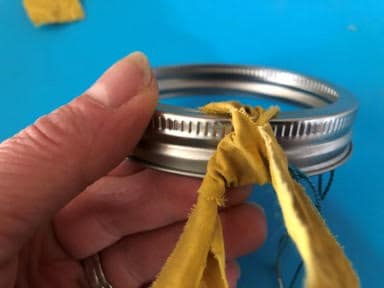
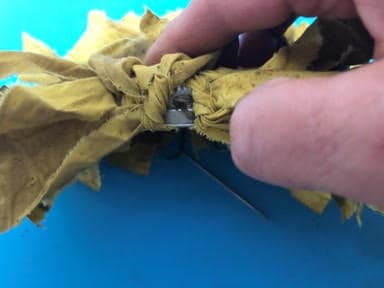
Before you begin tying the strips of fabric take your threaded needle and from the inside of the ring insert the needle through your drilled hole leaving the thread, this is so you will be able to find the hole after you have tied on all your fabric strips if you are making the sunflower ornament you will not need the needle and thread. Take one of your fabric strips and place one end under and up through the middle of the ring, bring your two ends together to make sure they are even then tie the strip into a knot on the outside of the ring, continue tying your fabric strips all the way around the ring pushing them together as you go.
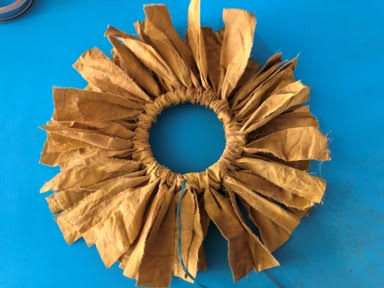
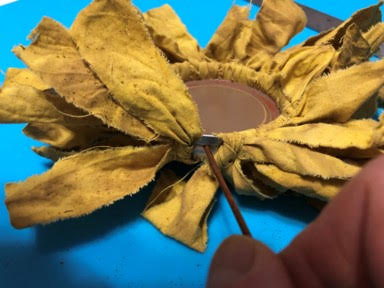
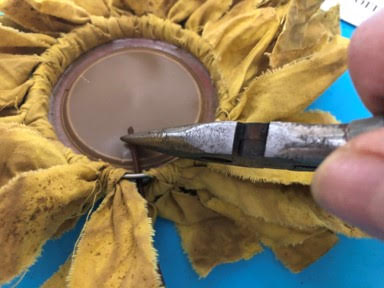
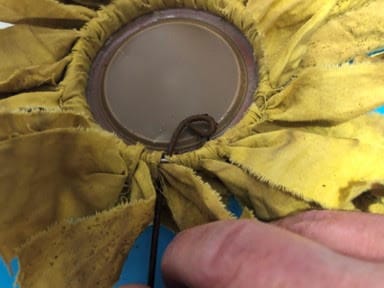
Attaching the middle and stem
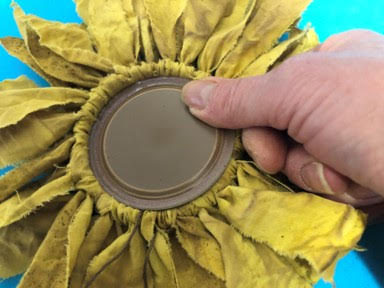
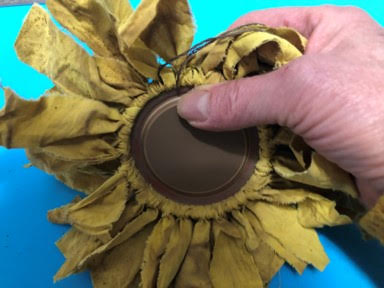
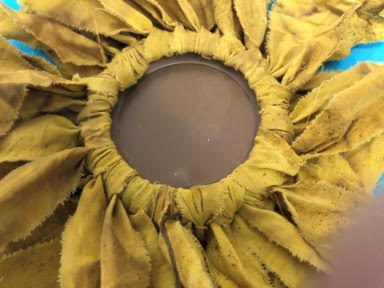
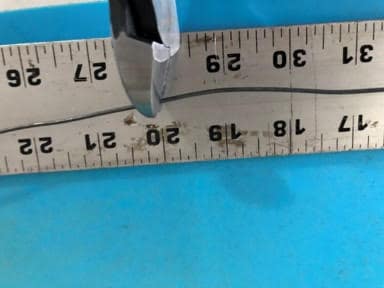
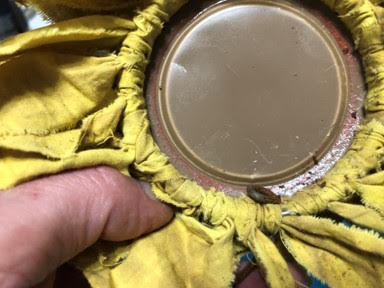
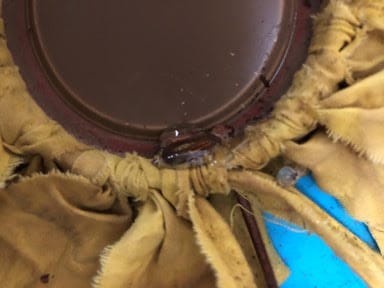
If you are making the sunflower ornament tie a piece of twine around the rim to use as your hanger before you move onto the next step. Insert the canning jar lid into the middle of the flower by laying the lid (front side facing in) on the back side of the flower then start pushing the lid down into the flower, once you get it started it will be easier to pick the flower up and push the lid in. To make the stem cut a 20 inch piece of the 14 gauge wire for the large flower and a 16 inch wire for the small flower, you can always cut the stem shorter if the flower ends up being to tall for your container. Once your have cut the wire remove the thread from the hole in the rim and place one end of your wire through so you have a inch or so up behind the center of your flower, now using the needle nose pliers bend the top of your wire into a circle pull your stem down so the circle is resting on the inside of the ring, you may have to use the pliers to bend the circle so it sits flat on the rim. Once you have the circle sitting flat add hot glue on the and around the wire circle, set aside until the glue sets.
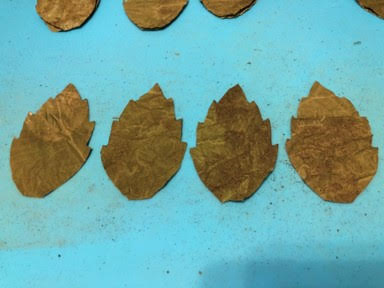
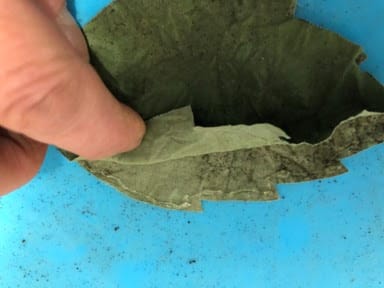
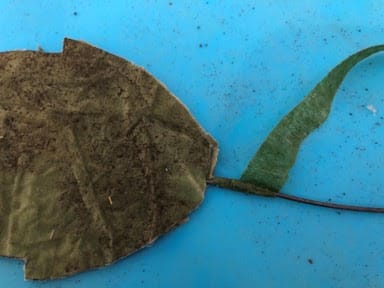
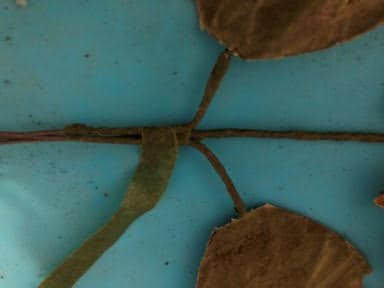
Making and attaching the leaves
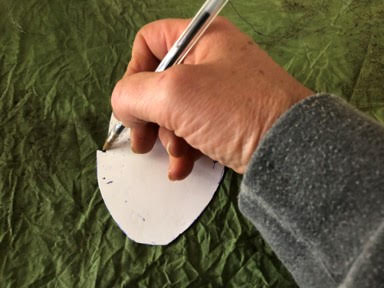
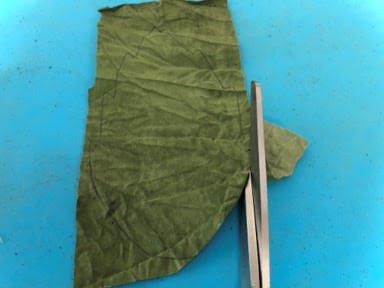
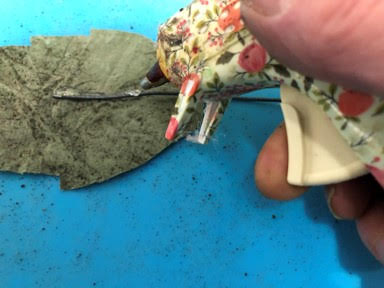
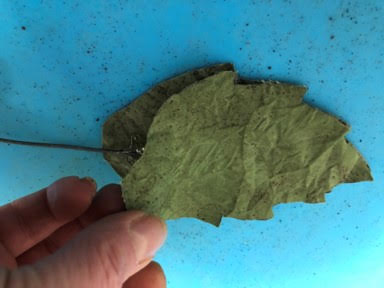
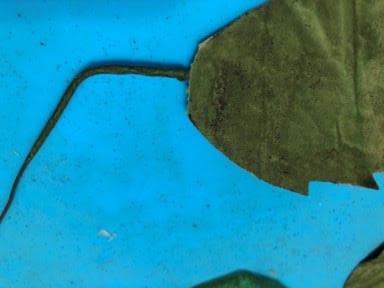
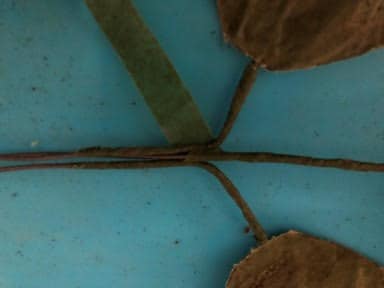
The first thing you will need to do is print and cut out the leaves from the pattern, the large leaf is for the large sunflower and the small leaf is for the small sunflower, next trace and cut out your leaves from the green fabric, you will need four leaves per flower. Now you will need to cut two pieces of your 16 gauge wire, for the large flower cut your pieces 8” and for the small flower cut the pieces 6”. Lay one leaf flat then place about 2 inches of your wire in the middle of the leaf, add hot glue onto the wire then place another leaf on top, make sure you glue them evenly, lift up one side of the leaf and add a small line of glue down the leaf and glue together then glue the other side other side of the leaf if there is any uneven parts on the leaf trim them off, repeat these steps to the other two leaves. Now that you have glued the leaves wrap the stems with green floral tape, next bend each leaf stem about a inch or so down from the bottom of the leaf so your leaves are facing outward, place your leaves on either side of the sunflower stem to see where you would like your leaves to be then start wrapping at the very top of the sunflower stem with green floral tape when you get to where your leaf stems are start wrapping all three of the stems together and continue wrapping to the bottom of your sunflower stem.

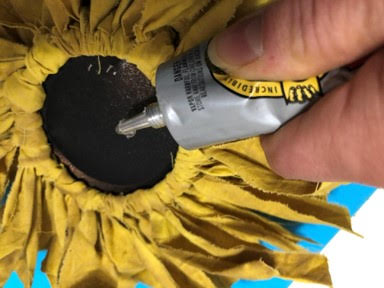
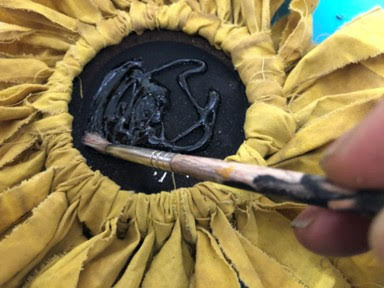
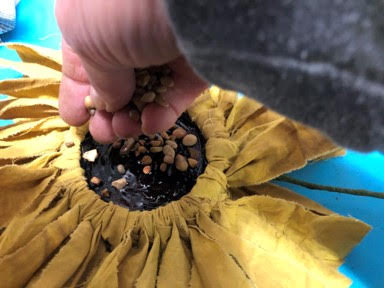
Adding the gravel
Apply glue to lid in the center of the sunflower, with a paint brush spread the glue making sure to cover the whole lid. Once you have covered the lid with glue cover the whole lid with gravel and let dry. Turn your flower over and repeat this step to the back side. Your flowers are now ready to decorate with.
The sunflowers are so beautiful! Thanks Sherry for sharing your crafts with us!❤️🌻
Hey Sherry! I made the sunflowers on the jar rings. I used patriotic materials and they turned out great. One big problem! I cannot find 14 gage flora wire. Are they the precut stems or is this gage on a roll? HL sold me jewelry wire and it was aluminum wire and it just flopped over. Where did you get your wire? Thanks for your help. I’ll send pics when I get the wire in them. Love your projects!! Becky in Fort Worth TX
Hi Im going to use sticks from the woods since the wire isnt available near me here in rural NC. But not Im thinking a wire hanger could work too.
You make the most amazing things. I love these sunflowers! I also love the pillow flower you put together last week. You put a lot of time into these projects and the quality really shows. You and your sister are truly amazing people.
Hi Sherry thanks for sharing all of these wonderful crafts.
I have a question? Can you use other paints such as latex etc, besides crafts paints on this project? Or Food coloring? Just happened to be out of yellow craft paint at the moment and I already started with my ingredients. Thank you have a wonderful
You could go ahead and test it out on a small piece of fabric using paint you already have. Im using plastic rims from food containers cut up rather than canning jar rings which I dont have. I dont see why the stain recipe uses 2 TBSP vanilla. Too wasteful and expensive for me to do that. Lets make our own recipe and I am using undyed fabric, going for patriotic. My flower centers are fabric over fiber fill.
Your instructions are amazing. They are beautiful. I love the paint added to the staining process. I am impressed. Thanks Sherry
You are great. Ty❤️
Like to see how you finished the back off
I am so impressed I bought the material today to make the flowers
Sherry, you are an incredible crafter! I love these unique flowers! I can’t wait to make them for decorating my church. They will be so beautiful!
Thanks for showing us how to make these Sherry. Thanks for taking that giant step and creating your crafting group. All your ideas are amazing and you do such a great job of explaining and showing every step.
Sherry I had a great time creating these sunflowers!
Thanks so much for your very detailed instructions 👋
These are beautiful and your instructions ensure success. I put this on my to do list and will become a follower.
I love these!
I just love the sunflowers I want to try and make them and put them on my porch for the summer
Can you purchase the sunflowers
I am sorry I only show how to make them I do not sell them.
Question: do you rinse the cinnamon and nutmeg off the fabric before you dry it?