Home Decor
DIY Recessed Lighting Chandelier
May
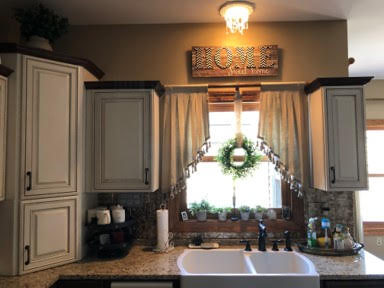
If you have been following The Crafty Decorator you know I am all about crafting décor for my home and making simple changes to give a room a total new feel. I really wanted to changeout the recessed light above my kitchen sink to a chandelier but after researching it was going to be a little costly to hire an electrician. I decided to search recessed lighting online and I came across recessed chandelier’s unfortunately they cost anywhere from $150 to $270 so I decided to try and make one myself, and I am so glad I did I just love how it came out and it cost me under $50. If you have recessed lighting in your home I hope you will give this a try.
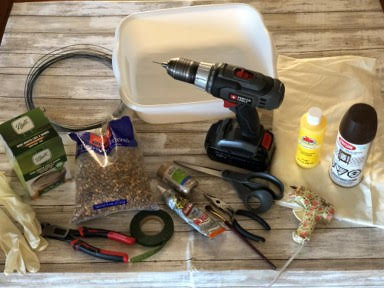
Here is a list of what you will need:
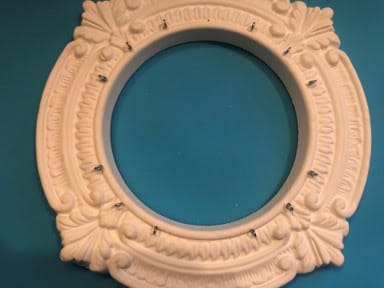
- 1 – 6” ID x 10” OD Urethane Recessed Trim
- 13 ½’ Clear Crystal Garland
- 12 – 1/2” x 1/2” Screw Eyes
- 4 – 38mm Chandelier Icicle Crystal Prisms
- White Craft Paint
- Paint Brush
- Pencil & Scissors
- Ruler
- 1” Mounting Tape
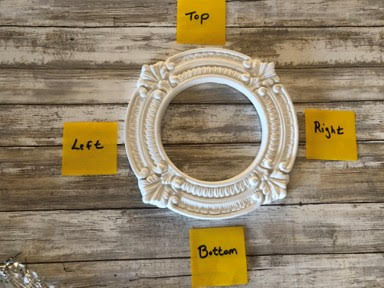
Pre-directions
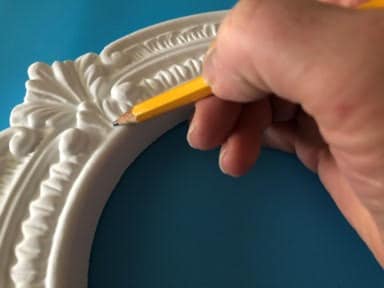
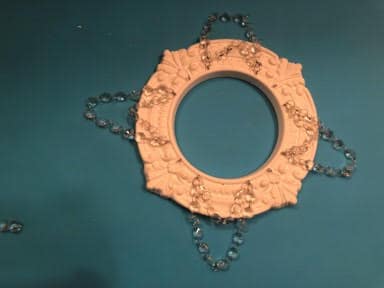
Before you start reading the directions below I wanted to explain what I mean when I talk about right, left, top and bottom in the directions I have posted a photo below so you will understand what they mean.
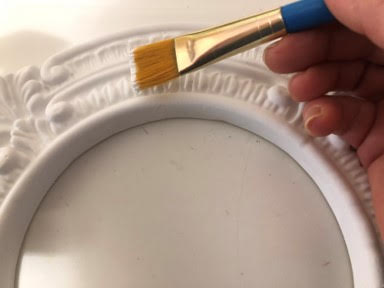
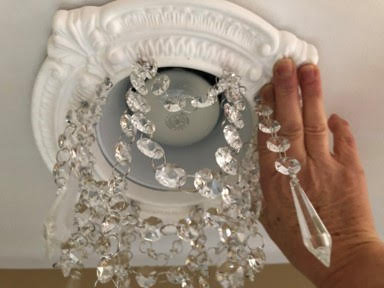
Painting and Adding Light Screws
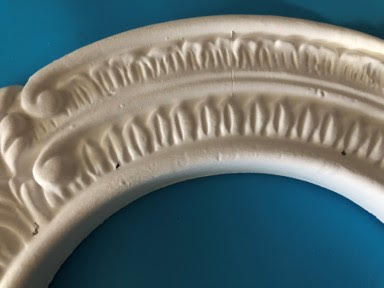
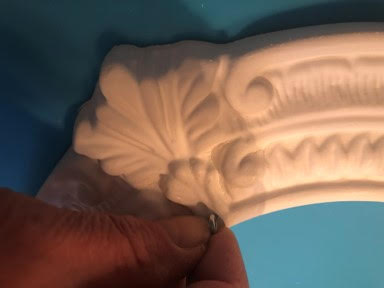
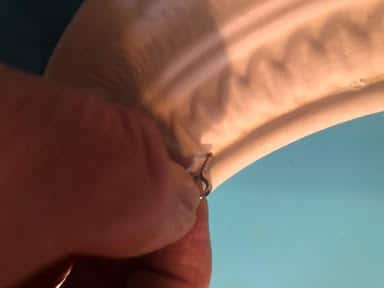
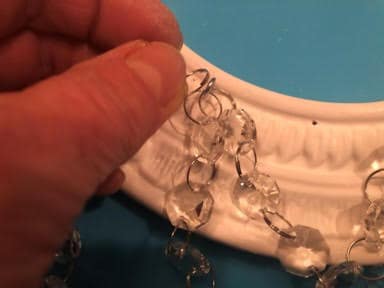
The first step is to paint all sides of the recessed trim, I chose to paint mine white but you can paint the trim any color you choose. Once your trim is dry you are going to mark where your 12 eye screws are going to be placed, If you are using the recessed trim like mine I placed one eye screw in the center bottom of each medallion then I placed another eye screw at the bottom of the second leaf to the right and left of each medallion. If you are using a different recessed trim use a pencil to mark one spot on your trim just above the center rim then mark another spot 1 ¼” to the right of the mark you just made, next working your way right mark another spot 2 ¾ inches from your last mark then mark another spot 1 ¼ inches away continue working your way around the trim using the spacing I just explained, you should have a total of 12 pencil marks. I hope you are understanding the spacing you can look at the photo below to better understand the spacing. Now that you have all your pencil marks finished screw in your 12 eye screws.

Preparing the Crystal Garlands and Icicle Prisms
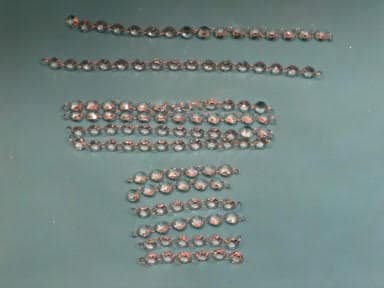
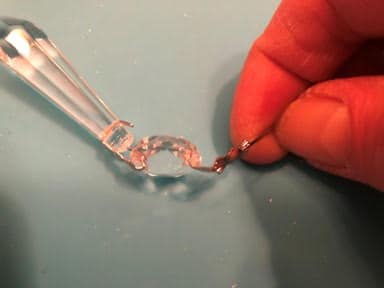
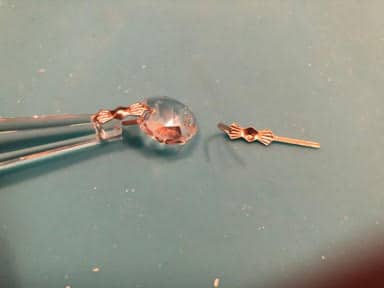
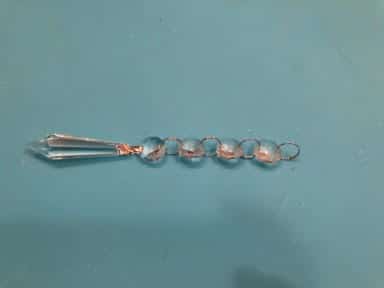
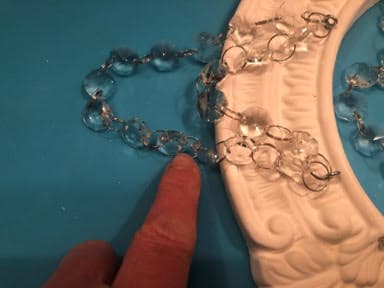
The 20’ crystal garland I ordered from amazon came in 6 strands of 3.33 feet each, I used 4 strands. You are going to make 6 garlands consisting of 6 crystals and 7 of the connecting rings, you will end up with crystals without any rings attached because you will need to make sure you have a connector ring on either side of your garlands. Next make 4 garlands consisting of 12 crystals and 13 connector rings, then make 2 garlands consisting of 16 crystals and 17 connecting rings. You are now going to need to add additional crystals to the four Icicle Prisms first start by removing the bowtie connector clip from the top of each prisms then add 3 crystals and 4 connector rings to each prisms.
Adding the Crystal Garlands
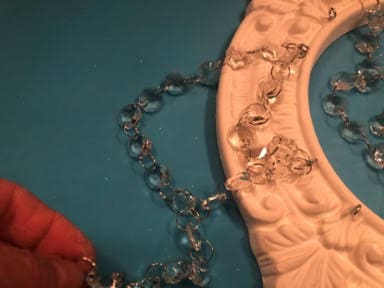
Take one of your six crystal garlands and attach each end to the eye screws that are 2 ¾ inches apart, attach three more six crystal garlands to the other 3 sets of eye screws that are 2 ¾ inches apart, see the photo’s below.
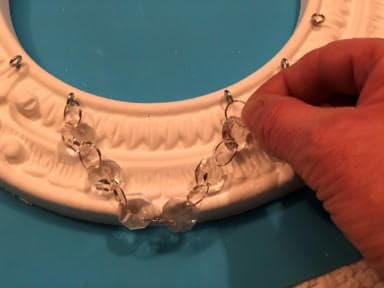
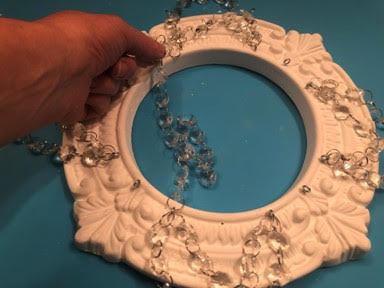
Take one of your 12 crystal garlands and attach to the same two eye screws that you have just added a six crystal garland too, attach three more 12 crystal garlands to the remaining three sets of eye screws you have attached the 6 crystal garlands too, see photo’s below.
Take one of the 16 crystal garland strands and starting at the bottom of your recessed trim attach one end of the crystal garland to the left eye screw that you just added your other two garlands too, take the other end of the garland and bring it directly across to the top of the trim and attach to the left eye screw. Repeat this step with another 16 crystal garland to the right eye screws, see the photo’s below.
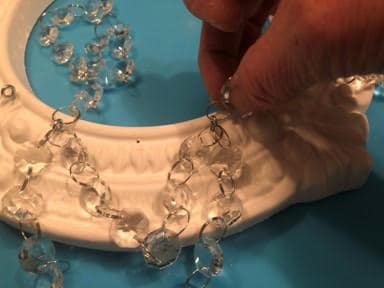
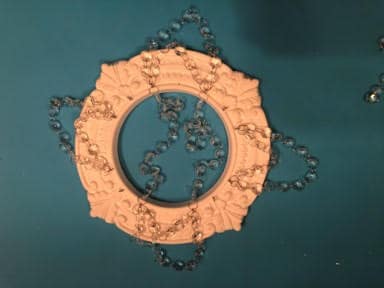
At this point you should only have two 6 crystal garlands left, on the left side of the recessed trim you are going to start at the bottom eye screw that you have already added two garlands too, on the 12 crystal garland you have connected count down four connecting rings from the eye screw and attach one end of your 6 crystal garland to that connecting ring, now take the other end and go directly across to the right side feeding it under your two strands of 16 crystal garlands you have laying in the center and attach to the fourth connector ring of the 12 crystal garland on the lower eye screw. Repeat this step with the other 6 crystal garland to the other side of the 12 crystal garland which is on the upper eye screw, see photo’s below.
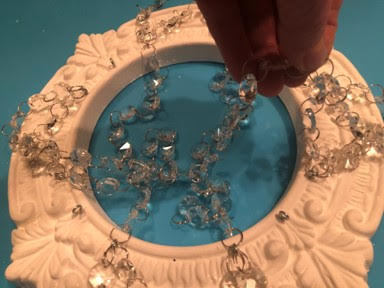
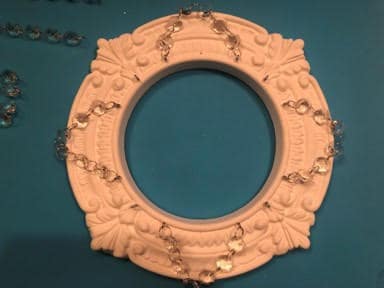
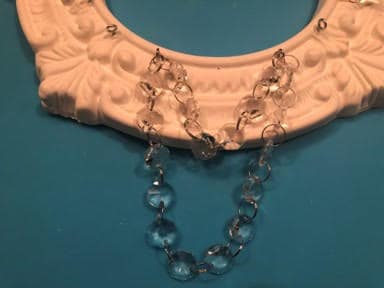
This is what you chandelier should look like so far.

Adding the Crystal Prisms
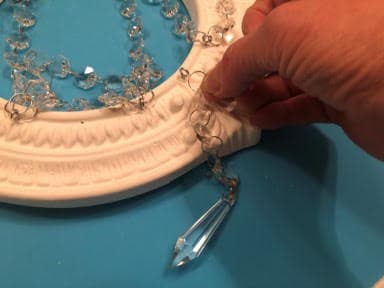
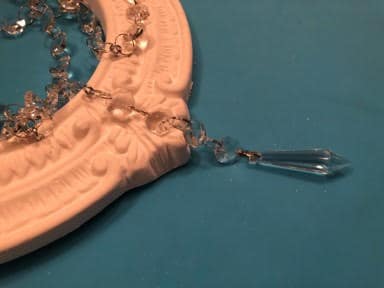
You should have four eye screws which you have not connected any garlands too, attach one crystal prisms to each eye screw.
Attaching the Recessed Chandelier
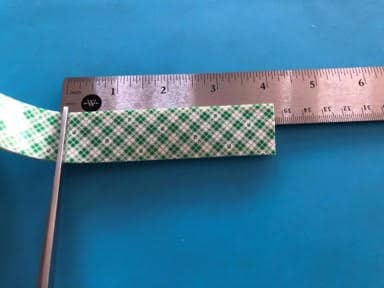
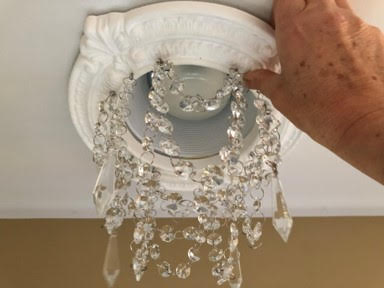
Turn your trim over so the back is facing up, measure and cut a 4 inch piece of your molding tape you will need a total of four pieces. Once you have four piece cut add the pieces around your existing recessed light trim, make sure you stay to the outside of the center of the trim you don’t want the tape to show when you attach the chandelier. Once you have placed the molding tape pull off the paper from each piece, hold up your chandelier to the recessed light and center then push all around the trim to make sure it is stuck really good, all that is left to do is stand back and look how beautiful the chandelier is you just made.
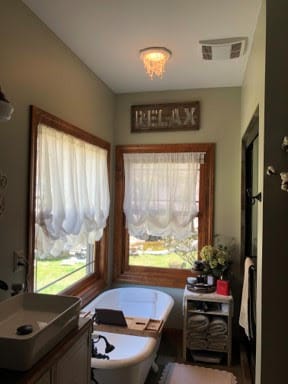
I love how this turned out so much I made another recessed chandelier for the recessed light above my master bathtub.
Hi Sherry! After watching you make your chandelier I made one for my recessed light! I love it! Thanks for the great idea!
That is so beautiful
This is cute and made it but had to change a bit. Did not like the 2 6 piece that went on the 12 piece behind the 16 piece. I took them off and made 2 more 16 piece going the opposite direction. I then made my 12 piece each hang from where the pendant hang to next pendant. Finally I took 4 extra pendant and hung one from each 6 piece. Can send a photo if you would like. Made it a bit more rounded and fuller looking.
Hi, I’d love to see a picture
BEAUTIFUL! I’ve been searching for ideas for the 4 pockets I have in my kitchen. Do you feel like this dims the light at all? My kitchen is ALL BLACK so I need the light, just want them to feel more glamourous.