Easter, Home Decor, Outdoors, Spring
DIY Large Bunny Door Hanger
Mar
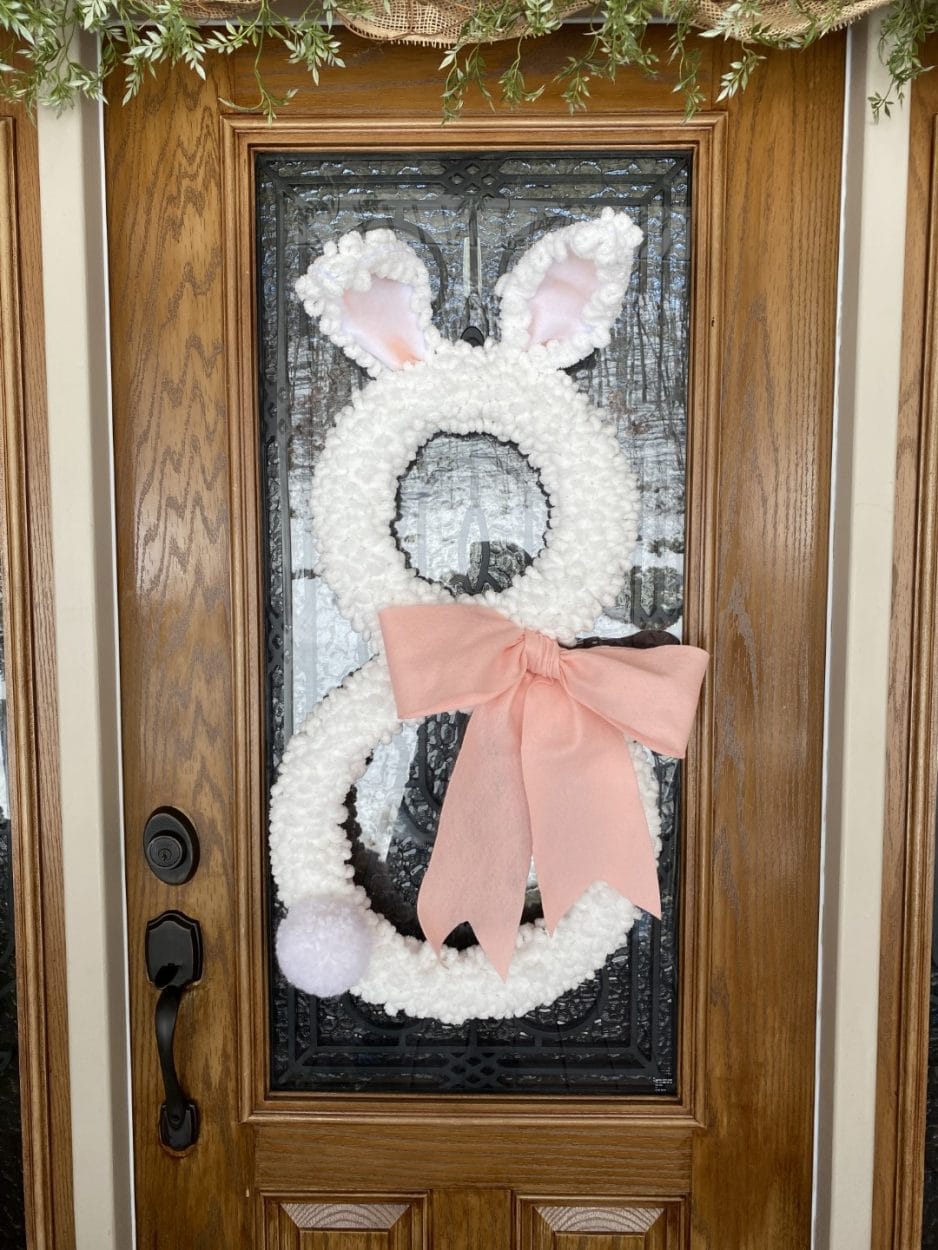
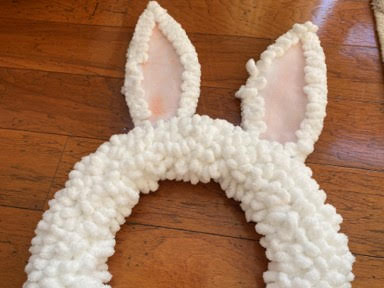
I wanted something new for my front door for Easter. I decided to make a large bunny he is about 42” long and I just love how he came out. If you looking for something for Easter for your front door you need to give this bunny a try he is very simple to make. Now I need to think of new Easter items to put around my door with the garland lol.
Here is a list of what you will need:
- Bunny Ear Pattern
- 1 – 18” Dollar Tree Wire Wreath Form
- 1 – 14” Dollar Tree Wire Wreath Form
- 54.6 Yards of White Loopy Yarn
- 5” wide by 34” long piece of pink felt
- White Yarn for tail
- Clover X-Large Pom Pom Maker
- 6- 4” Zip Ties
- 4- 8” Zip Ties
- Pink Craft Paint
- Paintbrush
- Pencil
- 4 pieces of 20 gauge stem wire
- Hot Glue Gun and glue sticks
- Scissors
- Wire Cutters
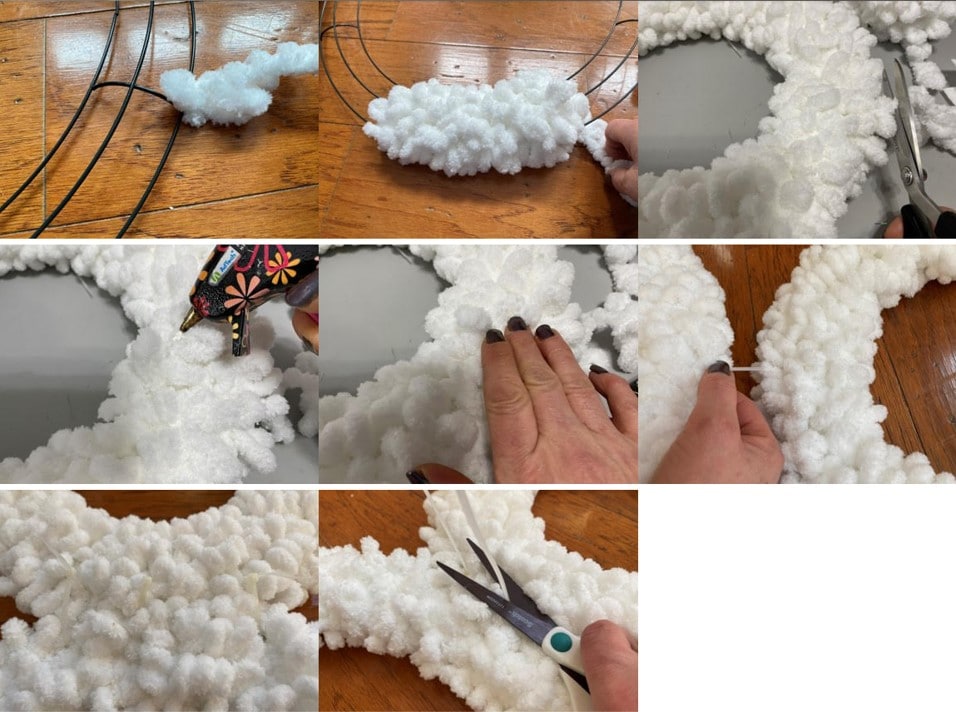
Making the Bunny Body
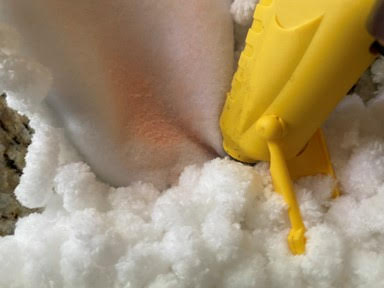
Take the end of your loopy yarn and tie it onto the outside of the 18” Wreath Form. Wreath the wreath form with the loopy yarn, you will need more then one skein of yarn. I ordered by loopy yarn from Ebay each skein of yarn is 18.2 yards I used three skeins to make this bunny. When you come to the end of the skein you will need to tie the beginning of the second skein to the end of the first skein. Continue wrapping the form until it is completely covered. I wrapped my form tightly so you couldn’t see any of the green form. Cut the yarn at the back of the form add hot glue to the end of your yarn and glue down. Wrap the 14” wreath form the same way you did the 18” wreath form. When you have both wreath forms wrapped lay them down with the 14” above the 18” wreath form. Using three 8” zip ties zip tie the frames together. I placed one in the middle then one on either side. Do not pull them tight until you have all three in place. Cut off the excess.
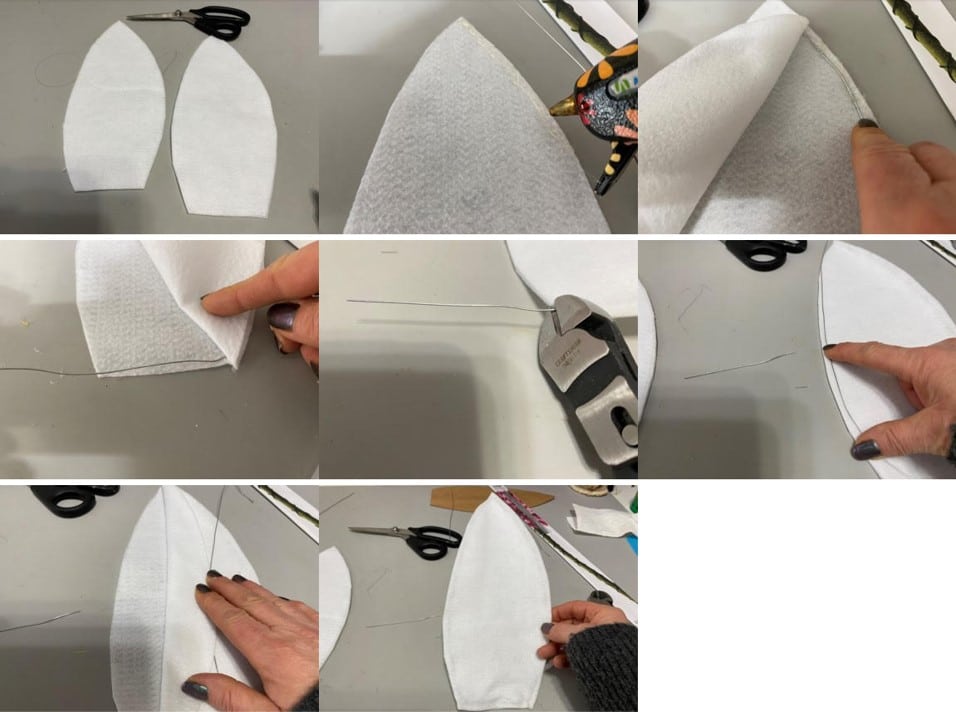
Making the Ears
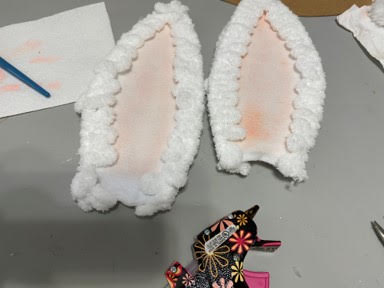
The first thing you will need to do is print and cut out the ear patter. Trace 2 ears from a double layer of white felt. Cut out about a ¼” away from the trace line. You will have four pieces. Lay down one piece of the ear add hot glue to the trace line down one side then place one of the stem wires on top of the glue then glue down the second piece of the ear. Fold back the other side of the ear bend the stem wire across the bottom and over to the other side. Trim off excess wire then add hot glue on top of the wire and glue bottom closed. Fold back the other side of the ear lay piece of the stem wire down the side bend to shape then cut off excess. Add hot glue down the side of the ear add the wire and glue the top piece of ear down. Repeat these steps to the other ear.
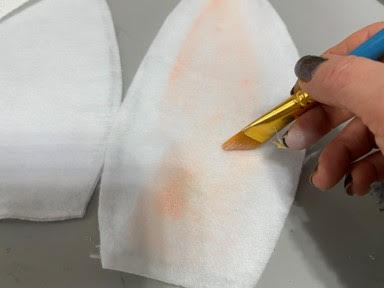
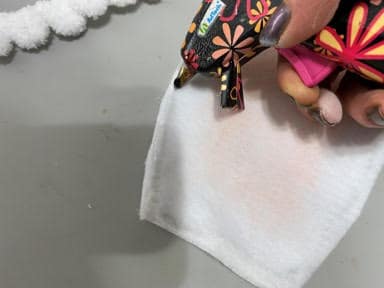
Using pink craft paint and a paintbrush paint the middle of both ears suing the dry brush technique. All this means is dip your brush into the paint then blot onto a paper towel. You don’t want a lot of paint on the brush.

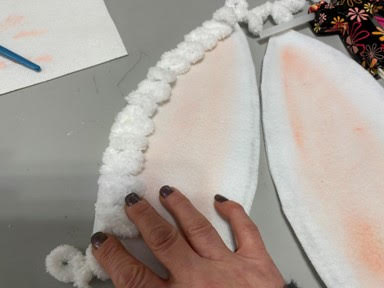
Add a line of hot glue down one side of the front of the ear start attaching the looping yarn to the side of the ear starting at the bottom working your way to the top. Add hot glue down the other side of the ear then attach the loopy yarn working your way down to the bottom. Trim off excess yarn. Repeat these steps to the second ear.
Attaching the Ears
To attach the ears you are going to use three 4” zip ties for each ear. Place your ears at the top of the bunny head to decide where they should go. Remove one ear. You are going to make three holes across the bottom of the ear. I used a big nail to do this but you can use what every you have handy even the tip of the scissors would work. Start by placing one zip tie into the middle hole then zip tie the hear to the end of the frame at the top of the head. Next insert the other two zip ties and attach them to the frame. Repeat these steps to the other ear. Now to make the ear a little more stable apply a small amount of hot glue at the base of the ear then pinch the ends of the ear towards the middle and hold in place for a minute until the glue hardens. Repeat this step to the other ear.

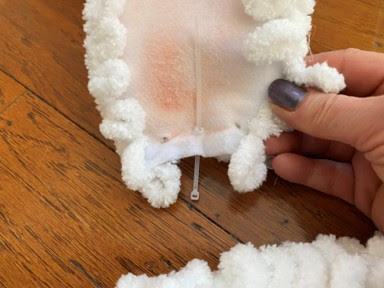
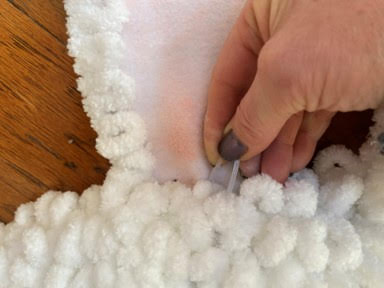
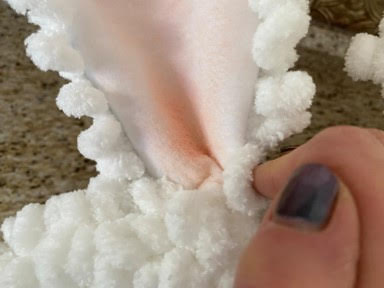
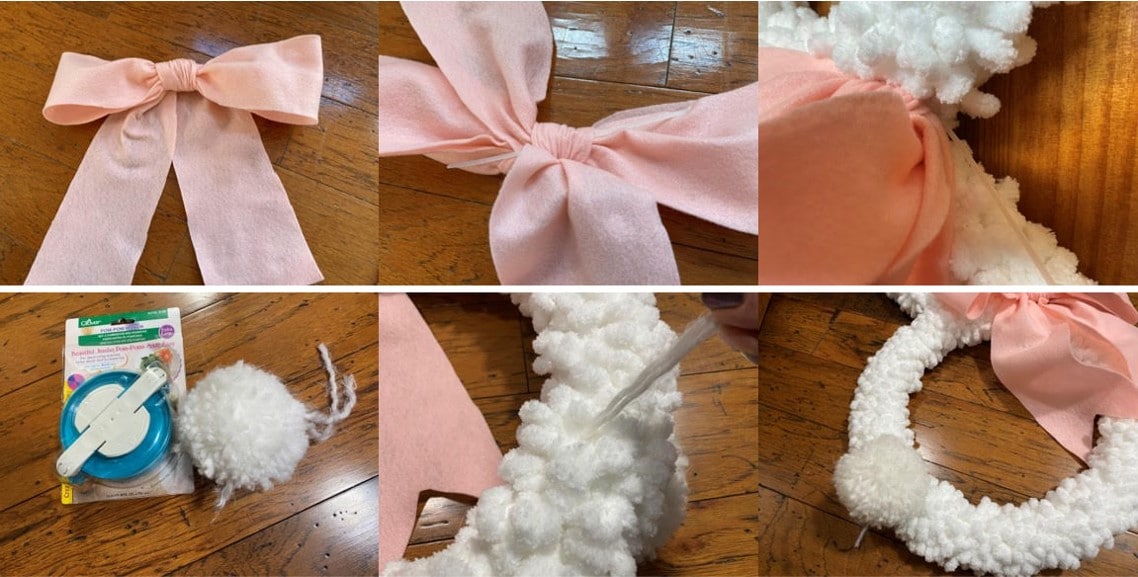
Attaching the Tail and Bow
Make a large bow from the 5” by 32” piece of felt. Place a 8” zip tie through the back of the bow and zip tie the bow to the bunny frame. Next make a X-Large pom pom using the Clover pom pom maker. Tie the tail onto the bunny.
You are now ready to hang the beautiful bunny on your front door. You can add any other embellishments you would like. I hope you found these fun and easy to make.
Just simply Beautiful !!!
Send ear pattern thank you
Its on the blog just click on pattern
I bought the yarn but can’t find the wreath wire any where. I want to make the big one like yours.
Sherry did you take the directions down , from when you made the laundry room signs on pizza pans? I bought the all the stuff, I think. But not sure about direction. Would you mind reposting them?
Please give me the instructions to do the laundry room signs. I have checked your videos and your blog. I was unable to find them. Thank you.
Found 18in wreath at joanns 3.49
Sherry did you take the directions down , from when you made the laundry room signs on pizza pans? I bought the all the stuff, I think. But not sure about direction. Would you mind reposting them?
I watched your video on making the bunny and I absolutely loved it, I’d love to see more of your craft ideals, am a big fan of crafters like yourself.
Sherry do you have a blog on making them out of canning lid jars? Or a video, I love this one but want to do it with a friend who’s home bound and think starting with the big one would be too much for her.
where is the pattern for the lambs face please?
When click to see the lamb 🐑 on the blog the pattern is there of the face with the lamb.
Where did you purchase the loopy yarn for Easter bunny wreath?
I ordered it off of Etsy.
It’s is big and looks great easy to make. Thank you Sheri
Sherry I just finished making the the bunny for the front door it came out wonderful.
Thank you for showing me how to make the bunny
I can’t wait to make this i have everything but the loopy yarn.cant find it anywhere. Love this Sherry
Are you sure the measurement for the bow is correct? It doesn’t seem near as big as the picture.
Oh goodness I wonder if you are right I just watched the video and I say 34″ but now I am thinking it is 68″ long. I am going to have to make one and then have my web person fix that for me thank you!
Hi, I would love to pay someone to make the bunny wreath for me. Do you know of someone who could do this? Thanks