Easter, Home Decor, Spring
DIY Macrame Bunny Hanger
Apr
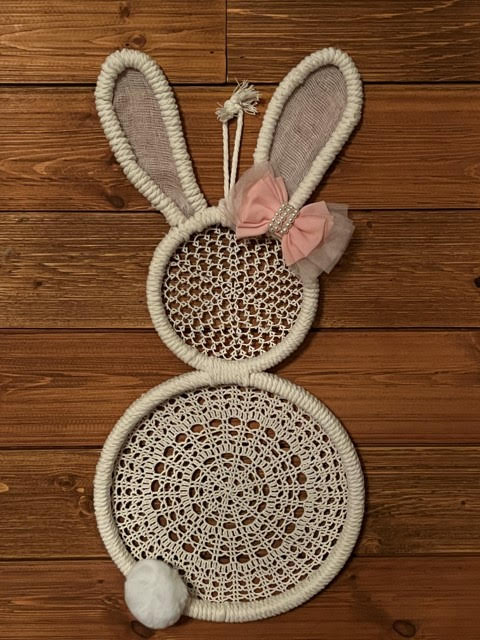
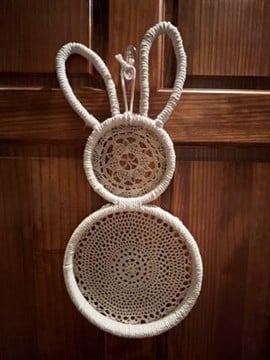
After making small macrame bunnies I decided I would try my hand at making a larger macrame bunny hanger. I just love how it turned out. This amazing macrame bunny hanger would be beautiful hanging on a wall or the front door of your home. If you haven’t seen my small version of the macrame bunny check out my blog.
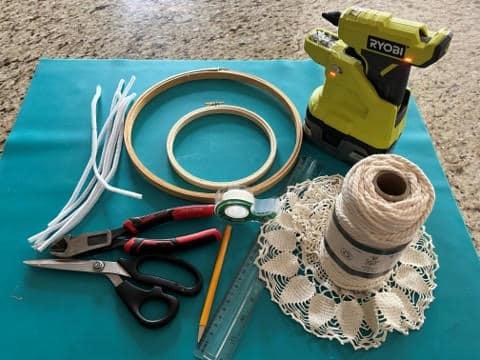
Materials I Used:
- One 6” embroidery hoop
- One 10” embroider hoop
- Macrame natural 5mm rope by Yarn Bee, Hobby Lobby #2170553
- 6 white pipe cleaners
- 2 doilies to fit the embroidery hoops or you can use a lace curtain or lace fabric
- Pencil
- Ruler
- Scissors
- Wire cutters
- Tape
- Hot glue gun and glue sticks
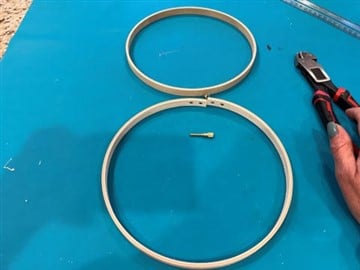
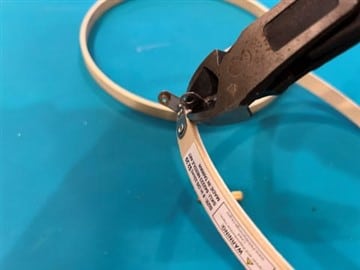
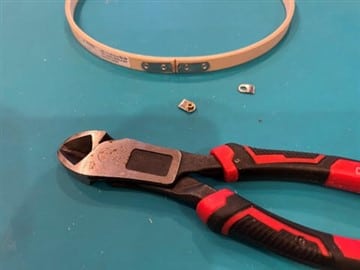
Preparing The Hoops
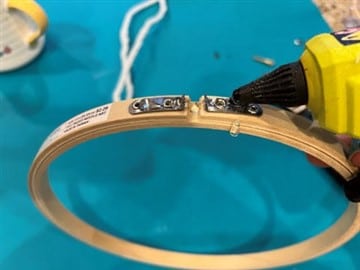
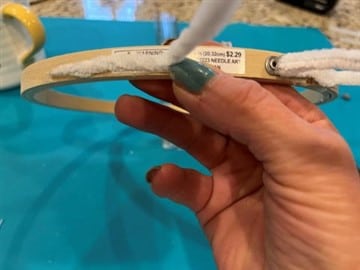
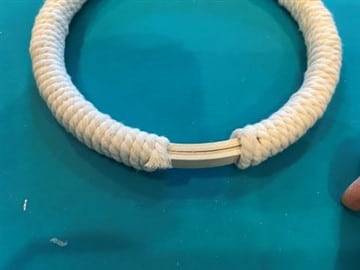
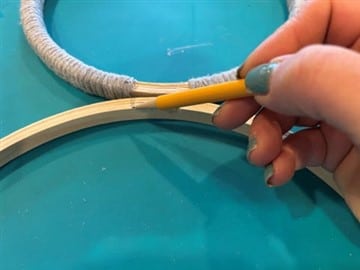
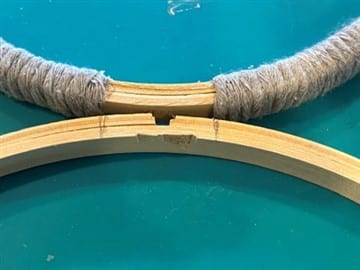
The first thing you will need to do is remove the screws from the embroidery hoops then remove the inner rings. Using wire cutters cut off the pieces of metal that the screws would go through, (see photo’s below). If you are using a lace curtain or lace fabric instead of doilies trace the two embroidery hopes onto a single layer of lace and cut out. Insert the inner rings back into the embroidery hoops.
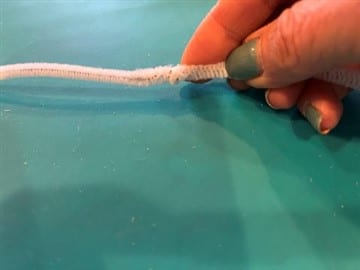
Making And Attaching The Bunny Ears
Take two pipe cleaners and twist one of each together next take another pipe cleaner and twist one end to a end of the two you are just twisted together. Repeat these steps to the other three pipe cleaners. Line both sets of 3 pipe cleaners and twist them together.
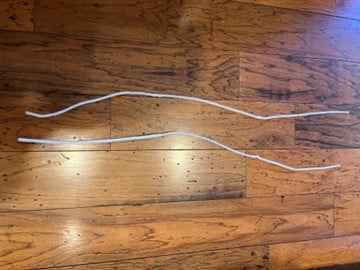
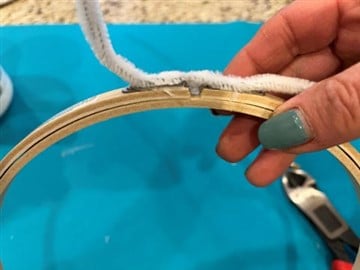
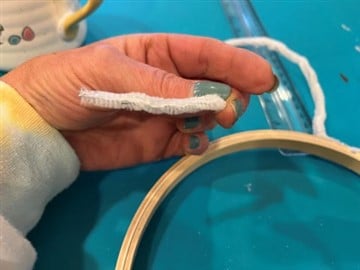
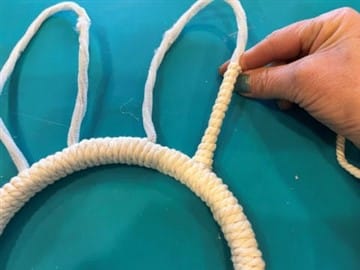
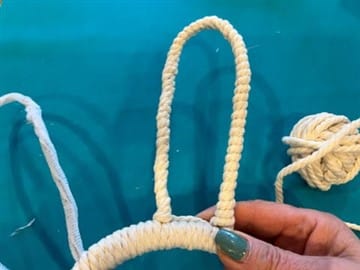
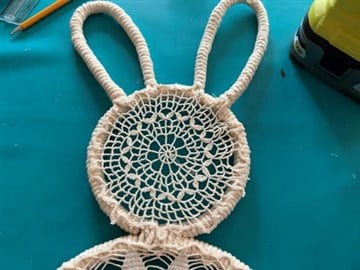
To attach the ears bend the pipe cleaner evenly in half. Add hot glue to the metal on top of the 6” embroidery hoop then glue down the middle of the pipe cleaner (see photo’s).
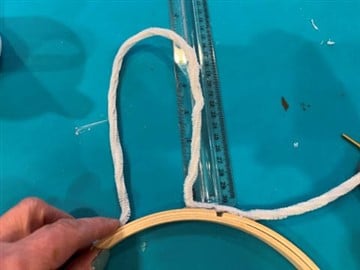
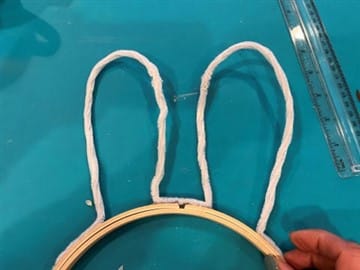
To form the bunny ears start by taking one side of the pipe cleaner and forming a bunny ear. I left about 1.5” space in the bottom center of the ear. Once you have formed the ear take the extra at the end of the pipe cleaner and form to the embroidery hoop. Using a pencil mark the inside of the ear where your extra pipe cleaner piece is, this will help to glue the piece down in the right spot. Lift the end of the ear add hot glue to the bottom of the extra piece and glue down to the embroidery hoop. Repeat these steps to the other side of the pipe cleaner. Make sure you form your second ear to match the first.
Wrapping The Head With Macrame Rope
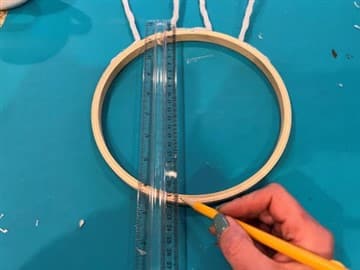
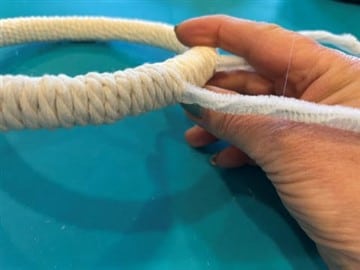
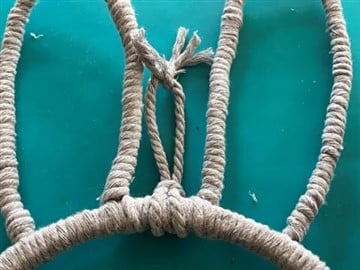
The first thing you will need to do is place a ruler on one side of a bunny ear at the space between the two bunny ears. Make the ruler even down to the bottom of the embroidery hoop then mark the bottom of the hope with a pencil. Repeat these steps to the other side of the space between the ears. You are not going to wrap the space between your two pencil marks.
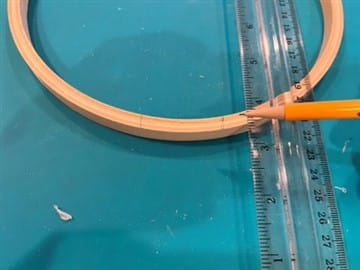
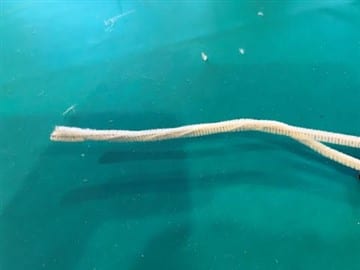
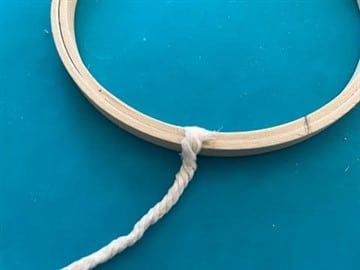
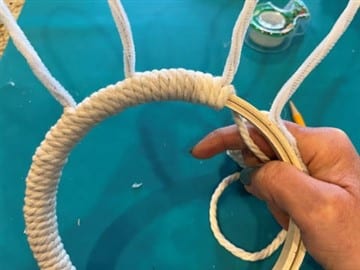
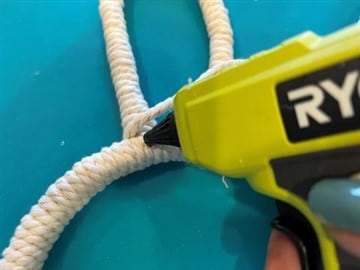
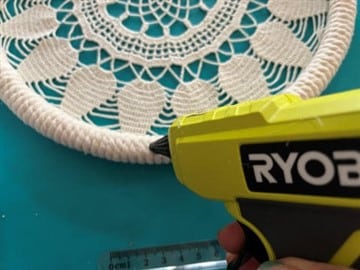
Cut 5 yards of the macramé rope roll up into a ball. I like to place a piece on the end of macramé rope that we just cut from so it doesn’t unravel. Add hot glue to one of the pencil marks at the bottom of the embroidery hoop and glue down the end of the rope. Start wrapping up the embroidery hoop pulling tight as you go. When you reach the ear continue wrapping the embroidery hoop wrapping in the ears and between the ears working your way down the hoop to the other pencil mark. When you reach the bottom add hot glue to the pencil mark glue down the rope and cut off any excess.


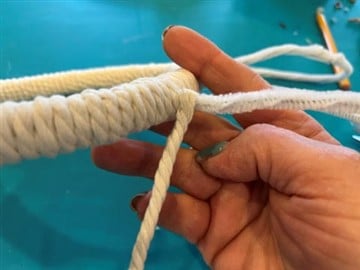
Wrapping The Ears
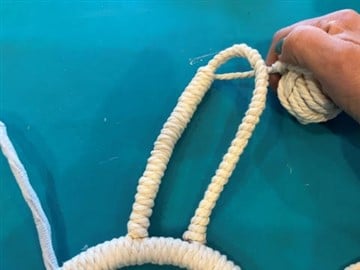
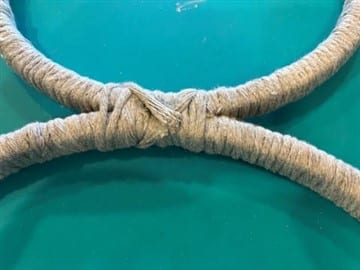
Cut 8 yards of macramé rope Add hot glue to the outside of one ear and glue on the end of the rope. Wrap the pipe cleaner all the way around the ear. When you reach the bottom of the other side of the ear you are going to wrap the ear a second time working your way up and around ending up where you started. When you reach the end add hot glue to the back of the embroidery hoop and glue down the rope, cut off any extra rope. Repeat these steps to the other ear. After wrapping the second time make sure you glue the end of the rope to the same side of the embroidery hoop as you did the first one. This will be the back of the bunny.
Wrapping The Body
Before you can start wrapping the body take the 10” embroidery hoop and line up the top (the part with the metal is the top) with the unwrapped section of the head. Using a pencil mark the section that is unwrapped on the head on the body.
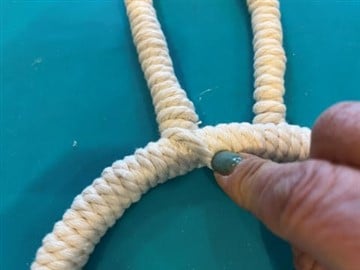
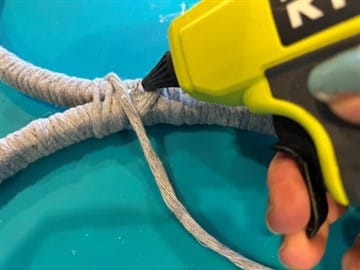
Start by cutting 10 yards of macrame rope wrap into a ball. Add hot glue to one of the pencil lines and glue down the end of the rope and start wrapping the hoop downward and around up to the second pencil mark. Line up the head and body again to see if your two unwrapped space line up or if you need to wrap a little more. Leave your head and body lined up and continue wrapping, you are going to wrap the head and body together by wrapping around the two unwrapped spaces pulling tight as you go.

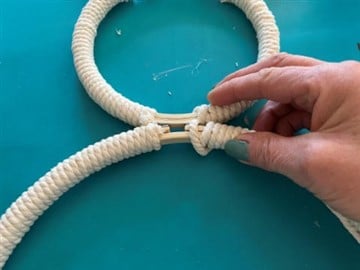
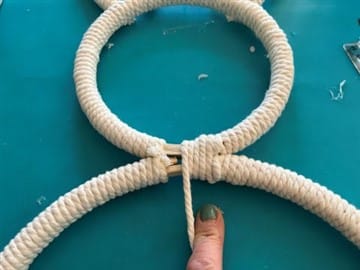
When you have the head and body tightly wrapped together add hot glue to the rope in the middle and glue down the rope cut off any excess. Make sure you end and glue down the rope on the same side you glued down the ends on the head this is the back of the bunny. Sorry the photo’s below are of the gray bunny I was making I forgot to take photo’s of the this part when I was doing the natural bunny.
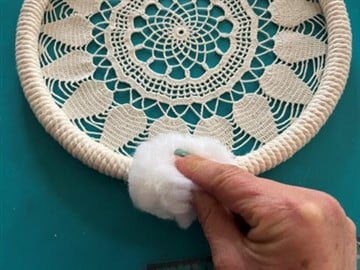
Adding The Doilies, Lace, And Cheesecloth
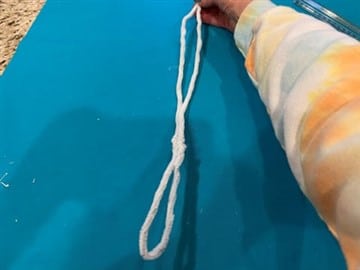
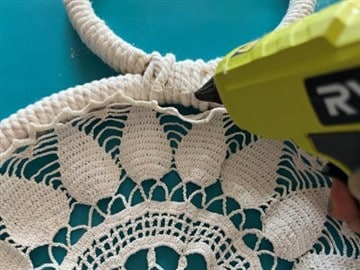
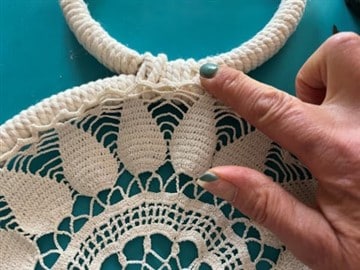
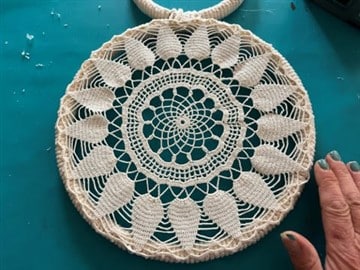
Whether you are going to attach the doilies or the lace they are going to be attached the same way. If you are using lace you have already cut out your lace circles. First cut a piece of the macrame rope to make a hanger for the bunny, make a loop place around the head between the ears slid the ends through the loop then tie a double knot. To attach you are going to add hot glue to the back side of the bunny body and attach the doily or lace. I recommend adding glue to one section at a time. Next attach the doily or lace to the head of the bunny the same way you attached the doily to the body. Adding the pink cheesecloth to the ears is optional. If you want to add the cheesecloth to the ears trace the ears onto the cheesecloth and cut out next add hot glue to one section of a ear and glue down the cheesecloth work your way around the ear adding the glue and gluing down the cheesecloth. Trim the excess cheesecloth around the ear if needed. Repeat these steps to the other ear. Sorry I decided to add the pink cheesecloth to the ears later so I did not take pictures of this step.
Adding The Finishing Touches
The finishing touches are optional but I decided to add a 2” white pom pom as the tail of by bunny by adding hot glue to the body and gluing on the pom pom. I also decided to add a bow on one of my bunny ears. I did no not glue the bow on I just used the attached clip and clipped the bow to one of the ears.
I hope you decide to give this macrame bunny hanger a try! You can see below in the photo’s the bunny with the pink cheesecloth ears, tail, and bow or without.

That is very clever. I have my grandmother’s crochet doilies that would wirk for me. Thank you for the inspiration.
Hi I absolutely love this bunny. Even though Easter is over, I’m going to make it. Thank you!