Christmas, Fall, Home Decor, Outdoors, Spring
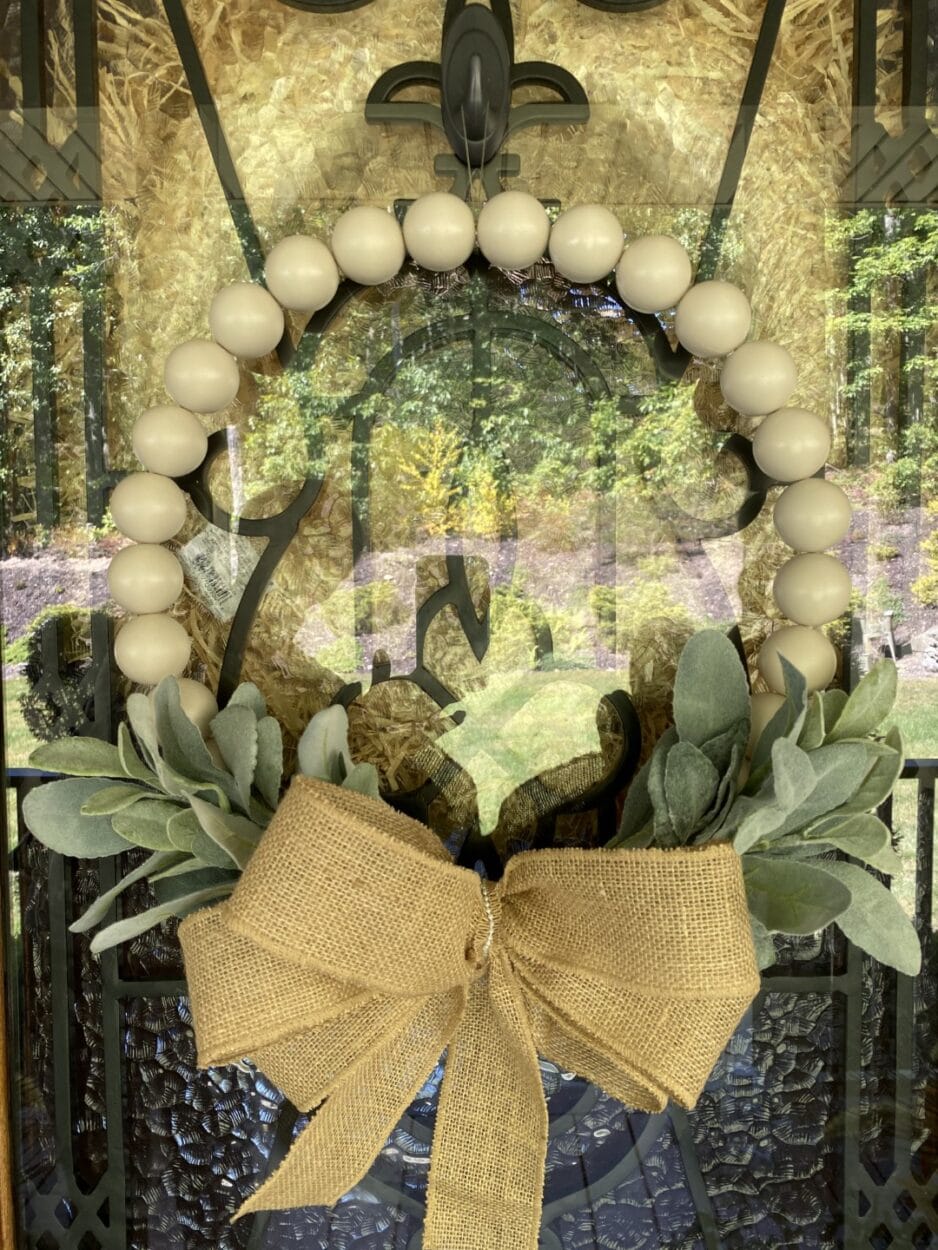
DIY Ping Pong Ball Wreath
Oct
Have you ever wanted to make one of the wooden bead wreaths you have been seeing all over Pinterest, well I have but the wooden beads are a little pricey and a little heavy to hang on your front door then one day I was reading my email and I came across Hometalk DIY ideas and there it was a wreath made out of ping pong balls that looked just like the wooden bead wreath I knew I had to give it a try.I have to tell you it looks amazing but I did do things a little different then the instructions I read for starters I couldn’t find ping pong balls in the Dollar Tree and I couldn’t find any for a reasonable price in the stores so I went on Amazon and found beer pong balls that work perfect, if you would like to see which ones I used you can check out my recommended products page, I also made my holes in the balls a different way and used a different kind of paint but the look came out just the same.
Here is a list of what you will need:
- 22 40mm beer pong or ping pong balls (Amazon)
- 13.7” Wire Wreath Ring (Walmart)
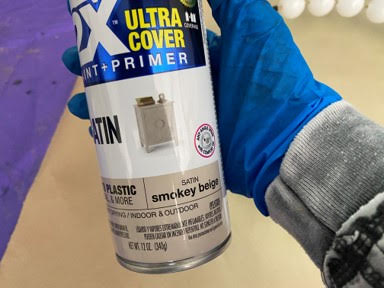
- Rust-Oleum Spray Paint In The Color Smokey Beige
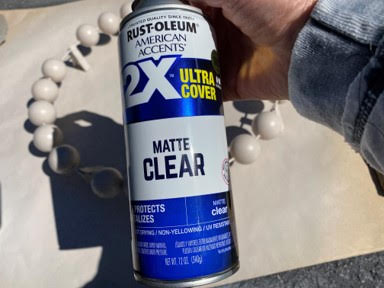
- Rust-Oleum Matte Clear Spray Sealer
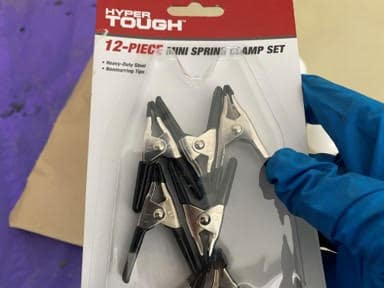
- 4 Mini Clamps or Potato Bag Clips (Walmart)
- Wood Skewer
- 4” Zip Ties
- Hot Glue Gun and Glue Sticks
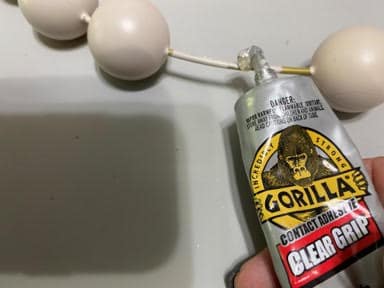
- Gorilla Contact Adhesive Clear Grip
- Wire Cutters
- White Duck Tape
- Jute or Twine
- Scissors
- Greens, Flowers and Ribbon of Your Choice
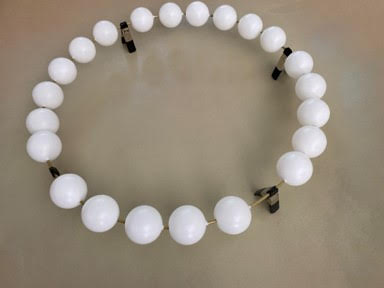
Preparing The Beer Pong Balls And Wreath Ring
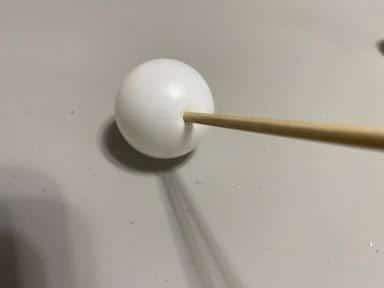
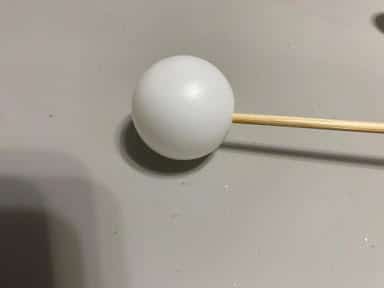
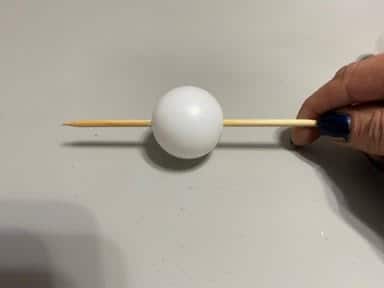
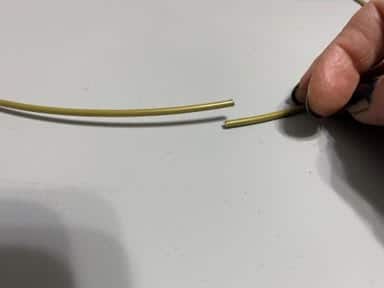
The first step is to make the holes in the 22 beer pong balls to do this take your wooden skewer and insert into the ball on the raised ring that is around the ball, I do this so that line is on the inside of the wreath and not facing the front, once you inserted the skewer push it up to the top of the ball you should be able to see the tip of the skewer through the ball, now look at the ball and make sure it looks straight if not adjust the skewer at the top, once you have it straight push your skewer through the top of the ball then remove the ball from the skewer repeat this step to the other 21 balls.
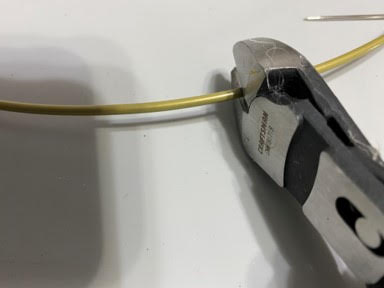
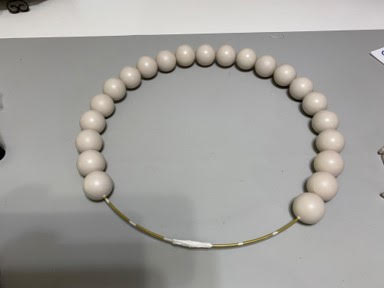
Now that you have made your holes in all 22 balls take a pair of wire cutters and cut your wire wreath ring where it is welded together.
Adding The Balls And Mini Clamps
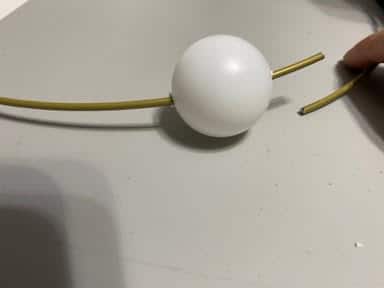
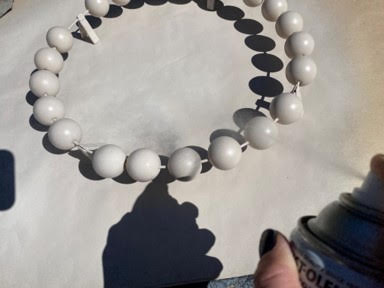
Now it is time to add the balls to the wire wreath ring, take one of the balls and slide it onto one of your cut ends of the wire wreath ring next slide ten more balls onto the same end after you have added 11 balls slide the other 11 balls on the other cut end of the wreath ring. Next you are going to clamp the cut end of the wreath with one of the mini clamps then starting on one side of the clamp spread 5 of the balls out just enough so they are not touching and add another clamp then spread 6 balls and add a mini clamp this clamp should be across from the clamp on the opposite side then spread 6 more balls out and add another mini clamp this clamp should be across from the clamp on the opposite side next spread out the last 5 balls. Once you have added the four clamps turn the clamps so the wide end is facing down this will make a stand for your wreath so it will not be touching the ground when you are spray painting the balls.
Painting The Wreath
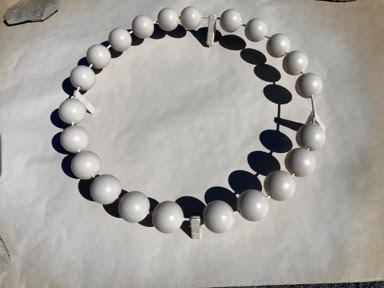
Now that you have added the 22 balls and the 4 mini clamps it is time to paint the wreath, make sure you spray paint in a well vented space I take mine outside and spray paint, using the Rust-Oleum smokey beige spray paint give the top and sides of the balls a coat of paint once dry give it a second coat and once that has dried turn your wreath over, you will also need to flip the clamps so the wreath will stand again, then give the top of balls two coats of paint allowing to dry in-between coats. Once your second coat has dried check all the balls and make sure they are all covered if you don’t need to paint them again you are now ready to apply the Rust-Oleum Sealer apply two coats to the all the balls the same way you applied the paint.
Finishing The Wreath
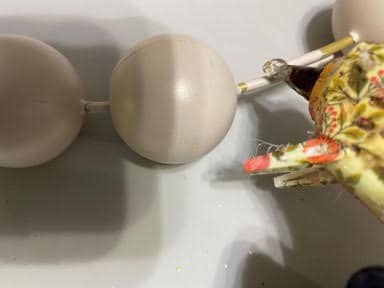
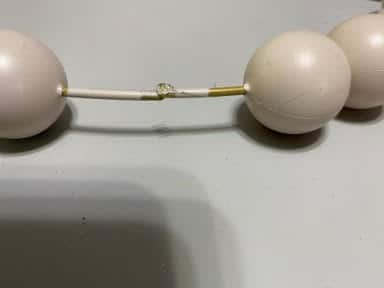
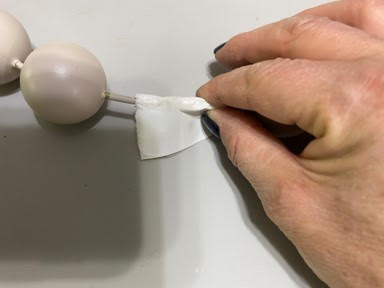
Once the wreath has dried you are going to remove the 4 clamps and slide all the 22 balls back up each side of the wreath. Next add a small amount of hot glue to the open end and glue them together then cut a small piece of the white duck tape, add a small amount of the gorilla contact adhesive on top of the hot glue you just added then tightly wrap your masking tap around the wire wreath where you just added the glue.
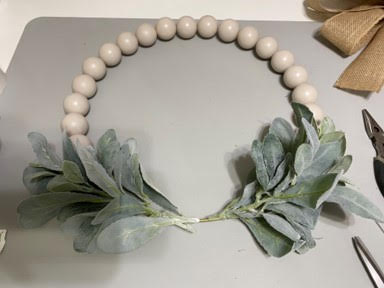
Now for the fun part adding your greens, flowers and ribbon. If you want your greens and ribbon to be on the bottom of the wreath make sure you have the wire wreath part that is not covered with the balls on the bottom if you want the greens and bow to be at the top of the wreath have the non ball part at the top. To attach you greens and or flowers place them one or two at a time and use a 4” zip tie to hold them in place I was wiring mine on until one of my friends told me to use zip ties, what great advice that was. If you are adding your greens to the top of your wreath add a piece of jute tied in the middle to be the hanger if your greens are on the bottom add your hanger in the middle of the 22 balls at the top.
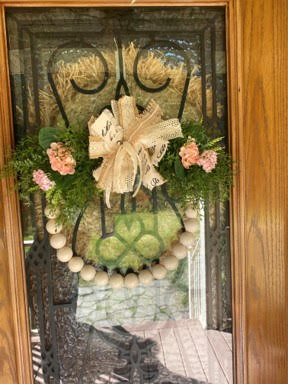
Now that you have your greens and hanger attached you can add your bow, I made by bow using the bowdabra because I am not good at bow making lol, then I just tied my bow in the middle of my greens. You can do any arrangement you like I am just sharing how I made mine.

I hope you will give this wreath a try it is so simple to make and the possibilities are endless for the seasons and holidays.

This is so neat. Thanks for sharing. I may try this!?
I will give this a try. Thanks for the instructions!
I love the wreath 😍
Getting all my supplies together to make this. I Love This Idea! Thank you, Sherry
Love this unique wreath!