Fall, Halloween, Home Decor
DIY Scarecrow Shelf Sitter
Oct
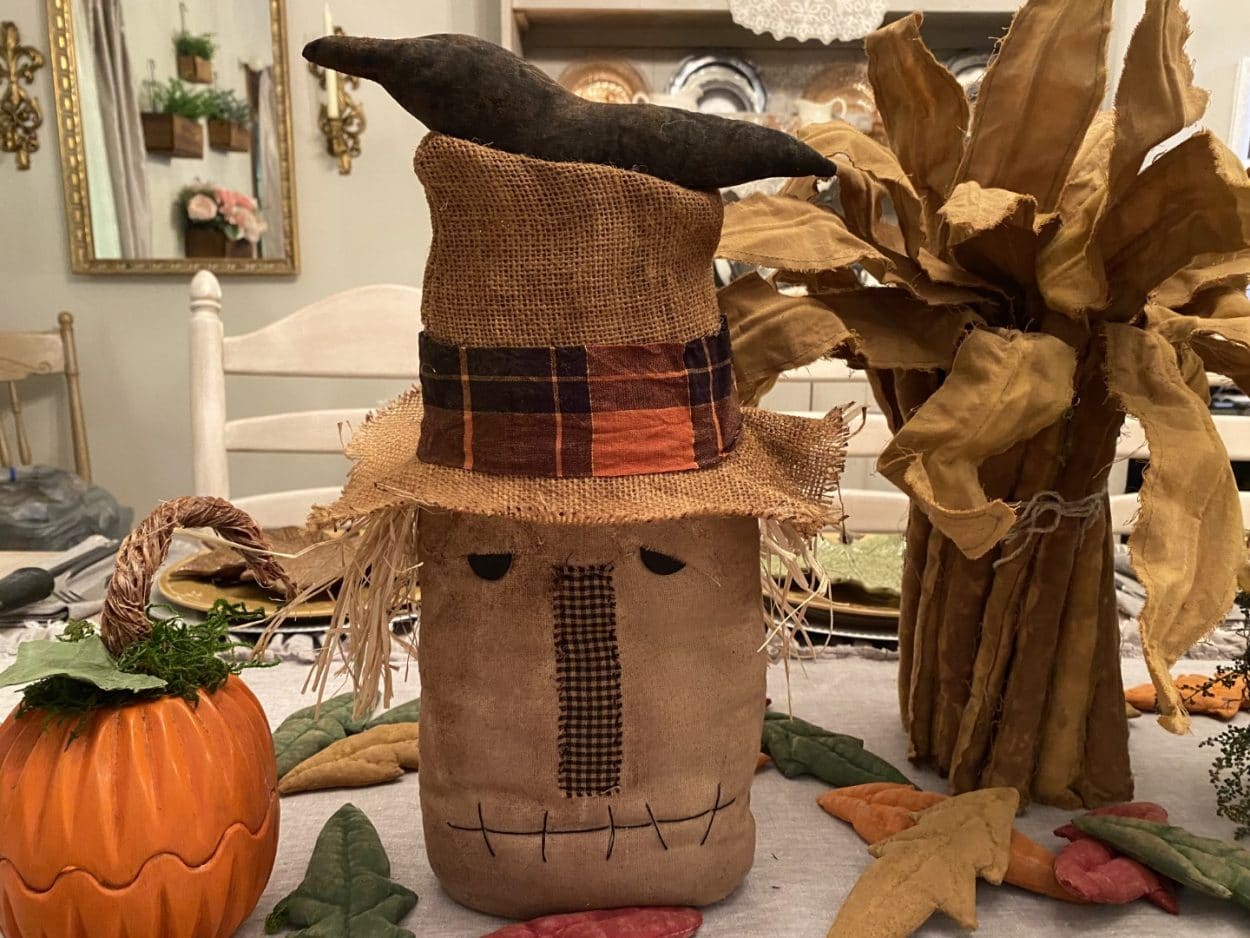
Fall is my favorite time of year, the cooler weather and the changing colors of the leaves is just absolutely beautiful. If you have been following The Crafty Decorator you have seen the scarecrow ornament/picks I have made I just loved them so much that I decided to make a scarecrow shelf sitter which has the same look, and he turned out so adorable and he is a great addition to my Fall table setting.
Here is a list of what you will need:
- Scarecrow Shelf Sitter Pattern
- Osnaburg Fabric
- Homespun Fabrics Of Your Choice
- Muslin
- Burlap
- Polyester Fiber Fill
- Rafia
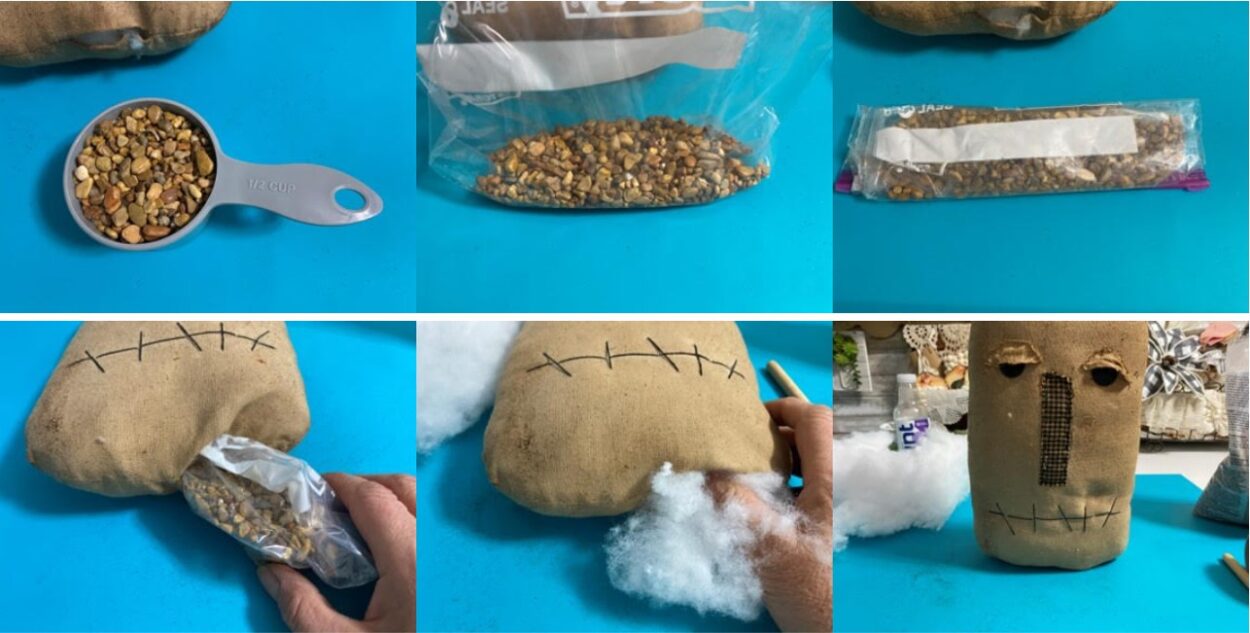
- ½ Cup of Fish Gravel or Sand
- 27/8 Black Buttons
- Black Craft Paint
- Paintbrush

- Sponge Brush
- 1 Sandwich Zipper Baggie
- Coffee Stain Mixture (see my blog on coffee staining for recipe)
- Black Marker
- Black Embroidery Thread and Needle
- Black Embroidery Thread and Needle
- Scissors
- Fine Sandpaper
- Scissors
- Hot Glue Gun and Glue Sticks
Print Out Scarecrow Shelf Sitter Pattern
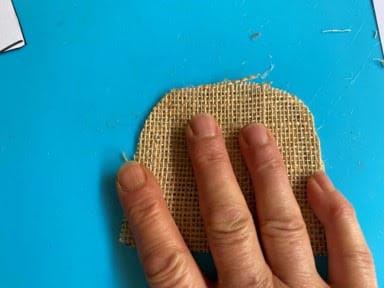
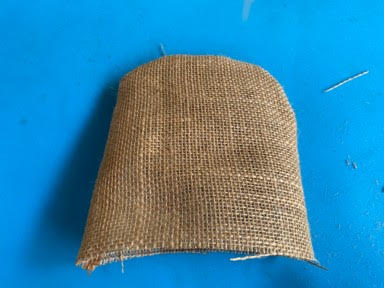
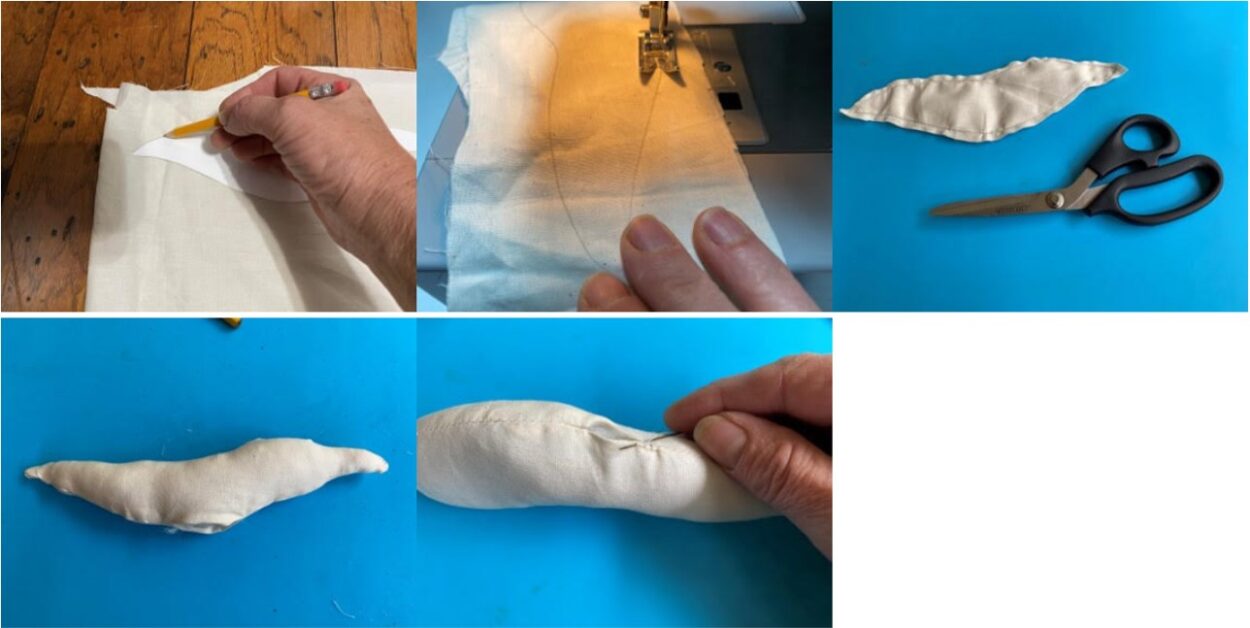
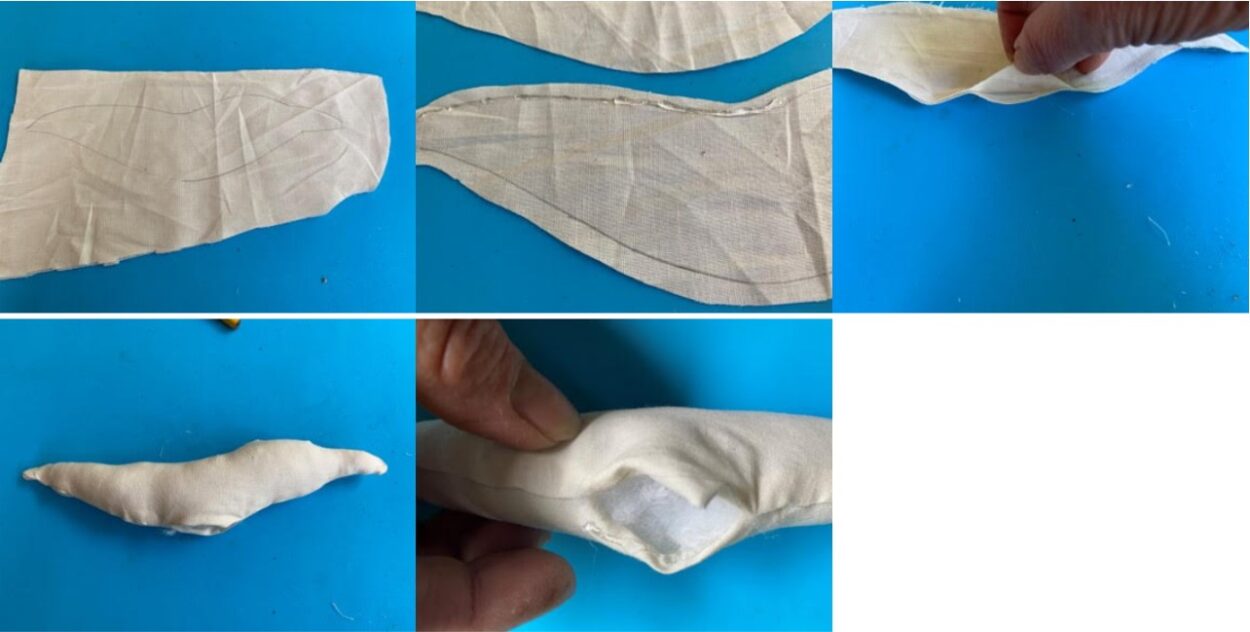
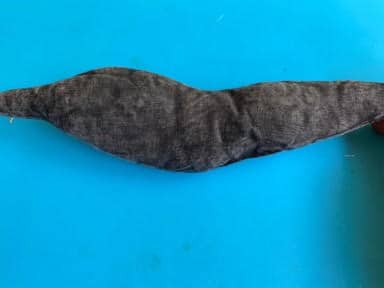
The first thing you need to do is print and cut out the scarecrow shelf sitter pattern.To make the scarecrow head place the head pattern onto a double layer of osnaburg fabric and trace next cut out your head leaving about a ½” around your traced line.If you would like to sew the head using your sewing machine you are going to sew on the traced line leaving about a 3” opening on the bottom, once you have the head sewn take your scissors and snip abound the head be careful not to cut your sewn line, then turn Right Side Out and stuff with your poly fill leaving the bottom a little unfilled so we can add the gravel later.
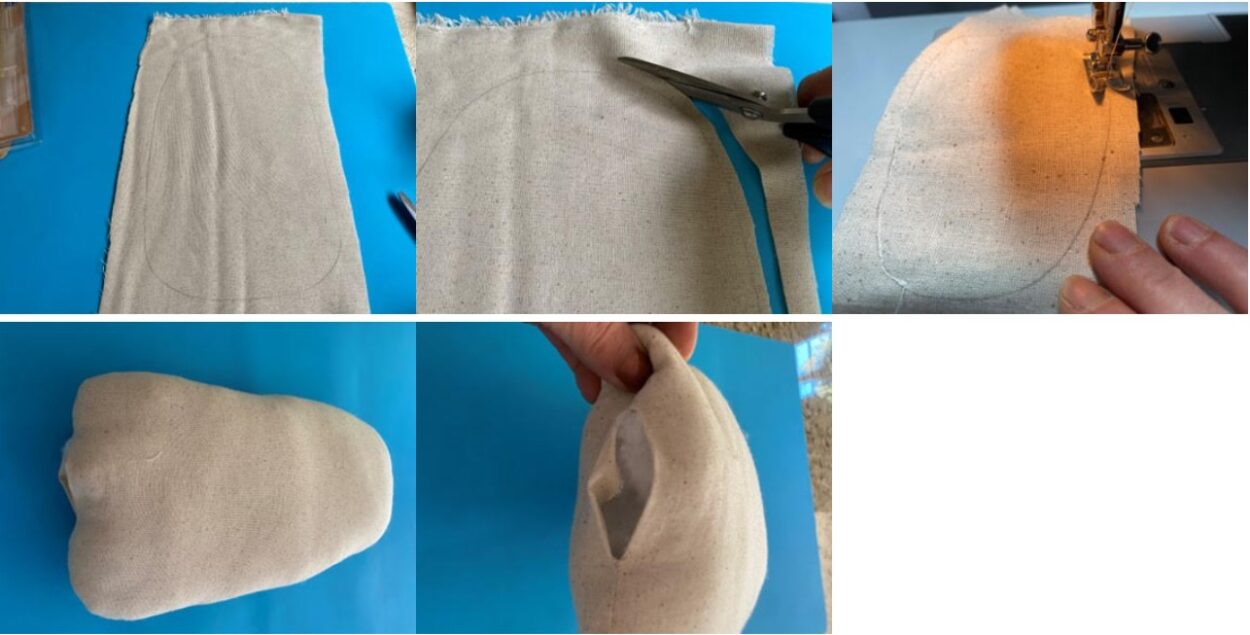
If you would like to hot glue the head lay down the piece of the head that has your trace line facing up then starting at the bottom on your traced line add a small line of hot glue to the left and right leaving about a 3” opening then place your second piece of fabric on top gluing down continue adding glue around the rest of the head, next using your scissors snip around the head make sure you don’t cut your glue line, then turn Right Side Out and stuff with your poly fill leaving a little space at the bottom so you can add the gravel a little later.
Making The Hat
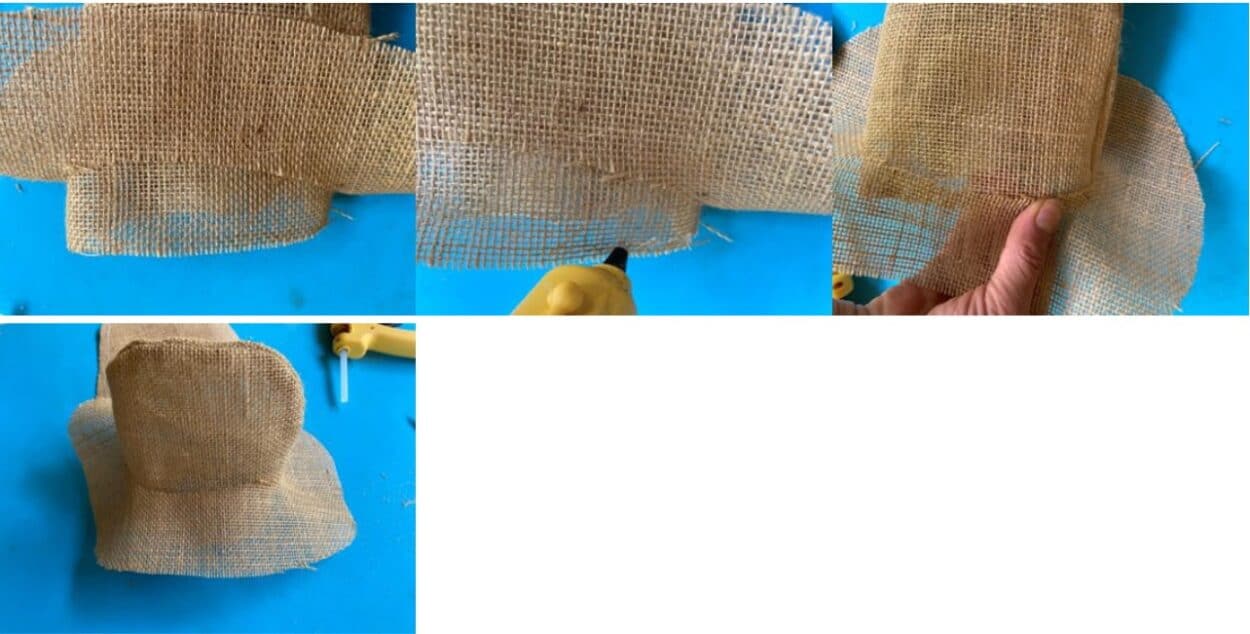
To make the scarecrow hat using a black marker trace the top part of the hat onto a double layer of Burlap then cut out leaving about a ½” around the trace line next trace the rim of the hat onto a single layer of burlap and cut out on the trace line, you will also need to cut out the middle section of the hat on the trace line. Once you have your pieces cut out if you want to sew the top part of the hat on your machine start at one side and sew around the hat leaving the bottom open I then did a second zigzag stitch around the hat, this seemed to stop the burlap from fraying, turn the hat Right Side Out.
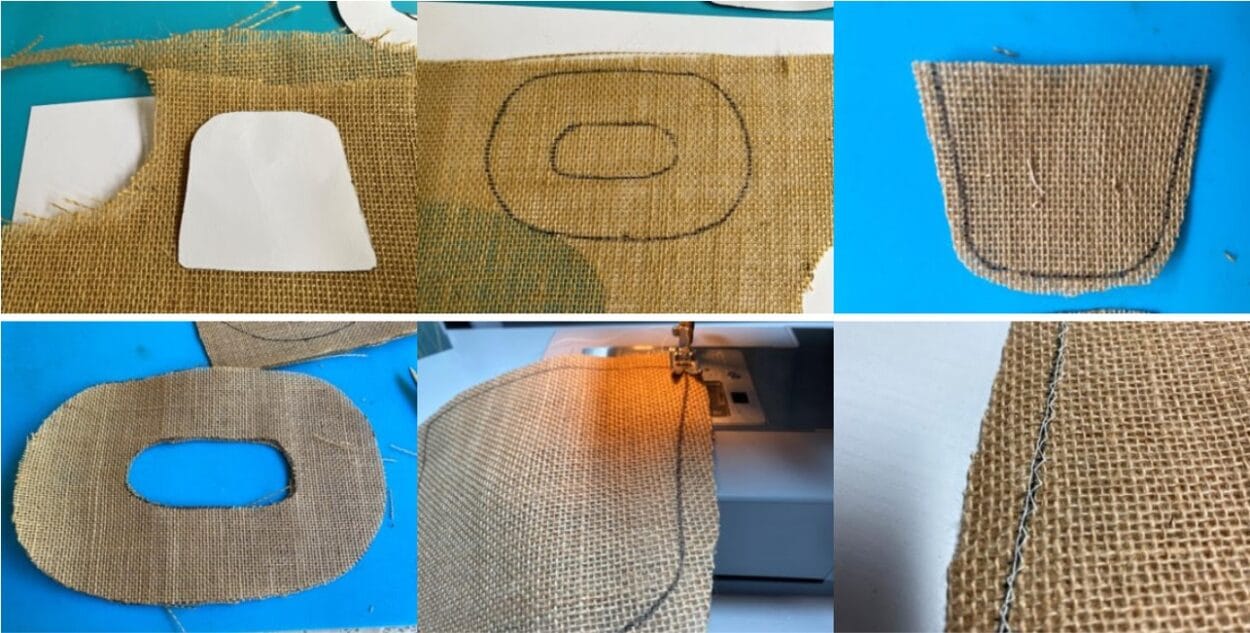
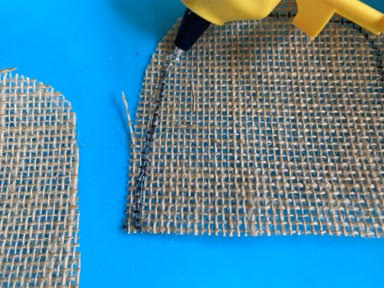
If you would like to hot glue the top piece of your hat together lay down the hat piece with the trace line facing up then on your trace line add a line of hot glue then place the other hat piece on top gluing down, turn the hat Right Side Out.
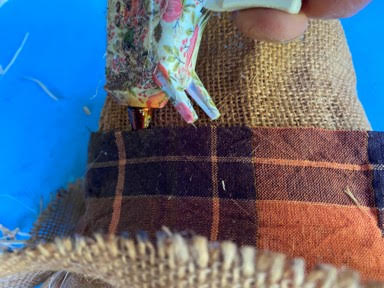
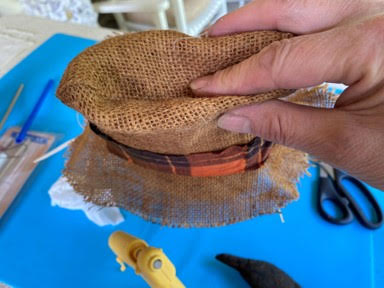
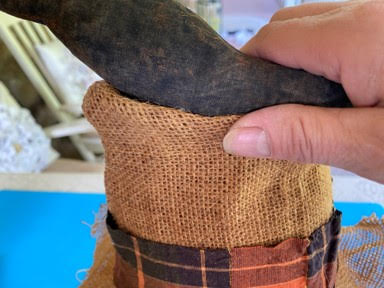
To assemble the hat slide the rim of the hat over the top part of the hat then add a small line of hot glue to a section of the bottom of the hat and glue the rim to the hat (see photo’s) continue gluing the rim around the hat.
Making The Hat
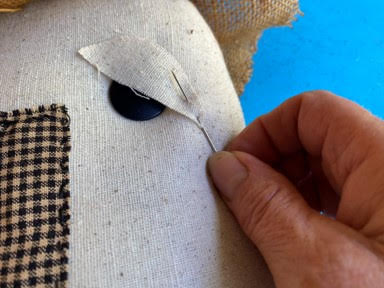
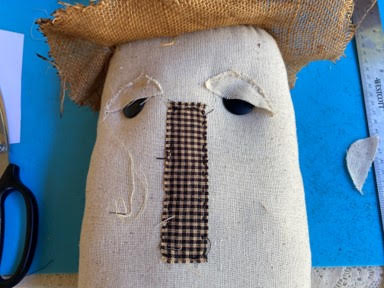
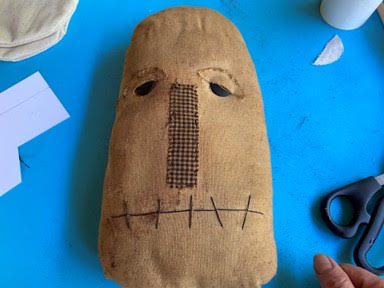
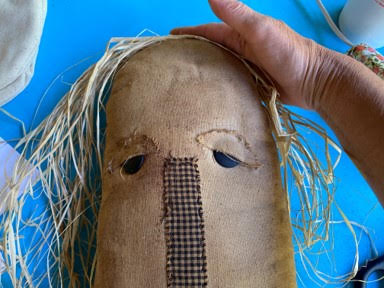
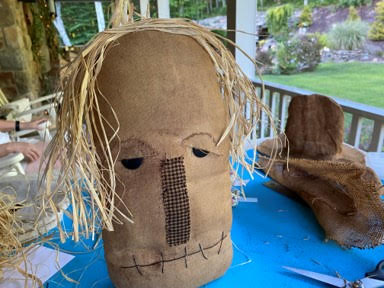
For the face you are going to start by tracing and cutting out your eyelids from a double layer of osnaburg fabric, next trace and cut out the nose from a single layer of homespun fabric. Now that you have your eyelids and nose cut out place your hat onto the scarecrow head then place your two button eyes, eyelids and nose where you think they look right, next remove the eyelids and using three strands of black embroidery floss sew on one of the black buttons (I leave the nose in place while I sew the button on it is ok if the other button falls you can place it again once you have one button done) after you have one button on make sure your nose is still in place then sew on the second button. Once you have your button eyes sewn on using three strands of black embroidery floss stitch on your nose.
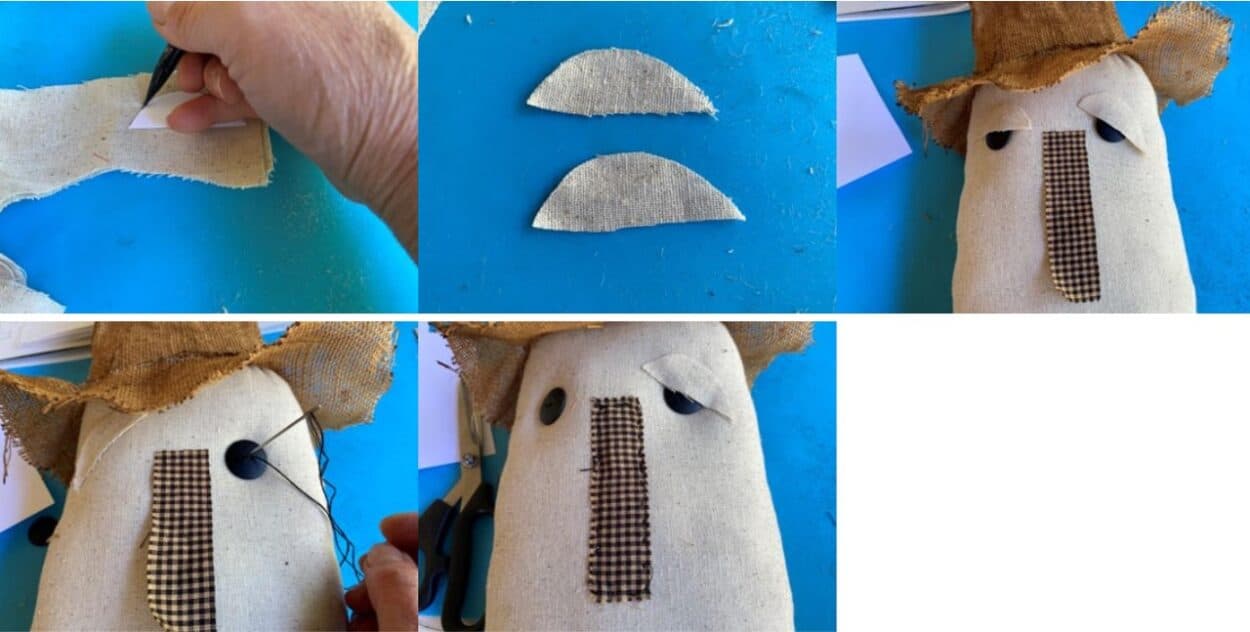
It’s time to add the eyelids and mouth, place one eyelid at a slant over the eye covering part of the eye, this will give him a droopy eye once you have the eyelid in place sew just across the top of the eyelid with cream thread. Next place the second eyelid over the other eye this time place it straight across covering part of the eye sew on the eyelid. To add the mouth using a pencil lightly draw what every mouth you would like then using 3 pieces of black embroidery floss stitch your mouth on.

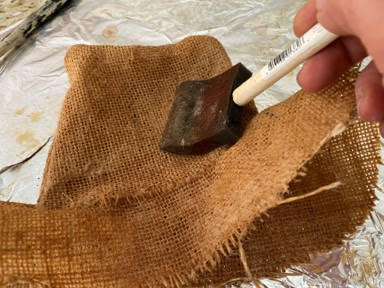
Coffee Staining
This step is optional but I like the look of the scarecrow coffee stained, if you are going to coffee stain you can find my coffee stain recipe on my blog titled how I coffee stain and color fabric. Once you have your coffee stain mixture using a sponge brush cover the entire head and hat with the coffee stain mixture, if it is sunny out you can place them in the sun to dry flipping them over to dry all sides if it isn’t sunny you can dry them in a 220 degree oven. Cover a cookie sheet with aluminum foil place your head and hat on the cookie sheet then put in the oven make sure you check and flip them every 10 minutes you don’t want them to burn, the hat will be dry much faster then the head.
Making The Crow
Using the crow pattern trace the crow onto a double layer of muslin, if you are going to sew your crow on a machine sew on the trace line leaving about an inch or so open at the bottom for turning and stuffing. Once you have sewn the crow cut it out about a ¼” inch away from your sew line then using your scissors snip around the crow making sure you don’t cut into your sew line, turn Right Side Out and stuff with poly fill. Now that your crow is stuffed using cream thread and a needle sew the opening closed.
If you would like to hot glue the crow, trace the crow pattern onto a double piece of muslin cut the crow out about a ¼” away from the trace line. Once you have your crow cut out separate the two pieces and lay down the crow piece with the trace line facing up, then starting at the top of the tail add a small line of hot glue then place your second crow piece on top gluing down continue gluing the crow but leaving about a inch or so opening at the bottom for turning and stuffing. Turn the crow Right Side Out and stuff with poly fill, next add a small line of hot glue to the opening and glue closed.
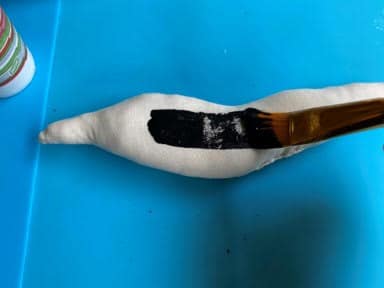
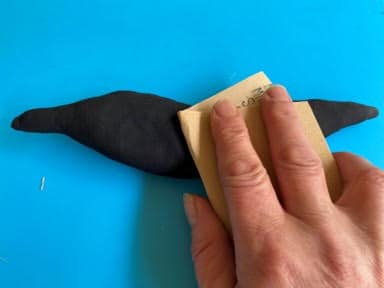
Painting And Staining The Crow
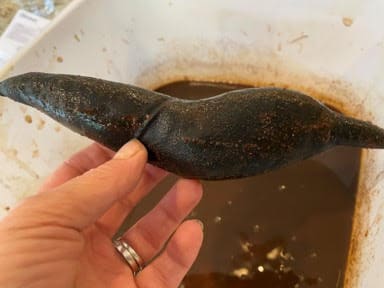
Using black craft paint and a paintbrush paint the whole crow black then place in the sun to dry if there is no sun you can dry in the oven the same way I told you to do the head and hat. Once the crow is dry take a piece of fine grit sandpaper and lightly sand the crow this will give him a old worn look, after sanding brush him with your coffee stain mixture then either place him in the sun or oven to dry.
Adding The Fish Tank Gravel
I used fish tank gravel to give my scarecrow weight at the bottom but you can certainly use sand or anything you have on hand that you think will work, take a ½ cup of gravel and placed into a sandwich zipper bag and close leaving a tiny bit open then roll your bag of gravel so it looks like a log then finish closing the bag, now insert the bag of gravel into the opening at the bottom of the scarecrow head making sure it is across the bottom, if you feel like you need to add more poly fill you can do so now. Once you have the gravel in and any poly fill you might want to add you can either sew the opening closed with a needle and thread or you can hot glue the opening closed.
Assembling The Scarecrow
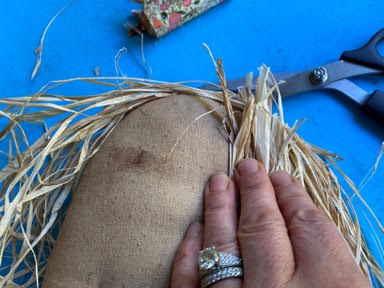
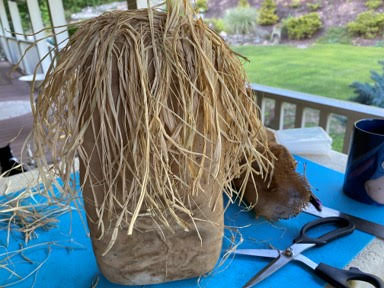
Now that we have all our pieces completed it is time to assemble your scarecrow head. You are going to start by taking a bunch of pieces of raffia and placing across the top of the head to see if you have enough or to much then add hot glue across the top of the head and glue the raffia in place, next take some raffia and glue vertically across the top back of his head, you can trim the raffia to a length you like.
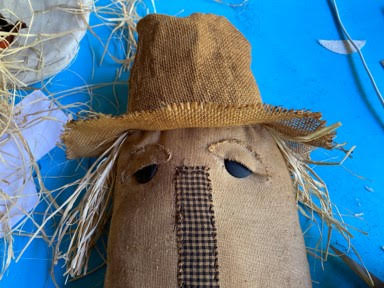
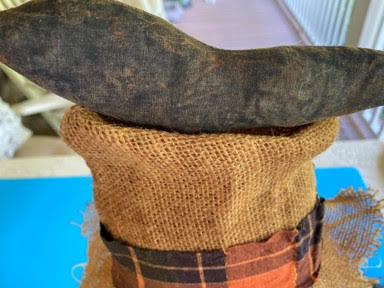
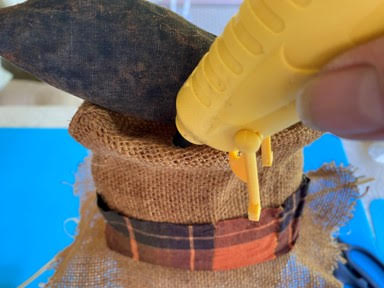
To attach the hat place the hat onto the scarecrow head then add small amounts of hot glue under the base of the hat gluing it to the head.Next cut a piece of fabric of your choice 14” long by 2 ¼” wide then hot glue around the hat.
To attach the crow to the top of the hat you are going to start by pushing the top of the hat in a little then place your crow in the top of the hat, you can decide how you would like the crow to sit in the hat once you have decided how you like the crow add a small line of hot glue to the inside front edge of the hat and glue to the crow repeat this step to the back.
Your scarecrow shelf sitter is now finished, I hope you love how he came out as much as I did.
He is totally awesome. I love this idea and pattern. Thank you.
Love it ❤️
Love, love love this. I made 10 of the smaller scarecrows to put in my trees. Thank you for all you do and for taking the time to share your patterns with us. Under the print out scarecrow pattern, I think you included directions for the black felt snowman hat.
Good morning Sherry. Trying to print the pattern for shelf scarecrow. When I go to print the pattern it print only first page. I didn’t know if it on my end. Haven’t had this problem with the other patterns you have share with us. Thank you!
I simply love you, Barb, and Lisa’s crafts. I do not have a printer to print off patterns, so I draw them out by hand, everything has turned out so stinking cute. I Love, Love, Love your scarecrow. I made 4 last night, going to coffee stain today, paint, and do finishing touches on them hopefully by tomorrow. You 3 are so creative, and talented, it’s got me wanting to craft again. Thank You so much for all the craft ideas. You’re amazing. ❤❤❤
First time making this cute scarecrow. Need something new to add to my Fall decorations.
Would also like to make the smaller ones for my fall tree. Thank you Sherry. I love your videos.