Fall, Halloween, Home Decor, Ornaments
DIY Peat Pot Pumpkin
Sep
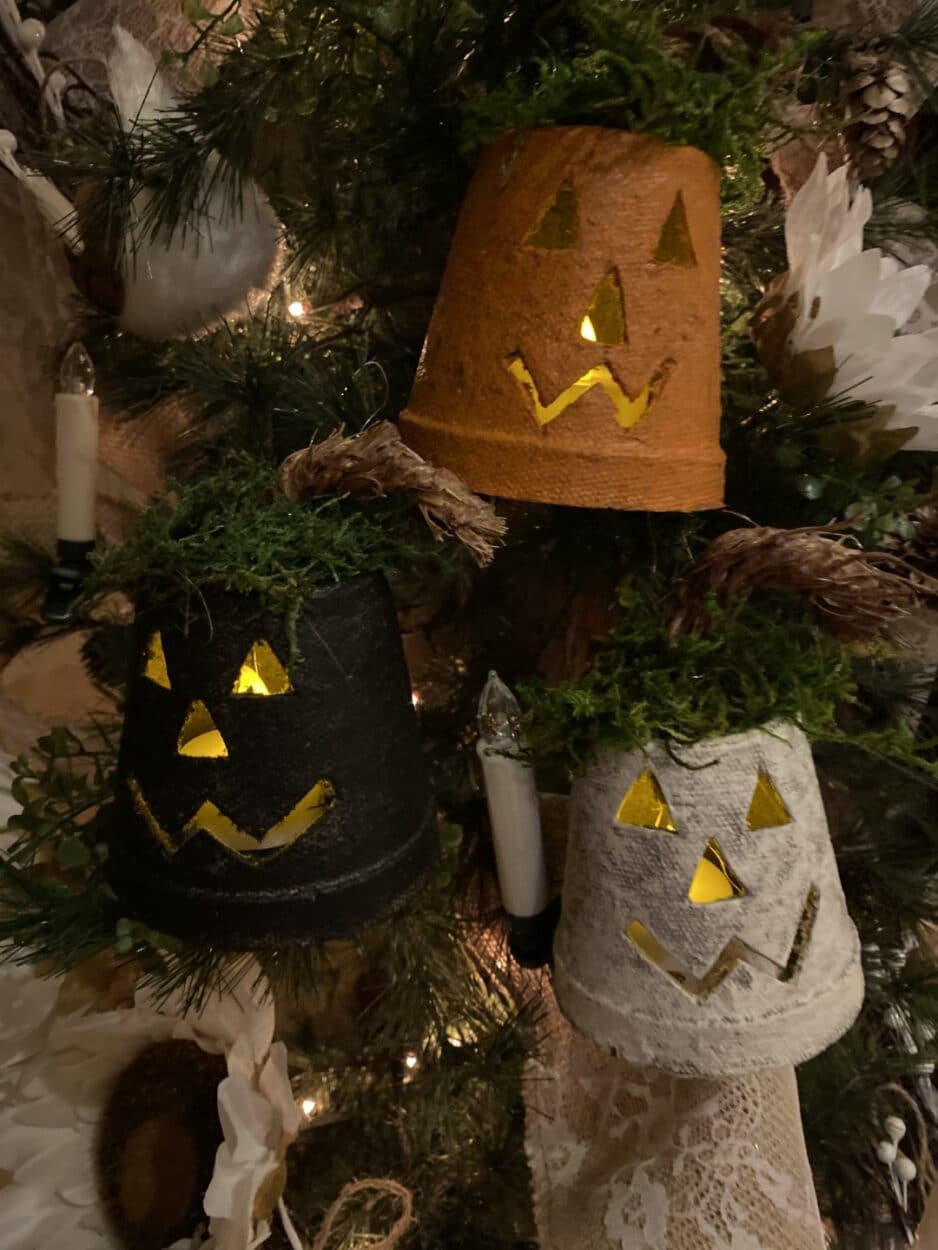
Fall is my favorite time of year I just love the changing of the leaves and the cooler sweater weather.I have made items for Easter out of peat pots then one day I was searching the web and I came across the pumpkins I just thought they were the cutest so I decided to give them a try and add a few of my own touches of course.I purchased my peat pots from Walmart you get 12 in a pack for under $2 what a bargain that is.
Here is a list of what you will need:
- Peat Pots (Walmart)
- Craft Paints in Your Choice Of Colors
- Paint Brushes
- X-Acto or Utility Knife
- Pencil
- Mod Podge
- Preserved Green Moss
- Stem of Your Choice
- Hot Glue Gun and Glue Stick
- Battery Operated Timer Tea Light (Amazon)
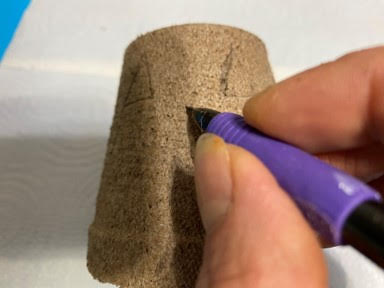
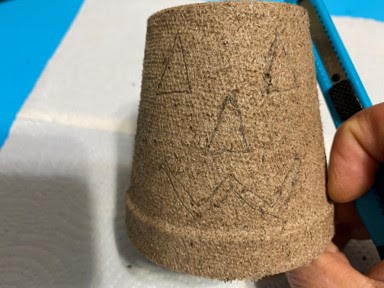
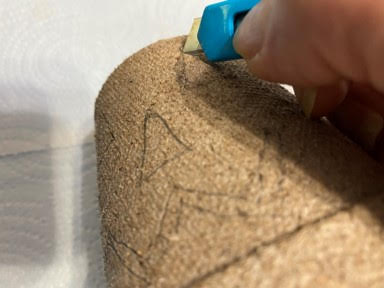
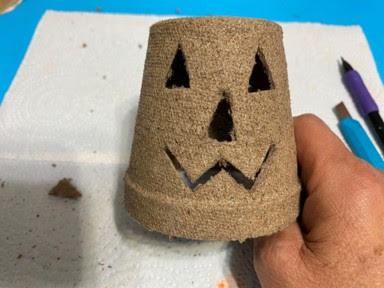
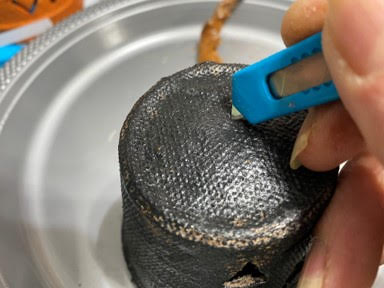
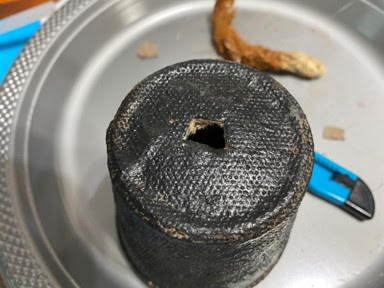
Drawing And Cutting Out The Face
Using a pencil draw out the face you would like your pumpkin to have then using a X-acto knife cute out the face.
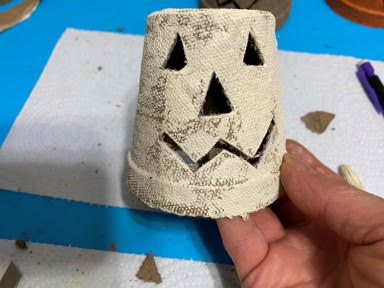
Painting and Sealing
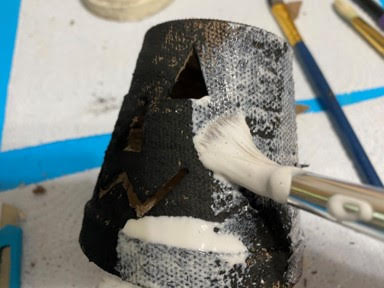
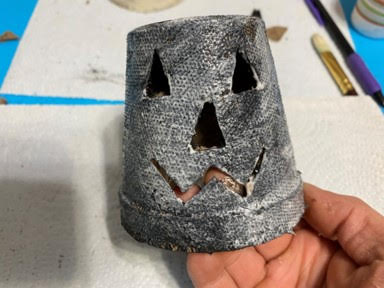
After you have cut out the face of the pumpkin paint your pumpkin with craft paint in the color of your choice, there are two ways you can paint the pumpkin you can do a dry brush which means after dipping your paint brush in the paint dab it on a paper towel then paint your pumpkin you don’t want to cover the whole pumpkin you want some of the peat pot showing, or you can give it two coats of paint then take a fine piece of sandpaper and lightly sand so some of the peat pot shows through the paint this will give it a distressed look.
Next cover the whole pumpkin a coat of mod podge and let dry.
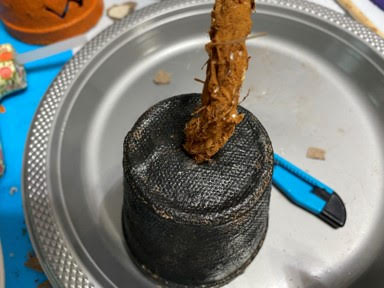
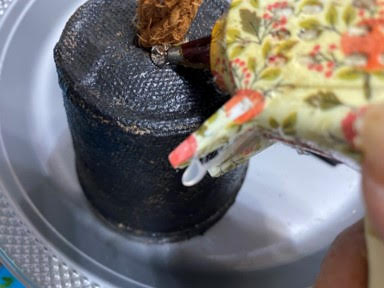
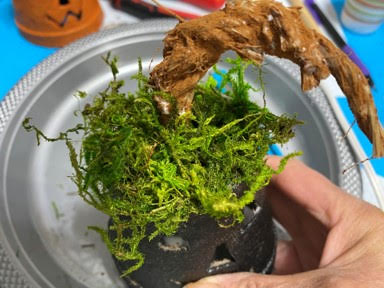
Adding Stem and Moss
Once the mod podge has dried using your utility or x-acto knife cut a small hole in the top middle of the pumpkin this will be where you are going to add your stem. Next insert the stem of your choice, if you would like to make my realistic stem you can find the directions on my blog called DIY Pumpkin Stem, then add hot glue around the stem to hold in place. To add the preserved moss add hot glue around the top of the pumpkin and glue on the moss.
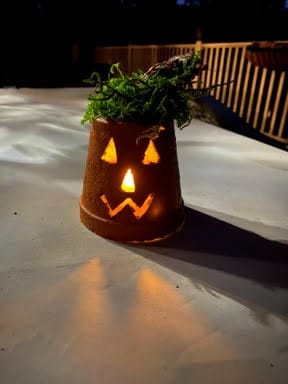
Adding the Tea Light
Now that your pumpkin is finished you can set him on a cabinet, table, etc. and place a battery operated timer tea light under him so he will light up, if you would like to hang him on a tree just take a piece of thin wire wrap one end inside the pumpkin around the bottom of your stem then wrap the other end of the wire around the bulb of the tea light so it is hanging up inside the pumpkin, I am sorry I forgot to take pictures of this step. I like to use the battery operated timer tea lights so I don’t have to be turning them off and on you can see which ones I use on my recommended products page.
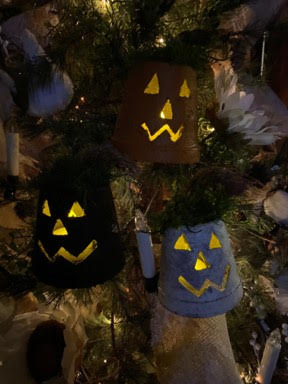
I hope you enjoy making these cute pumpkins, they are very simple to make and it would be a great project to do with your children or grandchildren.
Hi Sherry my name is Allie I love these pumpkins and you are great
I am so grateful for you
In these times of the pandemic it can get a bit lonely
I love doing crafts and right now I’m crocheting slippers for my family and I still have a few to do but I am planning on doing your crafts they are wonderful
These are adorable!
Great craft idea! I need to try these.
Love these pumpkins 🎃 Definitely going to try this!
Love them what size are the pots