Fall, Home Decor
DIY Pumpkin Throw Pillow
Aug
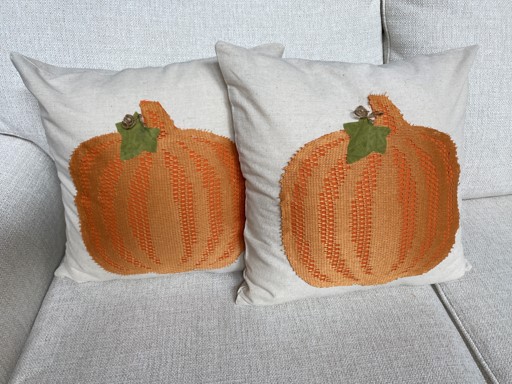
If you have been following The Crafty Decorator you know I like to use decorative pillow covers verses buying throw pillows to change out for the seasons and holiday’s. Pillow covers are so much easier to store away and they take up little space. I was in Dollar General one day and I came across a package of 2 pumpkin lace doilies for only a $1 and as soon as I seen them I knew I was going to use them to make pumpkin throw pillow covers. I always buy the 18×18 pillow covers at Hobby Lobby when they are half off so they are only $2.75 each, you can’t make them for that. I just loved how they turned out.
Materials You Will Need:
Pumpkin Leaf Pattern
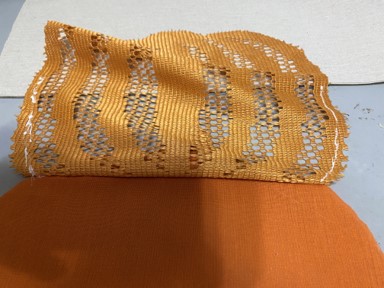
1 Pkg. Pumpkin Lace Doilies (Dollar General)
2 18”x18” Throw Pillow Covers (Hobby Lobby)
Orange Fabric
Green Fabric
2 18”x18” Throw Pillow Inserts
Piece of White Chalk
Scissors
Hot Glue Gun
Surbonder Fabric Hot Glue Sticks
Ruler
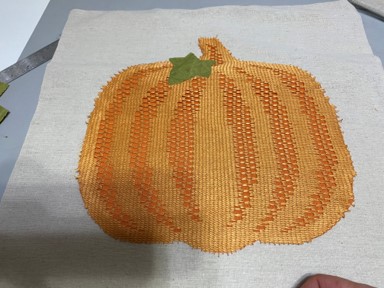
Cutting Out The Orange Pumpkin
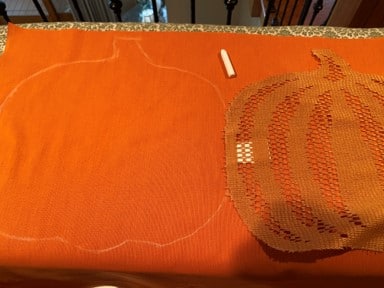
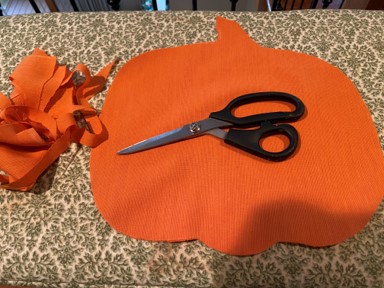
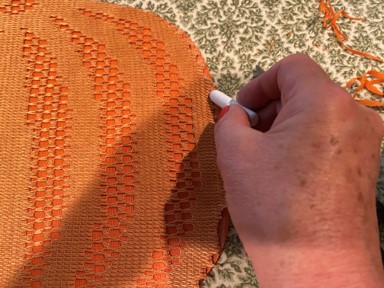
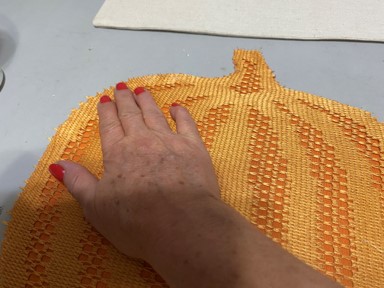
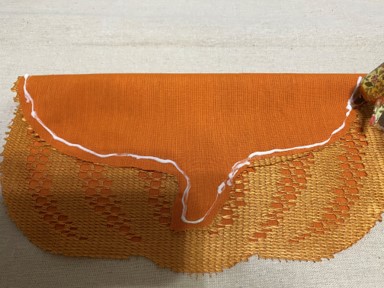
The first thing you will need to do is iron the pillow covers, orange fabric and pumpkin doilies. Lay one of the lace pumpkin doilies onto a double layer of orange fabric, using the white chalk trace the outline of the pumpkin doily onto the orange fabric. Cut out the pumpkin inside the trace line, you want the orange pumpkin to be slightly smaller then the lace doily pumpkin. After you have the pumpkin cut out lay the doily back on top of the pumpkin to make sure the pumpkin is smaller then the doily pumpkin. Mark with chalk any excess you will need to trim off.
Pumpkin Throw Pillow Pattern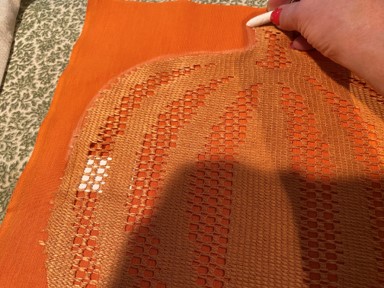

Attaching The Pumpkins To The Pillow Cover
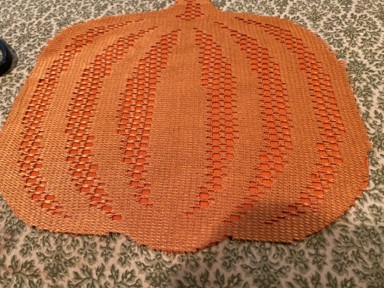
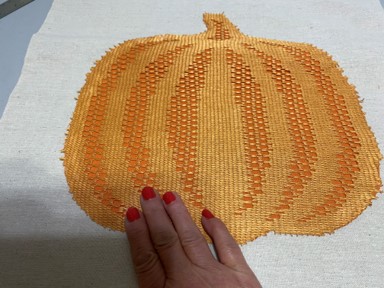
To attach the orange and doily pumpkins together lay the lace pumpkin on top of the orange pumpkin. Fold back the top of the lace pumpkin then using a hot glue gun and fabric glue sticks add a line of glue around the outer edge of the lace pumpkin then glue down to the orange fabric pumpkin. Lift up the lace pumpkin from the bottom and the fabric glue around the edges and glue down. Continue this step until the entire lace pumpkin is attached to the orange pumpkin. Repeat this step to the second set of pumpkins.
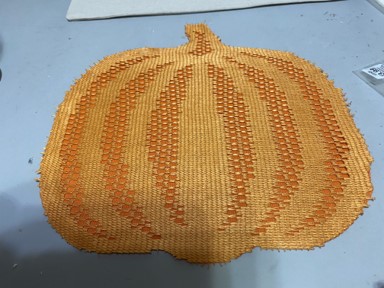
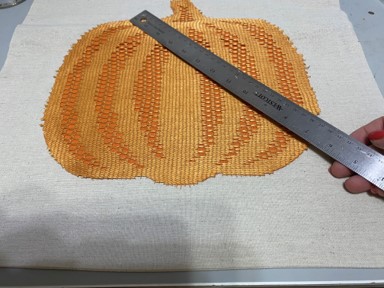
Next place the pumpkin on the front of the pillow cover in the center. Using a ruler measure the top, bottom and sides to make sure it is centered. I measured about 3 ½” all around. Fold down the pumpkin add the fabric glue around the outer edge of the pumpkin then glue down to the pillow cover. Lift up the bottom of the pumpkin add fabric glue around the outer edge of the pumpkin and glue down to the pillow cover. Repeat until the entire pumpkin is attached to the pillow cover. Repeat these steps to the second pumpkin and pillow cover.
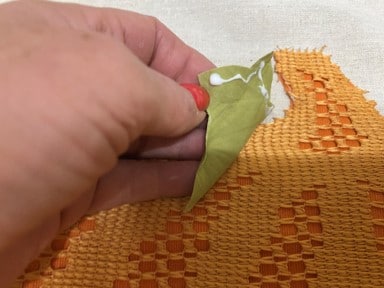
Making and Attaching The Leaf
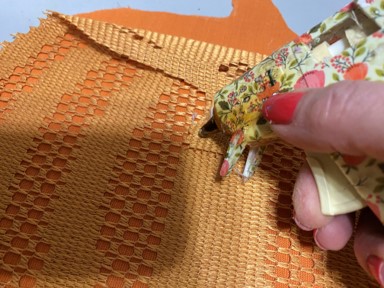
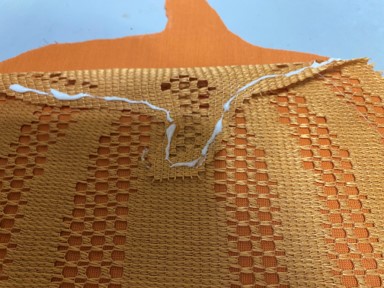
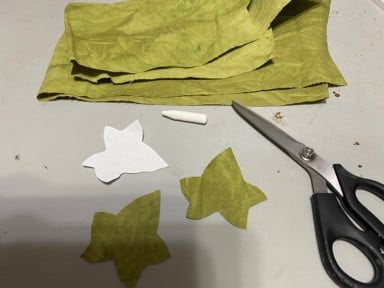
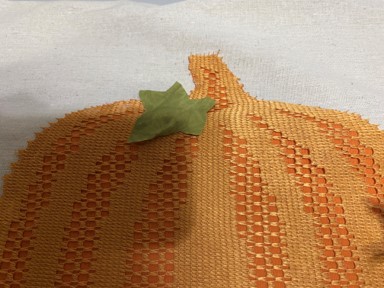
Print and cut out the pumpkin leaf pattern. Trace and cut out two leaves from green fabric. You can make as many leaves as you would like to add to each pumpkin. I like coloring my own fabric to make leaves if you would like to see how I do this you can find the blog under Sherry’s shortcuts. Place the leaf were you would like it to be on the pumpkin. If you would like to add a piece of curly twine to the pumpkin, cut a piece of twine wrap it around a pencil then brush some mod podge over the twine. Remove the twine from the pencil then glue down under the leaf before gluing on the leaf. Next fold back half the leaf add the fabric glue and glue down. Fold back the other side of the leaf add fabric glue and glue down. Repeat these steps to second leaf and pumpkin pillow cover.
You are now finished with you pumpkin pillow covers all that is left to do is insert your pillow forms. I hope you enjoy making these cute pumpkin pillow overs they are really simple to make and you really could make the pillow covers for any season just by using a fabric cutout that would be good for the season or holiday.
Sherry, this is absolutely so cute for fall! 🎃 Inspired!
Thank you so much!!
These are beautiful 🤩 I’m going to try and make them. Thanks Sherry love your craft ideas
Sherry, I thank your pumpkin pillow would look awsome to stuff the pumpkin.
Thank you