Home Decor, Spring
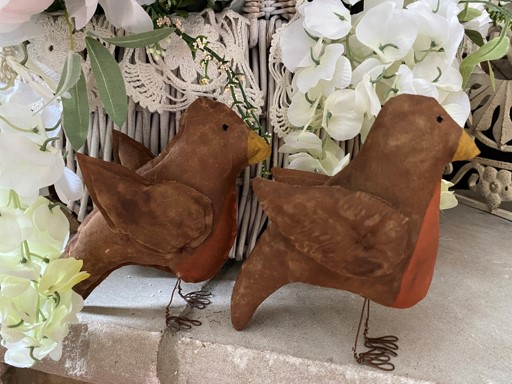
DIY Robin
Apr
Can you believe it is Spring? I am not seeing Spring right now, as I am typing up this blog I am looking out my window at snow, it is almost the end of April and we have snow! On nice days I just love sitting out on my porch watching all the different types of birds that have come back to make their nest. As I was watching all the Robin’s I thought I really need to make a robin to add to my spring and summer décor. I just love how he turned out, you can have him stand or if you keep tree’s up all year like me you can add a hanger and hang him on your tree. If you do not sew you can hot glue this adorable bird. I am not going to lie I had a little trouble with the seam popping open in a few spots while I was trying to stuff him but in the end he came out just adorable. If you would like to glue the robin please see the video on my Facebook page on how you can glue him.
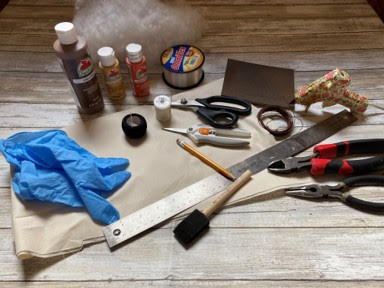
Supplies You Will Need:
- Robin Pattern
- Muslin
- Sewing Machine
- Apple Barrel Paints in the colors Nutmeg, Harvest Orange, and King’s Gold
- Scissors
- Polyester Fiberfill
- Black quilter’s thread or embroidery thread and needle
- Heavy Cream thread
- Doll Needle (This is a longer needle to go through both wings and robin body)
- Container to mix paint
- Coffee Stain Mixture (you can see how I make mine on my blog for coloring and coffee staining fabric)
- Sponge Brushes
- Paint Brushes
- 20 Gauge wire ( I used rusty wire)
- Scissors
- Pencil
- White Chalk
- Ruler
- Wire Cutters
- Needle Nose Pliers
- Fine Grit Sandpaper or Sanding Sponge
- Hot Glue Gun
- Rubber Gloves
- Fishing Line if you would like to add a hanger
Sewing and Stuffing the Robin
The first thing you will need to do is print and cut out your pattern pieces. On a double layer of muslin trace and cut out about a ¼” from trace line or if you are like me I like to just cut out the traced piece in a square sew then cut out, I will leave that up to you. The trace line will be your sew line. Trace one wing on a double layer of muslin then flip the wing pattern over and trace a second wing. This will help to know which wing is right and left later on. Cut out wings about a ¼” from trace line. On your machine sew the robin on the trace line leaving open where indicated on the pattern. Next sew both wings all the way around on the trace line, you do not have to leave an opening. After you have the piece’s sewn if you have not already cut out the pieces about a ¼” away from your sew line.
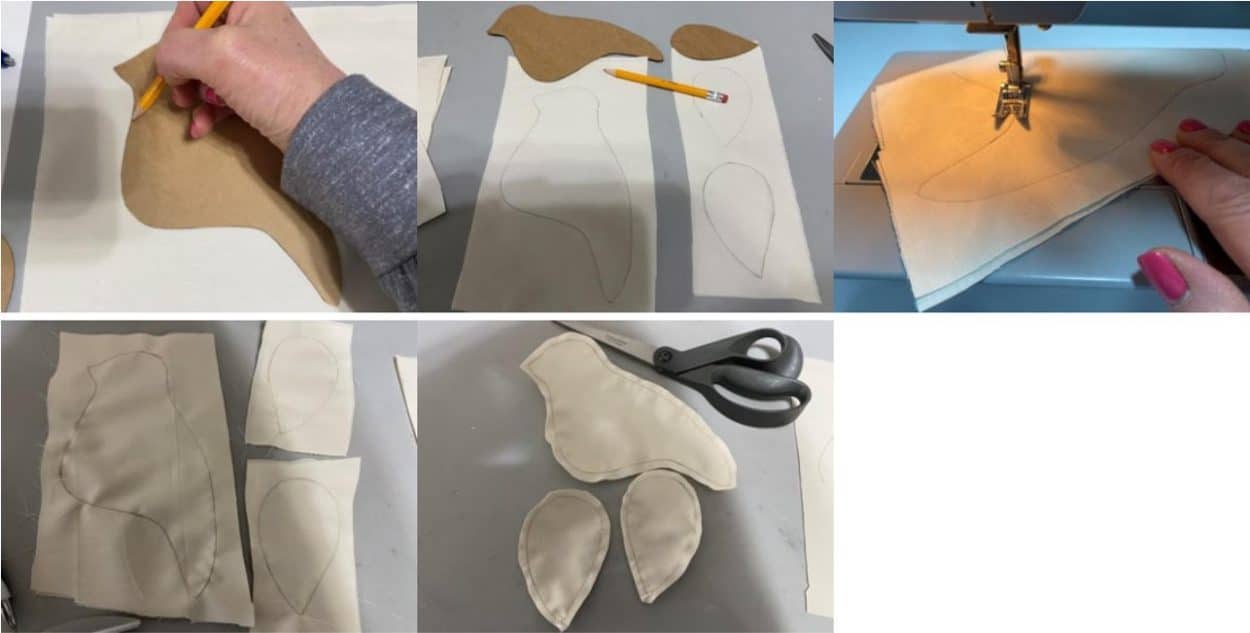
Using scissors clip around all curves on the bird and wings, this will help your fabric not pucker when you turn right side out. Take one wing and on the side you see the trace line snip the top layer of fabric about a ½” up from the bottom of the wing in the middle. The bottom is the wider part of the wing. Cut the hole a little bigger so you will be able to turn right side out and stuff. Repeat this step to the other wing. Turn the robin body and two wings right side out.
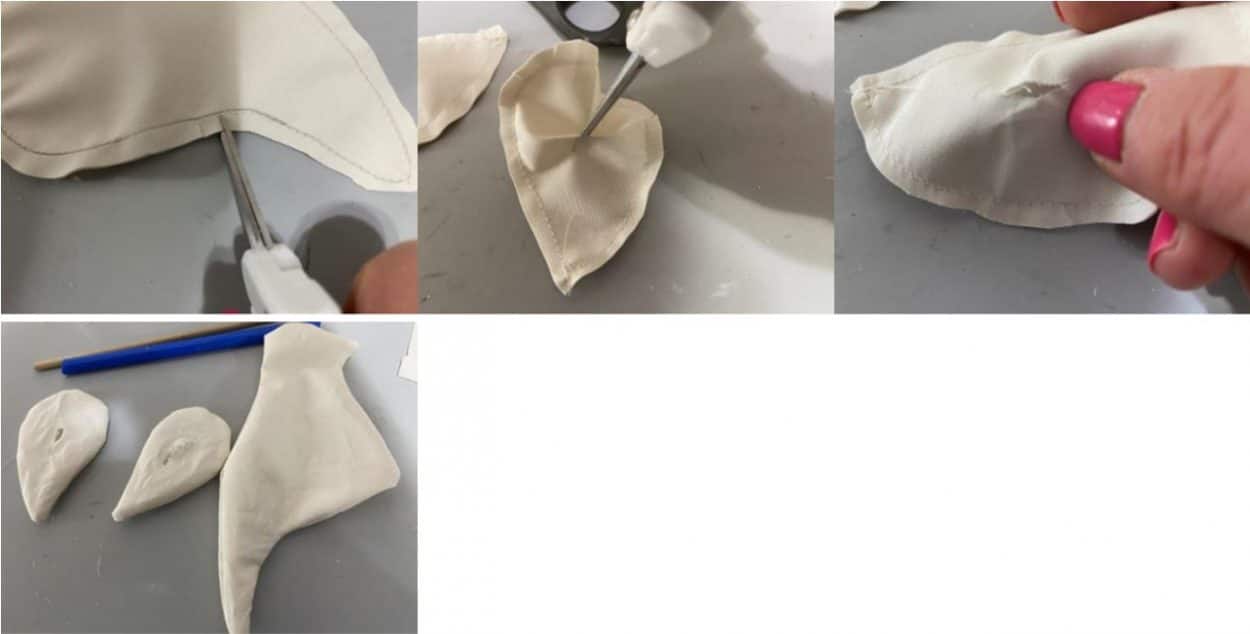
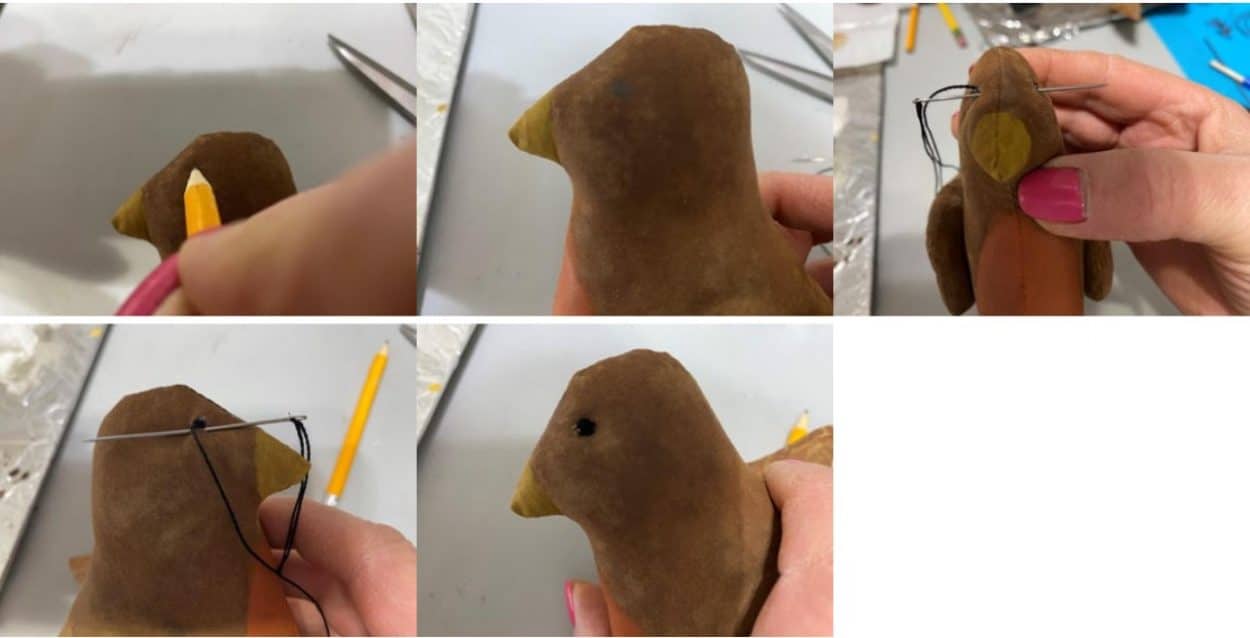
Now firmly stuff the robin and wings. I start by stuffing the beak of the robin first then the head working my way down. I like to use the eraser end of a pencil to push my stuffing in. After you have all your pieces stuffed using a cream thread and needle sew your pieces closed.
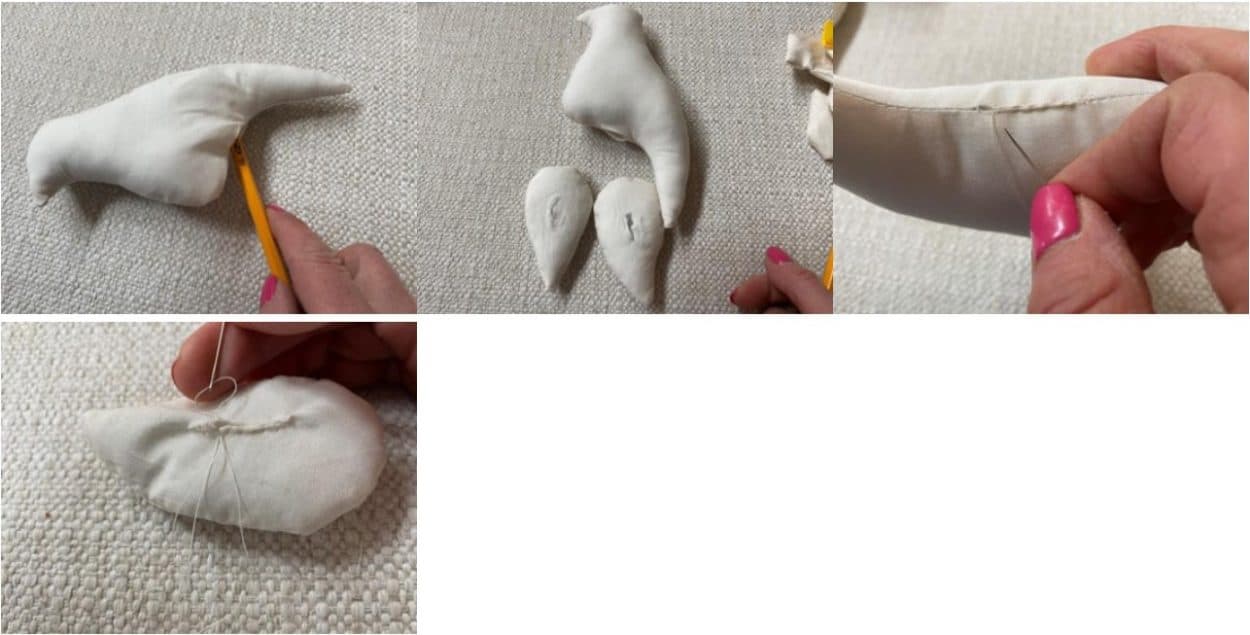
Attaching the Wings
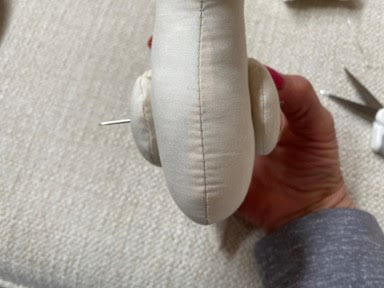
To attach the wings place a wing on each side of the robin where indicated on the pattern. Make sure you have the sewn side facing in. Using a heavy cream thread and doll needle you are going to sew the wings on where indicated on the pattern. Insert the needle into one wing then through the robin and coming out the second wing. Go through the second wing coming out the first wing. You want to sew them making your stiches an X as indicated on the pattern. On the last stitch tie a double knot and trim off excess thread.
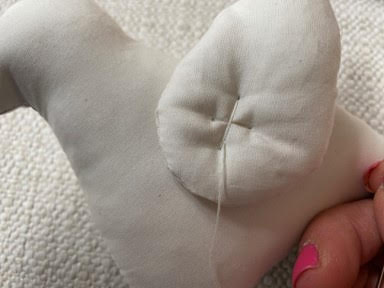
Painting and Coffee Staining the Robin
To paint the robin start by mixing 1/3 cup coffee stain mixture and 3 Tablespoons of nutmeg paint, stir well. Using a sponge brush paint the whole robin making sure you get under the wings. Let dry. After the robin has dried see if the color is to your liking I painted my robin a second time. I will leave the color choice up to you. Don’t worry if they look dark we are going to sand them so the paint will look lighter after sanding. Once the robin has dried give him a light sanding using a fine grit sandpaper or sanding sponge. Make sure you also sand under the wings. Once you are done sanding the robin paint the beak golden yellow and the belly harvest orange. Let dry. Paint the beak and belly a second time and let dry. You can paint the belly again if you want the color to be darker. After your paint has dried using a sponge brush cover the whole robin with coffee stain mixture and let dry.
Adding the Eyes
Using a pencil lightly mark where the eyes go as indicated on the pattern. Using black quilters thread or embroidery thread and needle you are going to stitch on the eyes. Go in one eye and come out the other eye continue going back and forth forming the eyes. On the last stitch tie a double knot bring your needle back out the other side and cut the thread.
Making and Adding the Feet
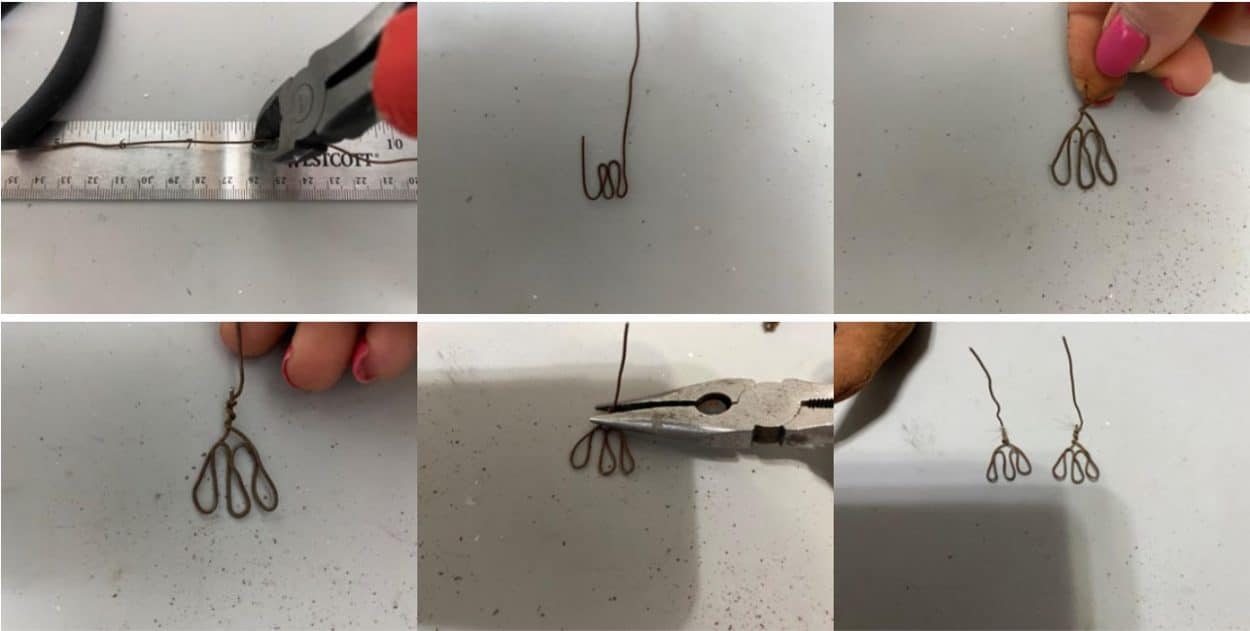
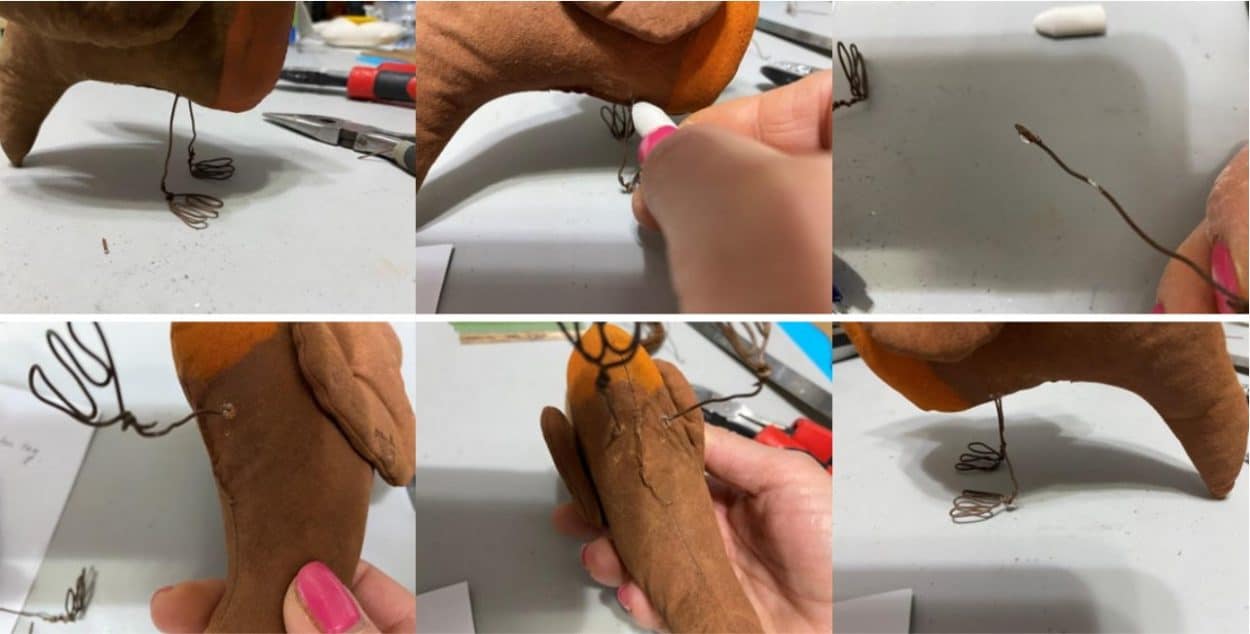
Cut a 8” piece of wire. You are going to going to bend the wire so you have three claws. See the photo below. Twist the two end pieces of wire together. Using the needle nose pliers bend the wire upwards at the base of the foot. You should have about a 2” piece of wire stand upright. Repeat these steps to a second 8” piece of wire. After you have the two legs made hold them together trim the upward wire so the two leg wires are the same height. About 1” from the front of the belly and about a ¼” on each side of the sewn opening insert each leg leaving about 1 ½” of the leg sticking out from the body. See if your robin will stand on his own. Make any adjustment you may need to make him stand. Once he is standing on his own using a white piece of chalk mark each leg where it comes out of the body. Remove the legs add a drop of hot glue to the tip of the wire at the top of the leg and insert into the same hole up to your chalk mark. Repeat this step to the second leg. Your robin should stand on his own you may just need to adjust the feet a little.
Adding a Hanger
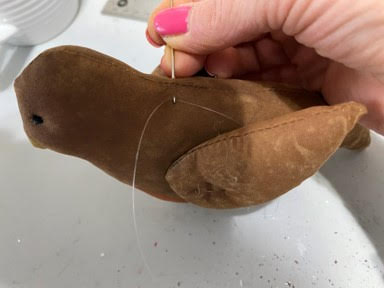
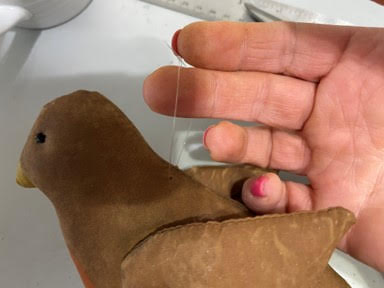
If you would like to add a hanger to your robin so you can hang him from your tree thread a needle with a piece of fishing line. Insert the needle at the top of the robin where indicated on the pattern. Tie a double knot trim off excess. You now have a hanger to hang your robin.
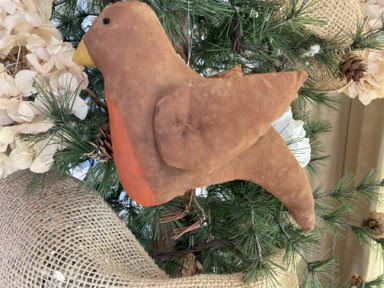
I hope you have enjoyed making this adorable robin to add to your spring and summer décor. You can use him in so many ways such as bowl filler, on a tiered tray, as an ornament on your tree, and how adorable would he look on a wreath.
Sherry, you are very helpful to all. Thank you so much jane
Sherry,
Thank you for all your work in making this blog! You made it very easy to follow!!!
Thank You,
Sherry, I love every one of your crafts. I try to do most of them. You are so easy to understand and follow. I ca not tell you how much I enjoy your lives. I look forward to them all. Thank you so much for all you do. ❤️ Stephanie
Beauties love them so much! Another must have!