Home Decor, Ornaments, Spring
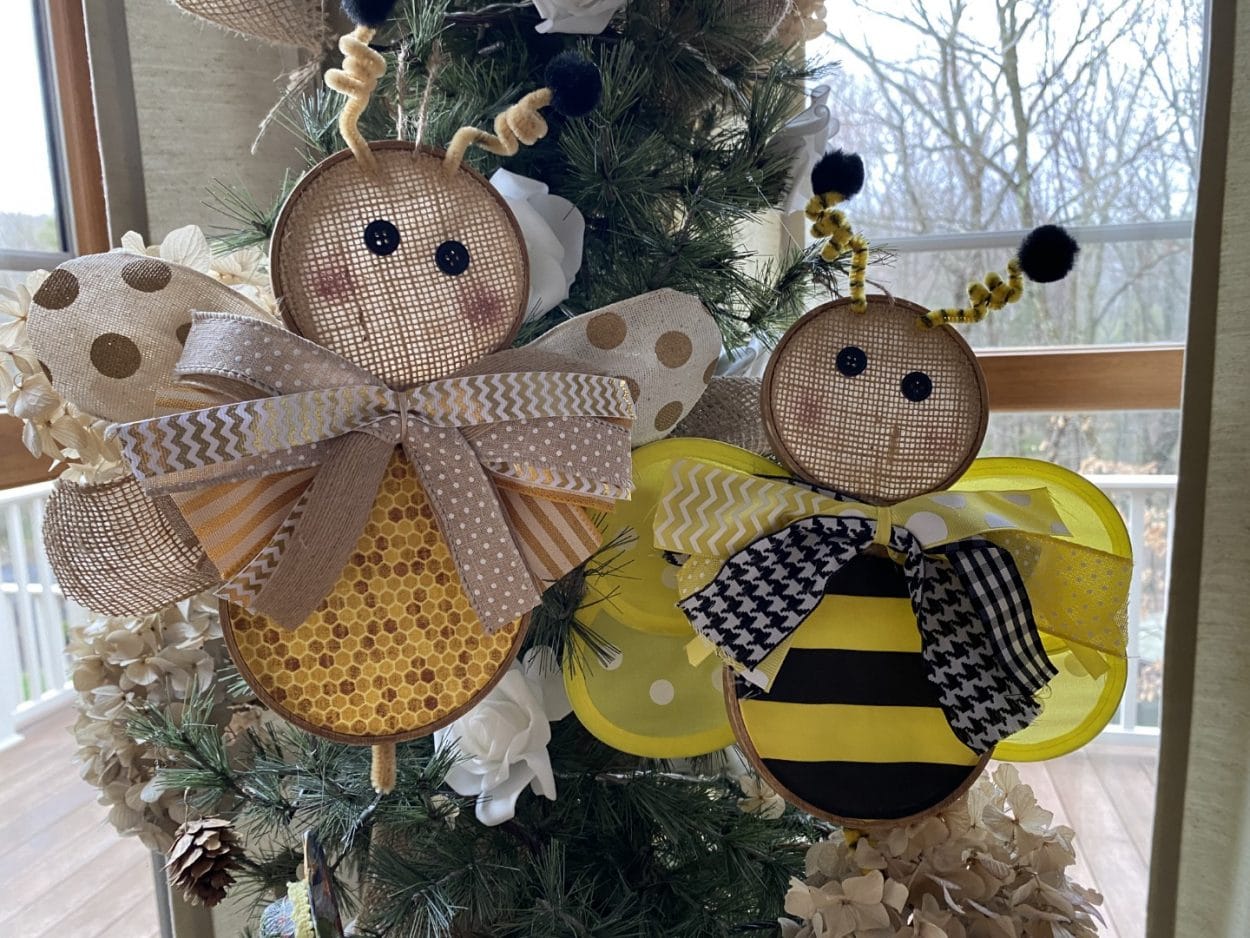
DIY Small Embroidery Hoop Bumble Bee
Apr
Have you seen all the bumble bee home décor items for this summer?We made a fabric bumble bee here at The Crafty Decorator last year.You can find it on my blog page.I decided to create another bumble bee this year and I am just loving how this bee turned out.I used the petals from the Dollar Tree pinwheel flower for the bee wings on the right and I made my own wings out of ribbon for the bee on the left.I am including a pattern for the petal incase you like the look and can not find any pinwheel flowers you will be able to make your own.I am liking the wings made out of the ribbon a little better then the petal ones.I hope you like these bee’s as much as I do and give them a try.
Supplies You Will Need:
- Bumble Bee Wing Pattern (If you want to make your own)
- 1 – 3” Embroidery Hoop
- 1 – 4” Embroidery Hoop
- 1 – 8” Zip Tie
- 2 – 4” Zip Ties
- 2 – ½” Black Buttons
- 2 Pipe Cleaners
- 2 – 2” Black Pom Pom’s
- Burlap
- Muslin
- Dollar Tree Bumble Bee Skirt or Printed Fabric of Choice
- Waverly Antiquing Wax
- Paint Brushe
- Rubber Gloves
- Ribbons of Choice (For Bow)
- 2 1/2 “ Wired Burlap Ribbon (For Wings)
- 2 ½” Wired Printed Ribbon (For Wings Optional)
- Blush and Stencil Bruch (For Cheeks)
- 4 ply Jute Twine
- Thine Jute Twine
- Scissors & Stapler
- Hot Glue Gun and Glue Sticks
- Paper Towel
- Ruler & Needle Nose Pliers
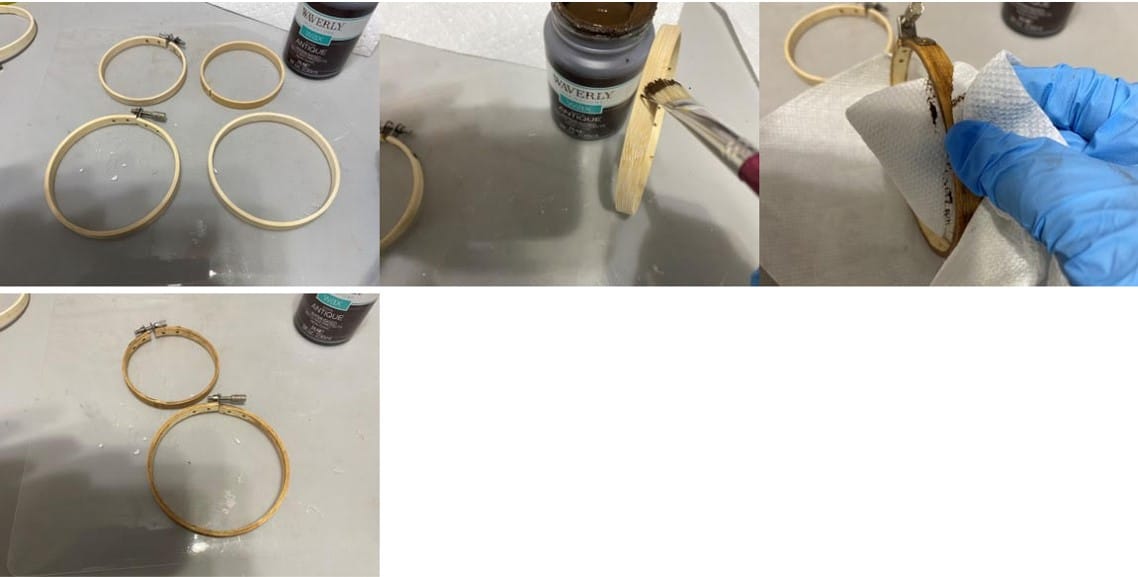
Staining The Embroidery Hoops
The first thing you will need to do is separate the inner and outer rings of each embroidery hoop. You might want to put on a pair of rubber gloves for this part so your hands do not het all stain. You are only going to be staining the outer rings, you will not see the inner rings so there is no reason to stain them. Using a paintbrush apply the antiquing wax to the outside and front of the ring. Using a paper towel wipe off the wax. Repeat these steps to the second outer ring.
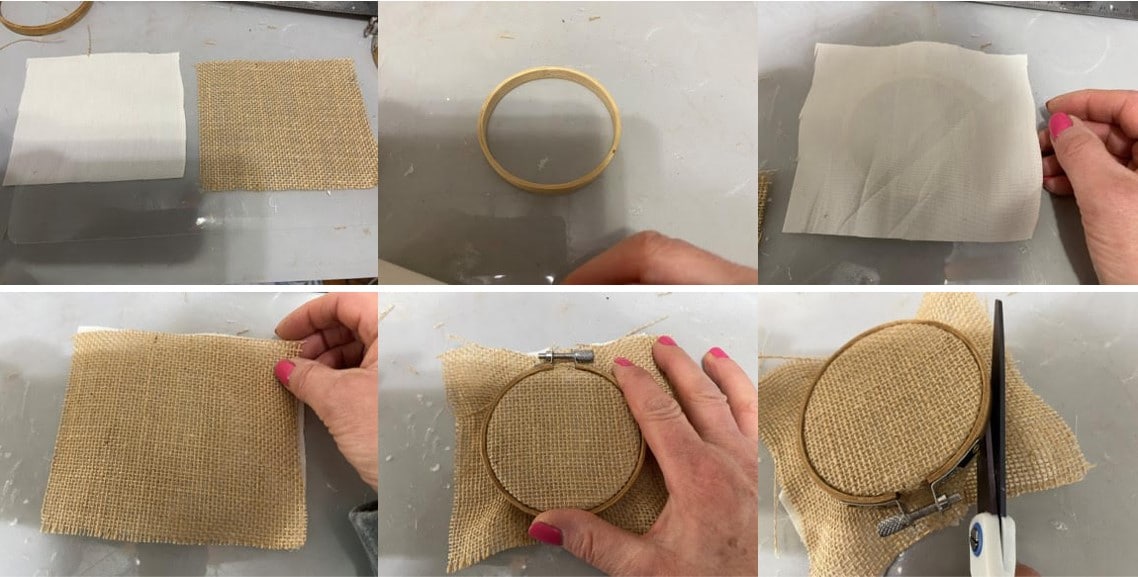
Adding the Fabric
Cut a piece of burlap and a piece of muslin big enough to cover the inner 3” ring. Make sure you have enough fabric to be able to able pull the fabric at the back of the hoop after attaching the outer ring. Lay the piece of muslin on top of the inner 3” ring then place the piece of burlap on top of the muslin. Now place the outer ring over the fabric and inner ring. Tighten the ring, when you can not turn the screw anymore with your hand use a pair of needle nose pliers to tighten the screw some more. After you have tighten the ring pull the fabric from the back making sure it is nice and flat on the front. Using scissors trim off the excess fabric on the back.
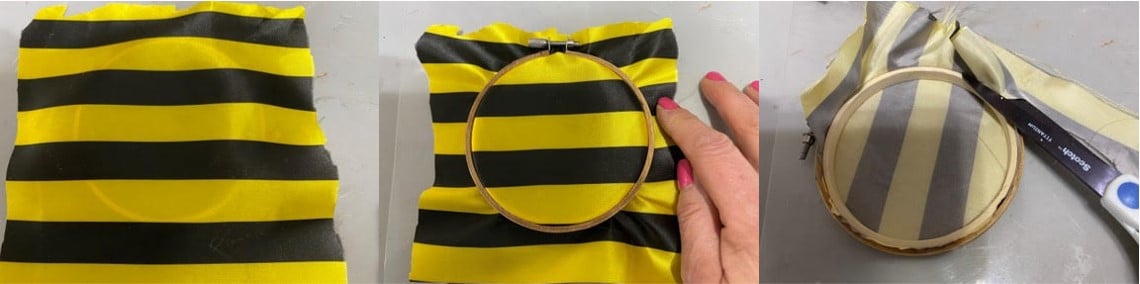
Next cut a piece of the bumble bee skirt or fabric of your choice to go over the 4” inner ring. Place the fabric so when you put on the outer ring the end of the screw you turn is opposite of the screw on the 3” ring. Place the outer ring over the fabric and inner ring and tighten as you did with the 3” ring. Trim off the excess fabric from the back.
Attaching the Rings Together
Feed one end of the 8” zip tie through the opening under the screw of the 3” hoop then feed the other end through the opening under the screw of the 4” ring. Close the zip tie and pull part way do not pull all the way tight. Place the 4” hoop screw on top of the 3” hoop screw then pull the zip tie tight. Use needle nose pliers to pull the zip tie tighter. Trim off excess.
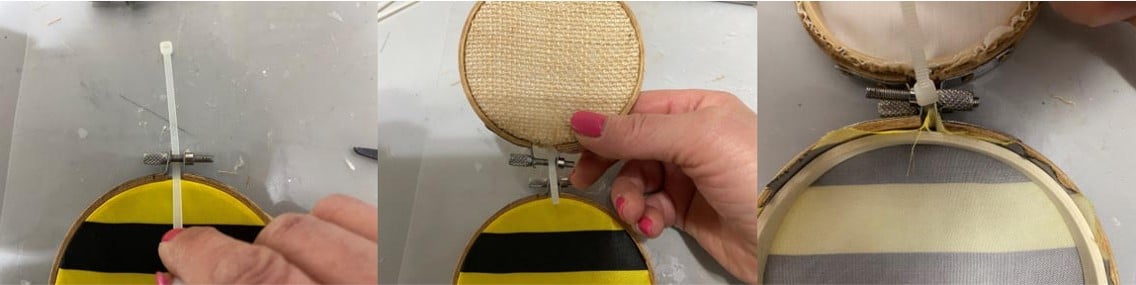
Add a line of hot glue across the screw on the back then glue down the end of the 4ply jute. Wrap the jute twice around the top of the screws then add a line of hot glue across the screw on the front and glue the jute down. Wrap the jute twice under the screws ending at the backside. Add hot glue and glue down jute and trim off excess.
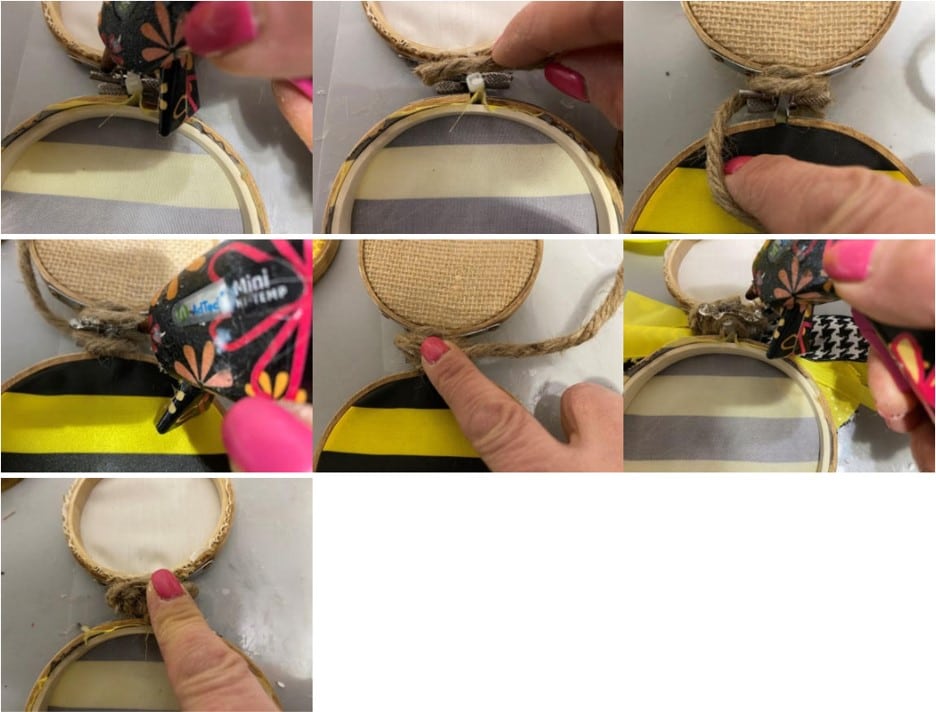
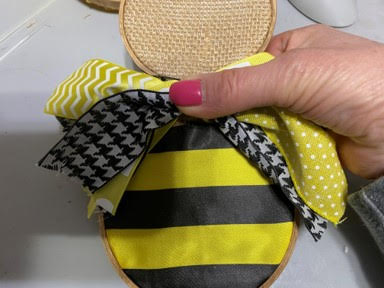
Make and Attach the Bow
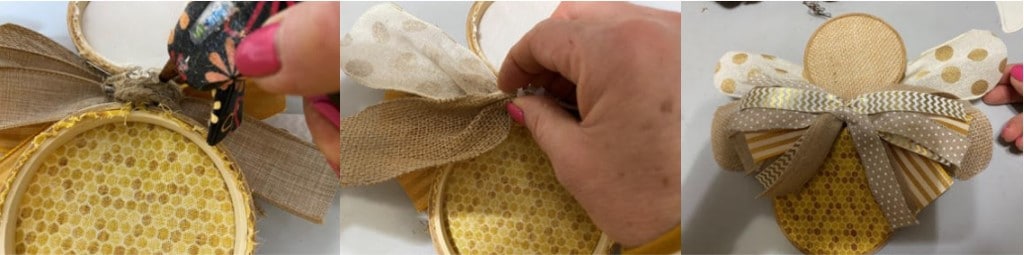
I am not a good bow maker so I like making the bow that Brook from re-fabbed shows how to make, you can see how on her blog. I cut 7” strips to make my bow, layer them and tie them together in the middle with a thin ribbon. To attach the bow add hot glue to the jute between the head and body on the front of the bee and glue on the bow.

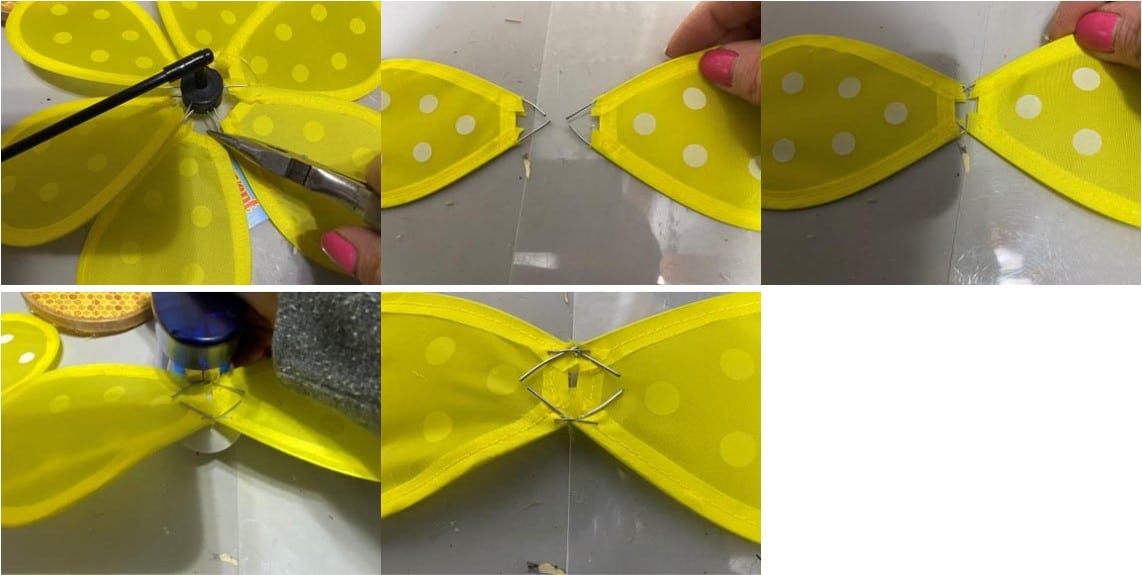
Making the Wings
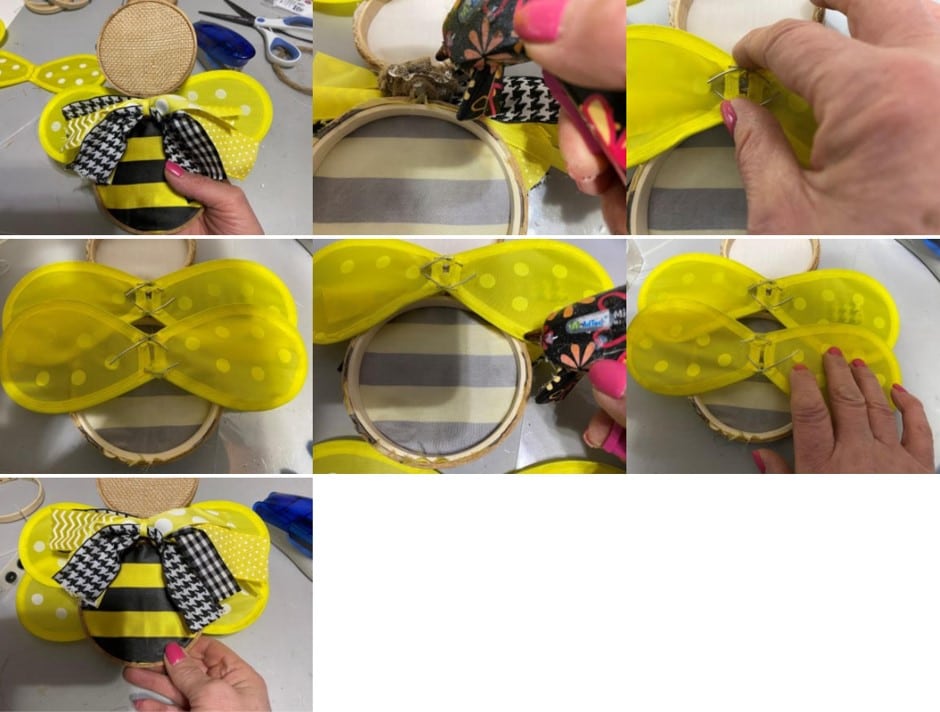
To make the petal wings use a pair of needle nose pliers to remove 4 of the flower petals. Hold two petals and place the two wires at the end of one petal behind the other petal so all four wires are at the back of the petals. Now staple the top of the two petals making sure you catch the two wires in the staple. Repeat this step to the bottom. I squeeze the staples closed with the needle nose pliers just to make sure the are closed tight. Repeat these steps to the other two petals.
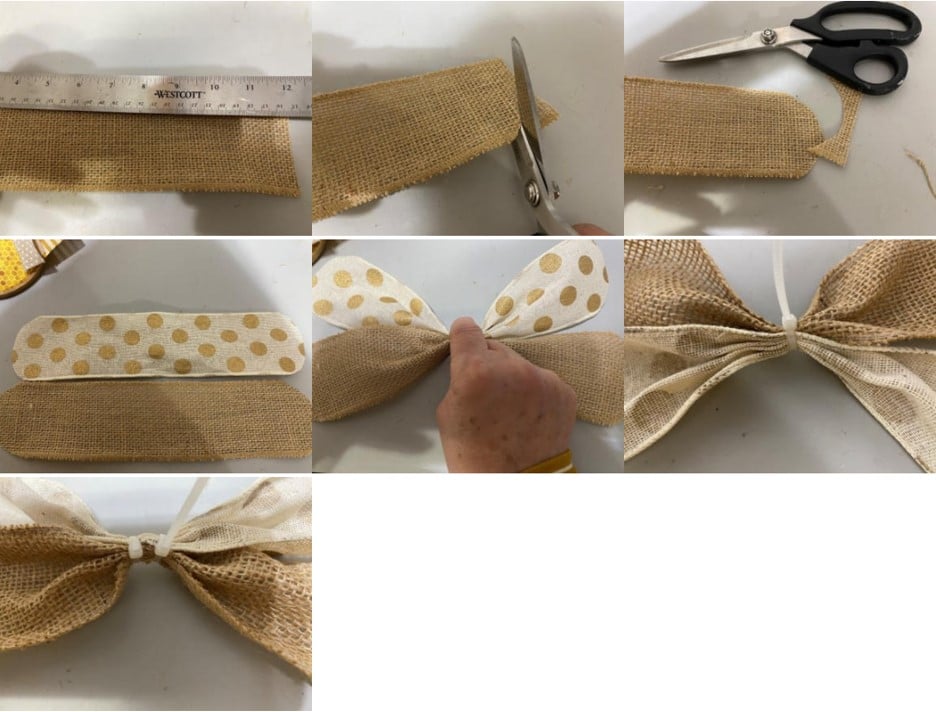
To make the wings using ribbon you will need to cut two 12” pieces of your 2 ½” wired ribbon. Trim the ends of the two pieces of ribbon so they are rounded. Pinch the center of each ribbon so they are pleated. Using the two 4” zip ties tie the two ribbon pieces of ribbon together in the middle.
Attaching the Wings
To attach the petal wings place one set of petal in the back of the bee at the neck. See if this is where you like the wings. Flip the bee over add glue to the jute on the back of the bee and glue on the wings. Look from the front and make sure they are placed correctly you can adjust them while the glue is still hot. Place the second set of petal wings on the back overlaying them on top of the first set of wings. Check to see if they are where you like them. Add hot glue to the bottom of each petal on the first set of wings then glue the second set in place.
To attach with wings you made with ribbon apply hot glue to the jute on the back of the bee and glue the ribbon wings in place.
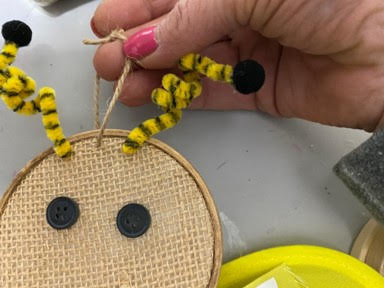
Adding the Eyes, Antennae’s and Stinger
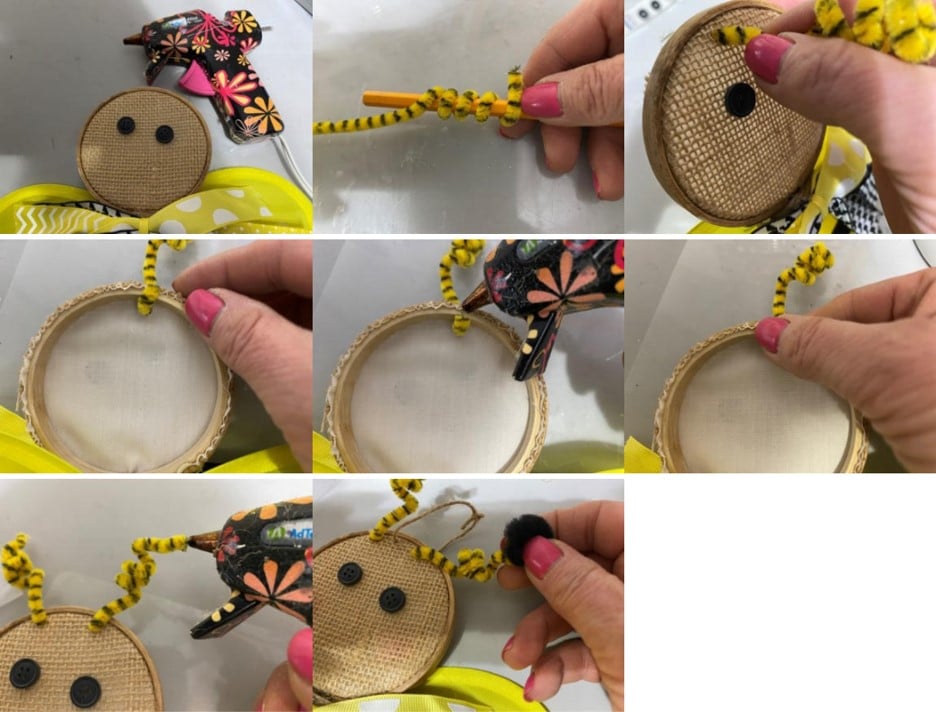
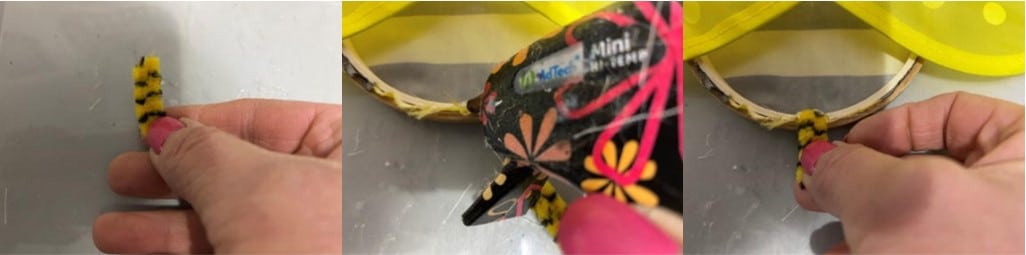
Place the two black buttons onto the face. I off set one of the buttons to give him character. Once you have the eyes the way you want them lift one button at a time, add hot glue to the back of the button and glue into place. Take one pipe cleaner bend in half then cut at bend. Wrap one piece of pipe cleaner around a pencil about four times. Remove from pencil.
Insert the uncurled end through the fabric above one eye just under the ring bringing the end to the back. Bend the end up. You only want enough of the pipe cleaner to bend up to the top of the hoop. Bend the end back add hot glue then glue down. Add hot glue to the tip of the curled end and glue on a 2” black pom pom. Repeat these steps with the second piece of pipe cleaner going over the second eye.
To make the stinger cut a 2” piece of pipe cleaner bend in half. Add a drop of hot glue to the back of the body hoop at the bottom middle and glue the stinger in place.
I gave the bee rosy cheeks using blush and a stencil brush. Add blush to the stencil brush then apply to the face.

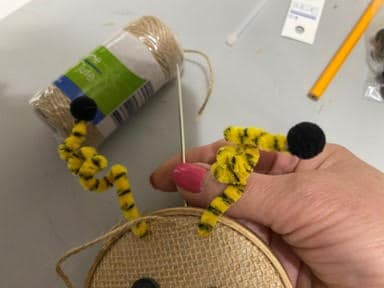
Adding a Hanger
Thread a needle with a piece of thin twine. Insert at the top of the head between the antennae’s just under the hoop. Bring one end to the back, form a loop tie a double knot trim off the excess.
You are now finished making your bumble bee. I hope you enjoyed making him and find him as adorable as I did. You can use any fabrics you choose for the head and body. I love the honeycomb fabric I got from Hobby Lobby that I used for one of the bee’s body. I love these bee’s so much I am going to make a larger one.
They are so stinking cute but can’t find any of the supplies you mention the only thing I have is the Muslim fabric
Keep checking your Dollar tree. I’ve been looking for the yellow spin flowers for wings since Sherry did this bee. Yesterday I walked into one of my Dollar Tree stores & there was a whole box of yellow flowers & red flowers with black dots (thinking lady bug). Now I can make one. You can get embroidery hoops on Amazon.
These are darling. I love to watch you craft. You are so calm, cool & collective. (Remember this from the back then days) You really are all these things. Your are very creative & talented.
I agree!!! So stinking CUTE!!!!!! I will work on these when I get out for summer vacation (retired teacher still working part time!)! 🙂
So cute
I am doing this
So cute… on my list of things to do 😉
Thank you so much for sharing this tutorial! As it turns out I have all the supplies in my stash!