Flowers, Home Decor, Spring
DIY Rose Flower Stem
Jun
I have been making my own craft appliques using silicone molds and molding clay, then one day I came across flower silicone molds so I wanted to give them a try using Plaster of Paris I just love how they came out now I just want to keep making all different flowers using silicone molds.You will not be disappointed in how realistic the flowers look if you like the roses you have to check out my blog for the Peony flower.
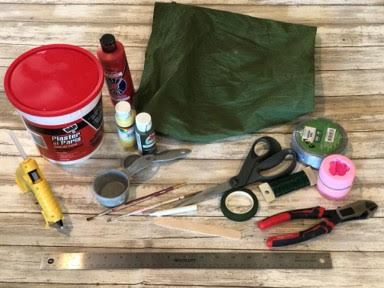
Here is a list of what you will need:
- Rose Leaf Pattern
- 3D Rose Silicone Mold (see my recommended products)
- Plaster of Paris
- Measuring Cup
- 1/3 measuring cup
- Tablespoon
- Craft Stick or Something to Stir the Mixture
- Green Colored Fabric (See my blog on coffee staining and coloring fabric)
- Craft Paint (color of your choice)
- Paintbrush
- Piece of Chalk
- 16 Gauge Wire
- Green Floral Wire
- Green Floral Tape
- Ruler
- Wire Cutters
- Hot Glue Gun and Glue Sticks
- 4 Small Rubber Bands
- Fine Grit Sand Paper
Preparing the Rose Mold
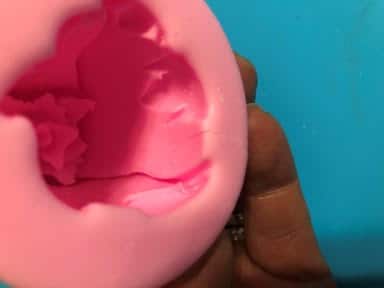
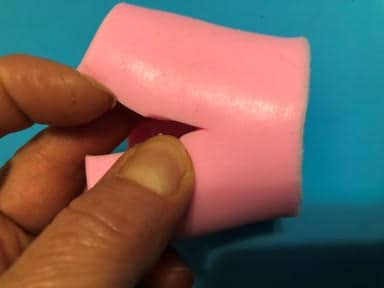
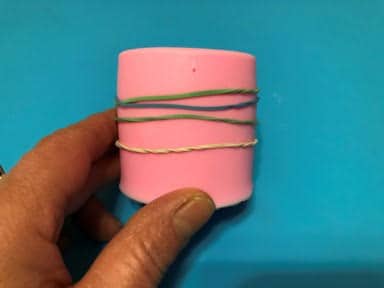
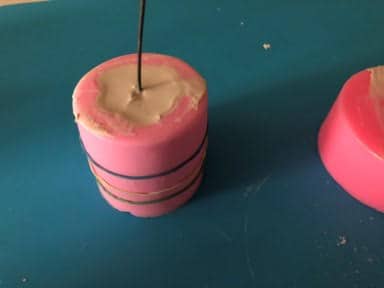
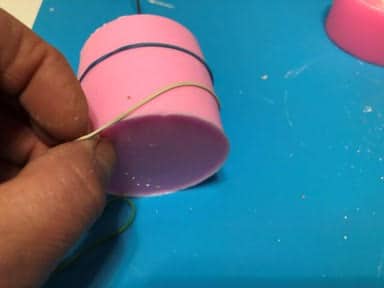
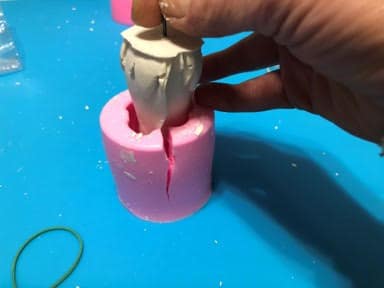
I know this is going to sound a little scary but you are going to have to cut down the side of the rose mold this is going to make it easier to remove the rose from the mold in one piece, start by looking inside the mold for a flat section that will be easy to cut then using your scissors cut between ½ and 3/4 ‘s of the way down the mold, after you have cut the mold you now need to place 4 small rubber bands around the mold to hold it tightly closed. See photo’s below
Making The Rose
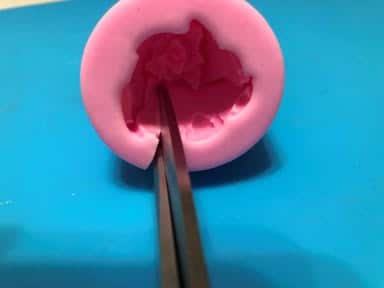
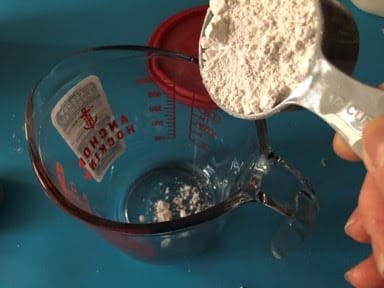
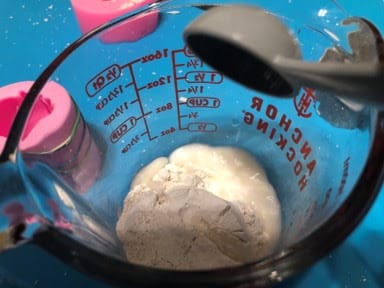
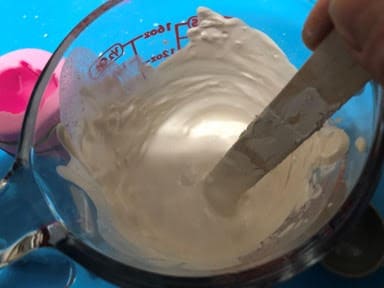
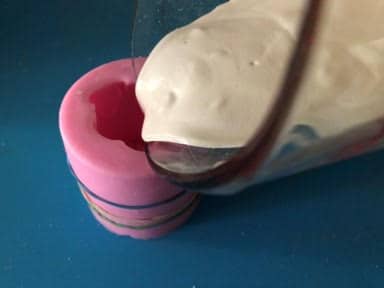
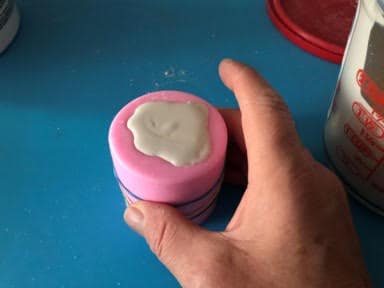
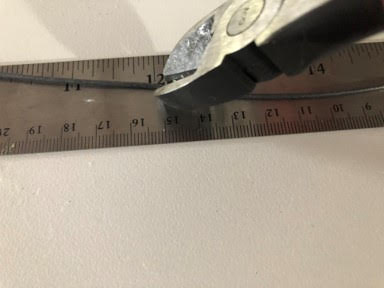
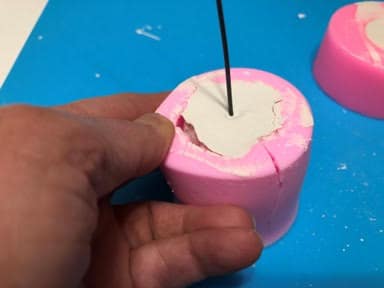
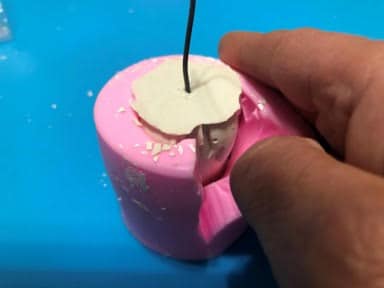
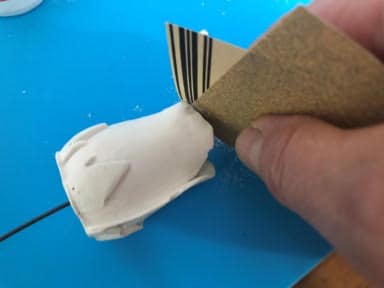
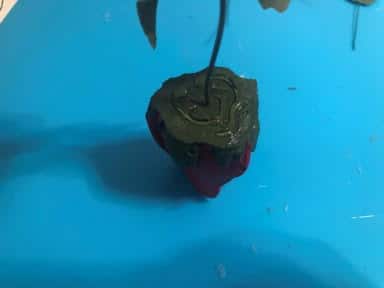
To make the rose you will need to start by putting 1/3 cup Plaster Paris into a measuring cup then add 2 Tablespoons of cold water and stir until well mixed, check your mixture to see if it is the consistency of pancake batter if it is still a little thick add another ½ Tablespoon of cold water and stir. Once your mixture is ready fill the rose mold about ¼ of the way then tap the mold onto the table this will remove the air bubbles continue adding the mixture in small amounts at a time and tapping in-between, do not overfill the mold you want the mixture just to the top. Now that you have the mold filled you need to let it set for about 5 minutes. While your flower is setting cut a 12 inch piece of 16 gauge wire, after your mold has set for about 5 minutes insert the wire into the middle of the flower if the wire can not stand by itself you need to let the mold set another 2 minutes then insert the wire again if it still will not stand by itself keep trying every 2 minutes until it will stand by itself, once you have the wire in you will need to let the mold set for an hour. After you let the mold set it is time to remove the rose from the flower, start by removing the rubber bands then slowly pull the sides of the mold away from the rose next holding the mold open slowly pull the rose upward and up out of the mold. If there are any chips or air bubbles you can fix them by lightly sand them with fine grit sand paper then set the flower aside to dry for another 30 to 60 minutes.
Painting and Sealing the Rose
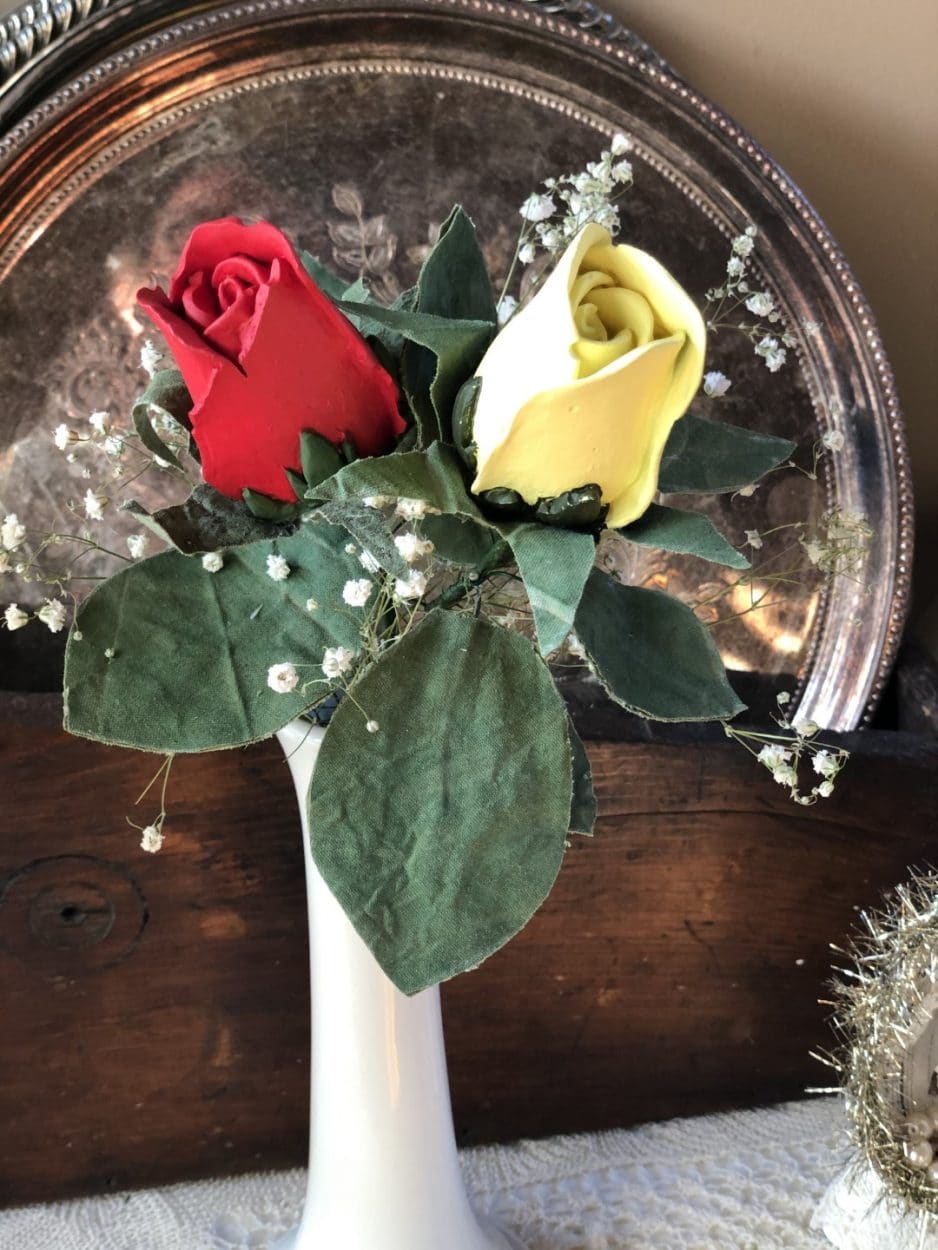
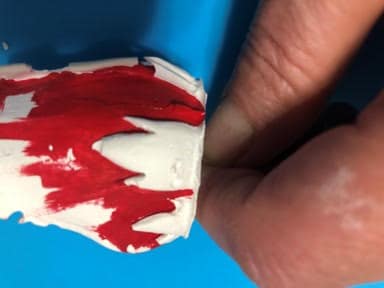
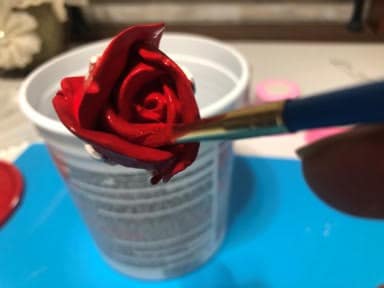
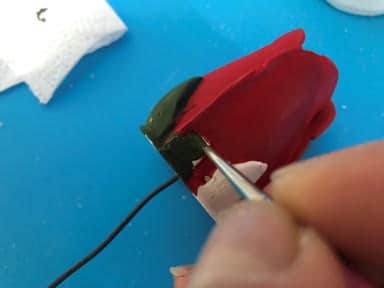
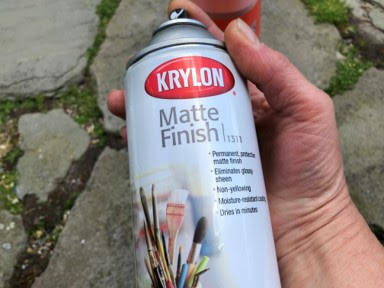
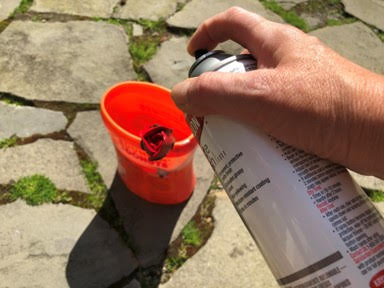
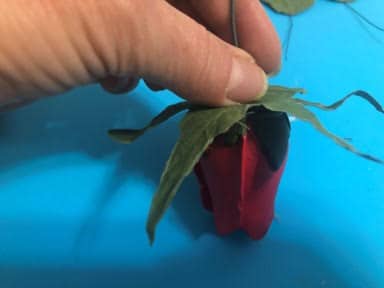
Start painting the rose red by using a small paint brush and begin at the bottom between and around the leaves, once you are done painting around the leaves you can switch to a bigger paint brush and continue to paint the rose, once you reach the top of the rose you will need to make sure you get the paintbrush way down in-between the petals, let dry then apply a second coat. Now that you have painted the flower part it is time to paint the leaves green using a small paint brush, I used English Ivy Green, apply two coats letting dry in between. Once you have two coats painted and the rose is dry take the flower outside and spray with a sealer, I used Krylon matte finish sealer, let dry.
Making The Leaves
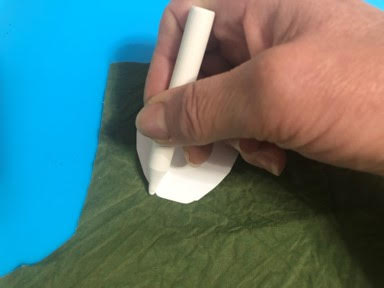
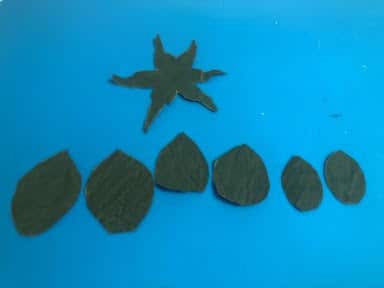
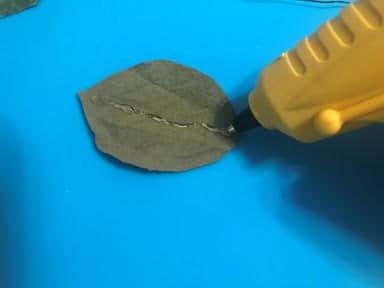
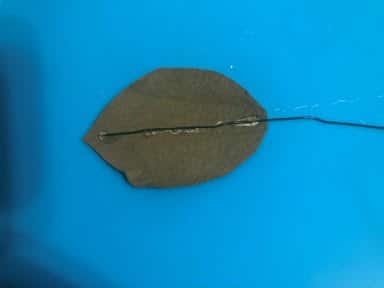
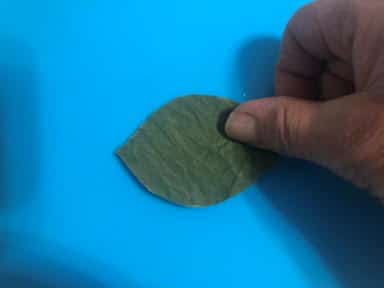
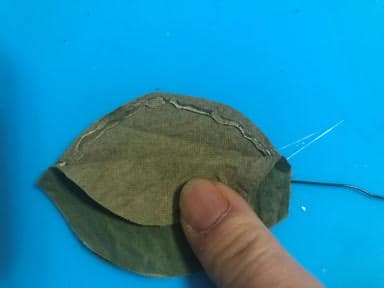
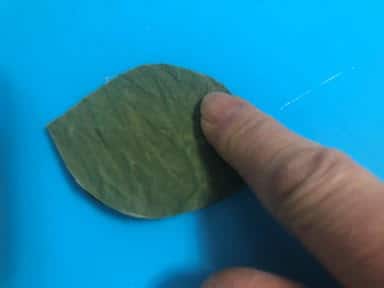
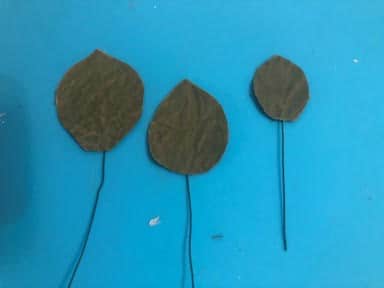
The first thing you have to do is print out the leaf pattern from the PDF file then cut the pattern pieces out. You can use green fabric to make the leaves or you can used coffee stained and colored muslin which I used to make my leaves I feel it gives them a more realistic look, if you would like to use the colored muslin you can see how I make mine in my blog on How I Coffee Stain and Color Fabric. Lay out your fabric then trace and cut out two of each size leaf and one of the 6 leaf piece, now you will need to cut 2 four inch and 1 six inch pieces of the green floral wire. To make the leaves take one of the largest leaves and add a line of hot glue down the center then place your 6 inch wire on top of the glue now place your second leaf on top gluing the two leaves together, if the sides of the leaf are not matching evenly trim to make even, next lift up one side of the top leaf and add hot glue then glue the sides together repeat this step to the other side. To make the two smaller leaves repeat the above steps using the two 4 inch pieces of wire.


Attaching the Leaves
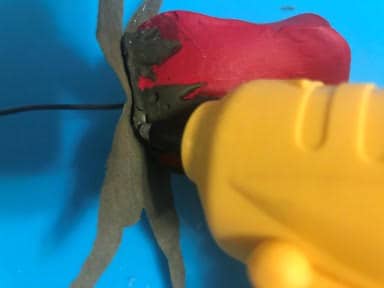
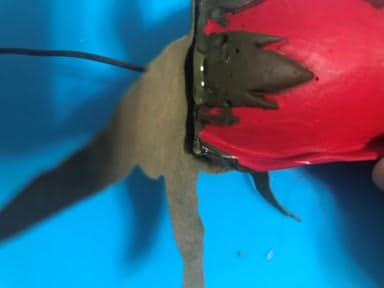
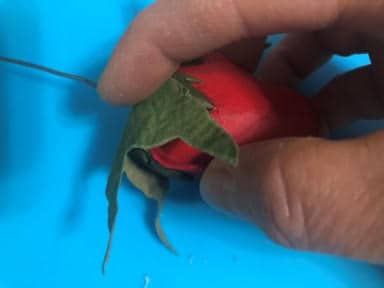
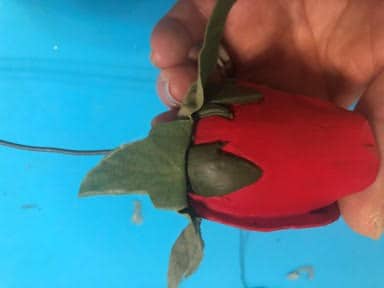
To attach the leaves you are going to start with the 6 six leaf piece, poke the end of the wire rose stem through the center then add hot glue to the bottom of the rose and attach the leaf piece to the bottom next add a small line of hot glue at the bottom rim of the rose and attach the leaves work your way around the rose, see photo’s below.
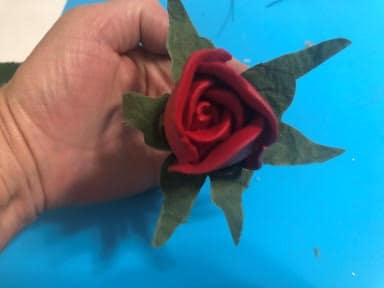
To attach the other 3 leaves place them where you would like them to be on the rose stem then twist the 3 wires around the rose stem leaving about ¼ inch or so at the bottom of each leaf, now starting at the base of the rose start wrapping the floral tape around the rose stem when you reach the leaves stop and arrange the leaves the way you want them then continue wrapping the floral tape around and between each leaf wires continue wrapping down until your reach the bottom of the rose stem.
[row_inner_3] [col_inner_3 span__sm=”12″]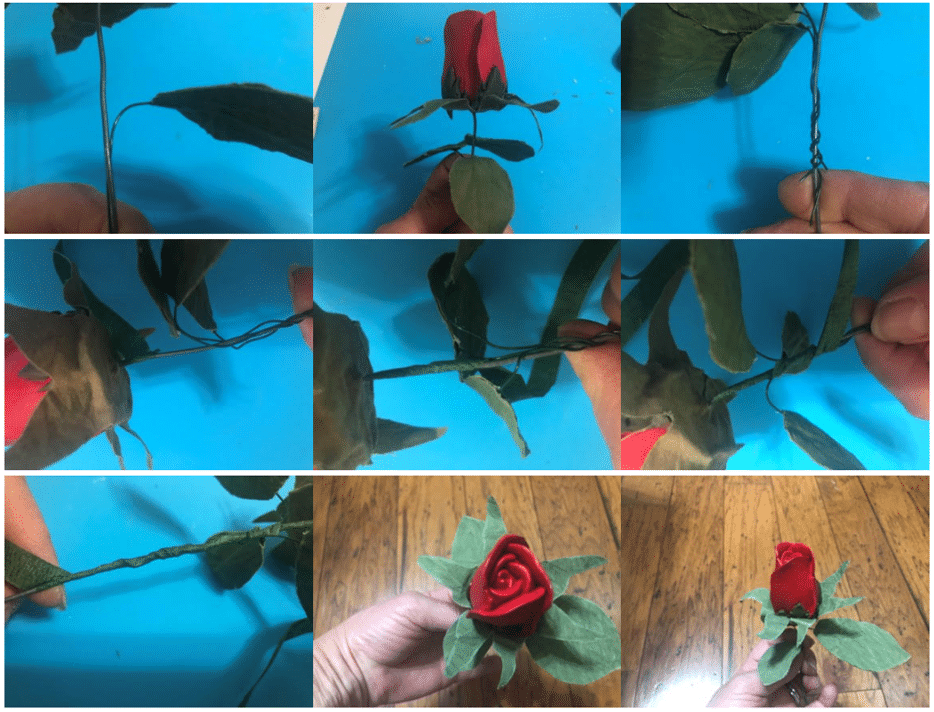
can’t find the sunflower leaf pattern on your blog