Home Decor, Outdoors, Thrifty Makeovers
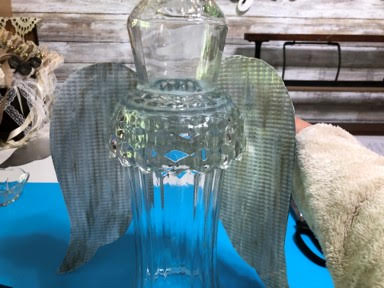
DIY Solar Garden Angel
May
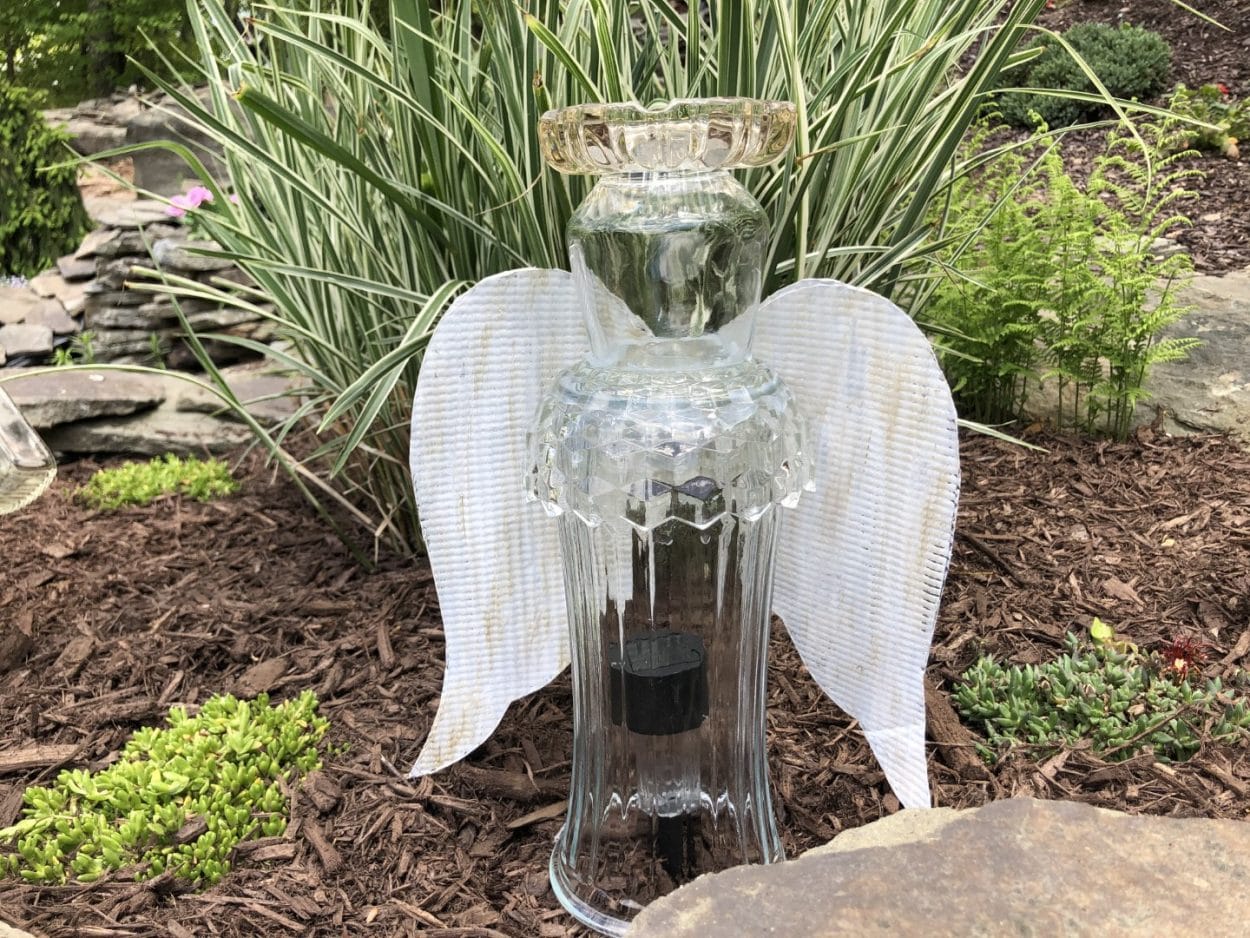
I love to make items to use in my garden, while I was on Pinterest I saw how everyone was making solar angels using thrift store glass items so I thought I would give them a try but I had a hard time attaching the glass wings without them sliding off I finally got them attached but I new there had to be something else I could use.I am not sure if you have seen all the flowers everyone has been making from the foil cookie sheets from the dollar store this gave me the idea of trying to use them to make the wings for the glass solar angel and let me tell you I am liking them a lot better, for one they are easier to attach and second you can see them so much better then the piece of glass everyone is using, I will let you decide once one you would prefer.
Here is a list of what you will need:
- Wing Pattern
- Glass Vase, Bowl, Candle holder and a small plate, bowl or ashtray for the halo
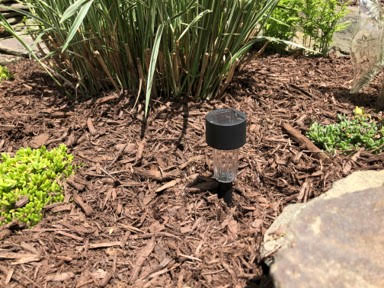
- Solar Light (Dollar Tree)
- 1 Pack Of Foil Cookie Sheets (Dollar Tree)
- Craft Paint in White and Gold
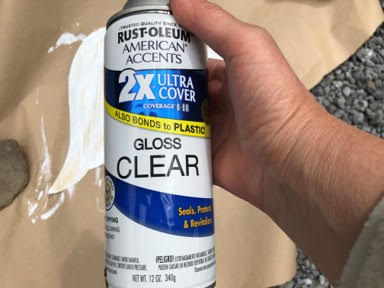
- Spray Sealer
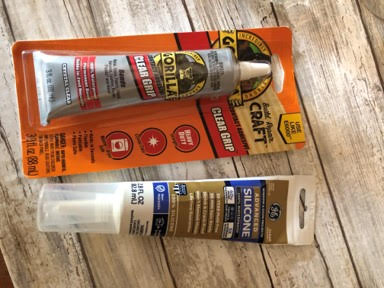
- Advanced Clear Waterproof Silicone
- Clear Grip Gorilla Glue
- Hot Glue Gun and Glue Stick
- Paintbrush
- Scissors
- Pen
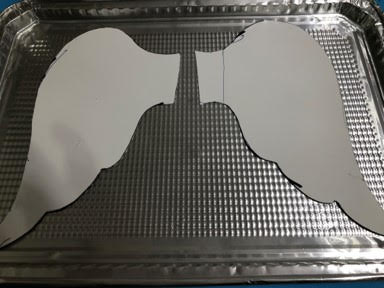
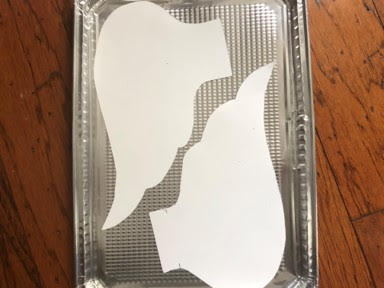
Print Out Pattern
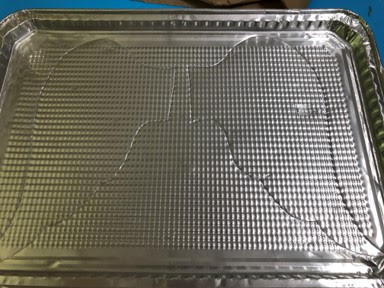
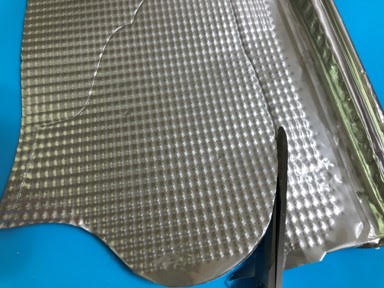
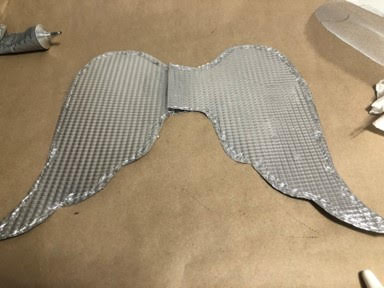
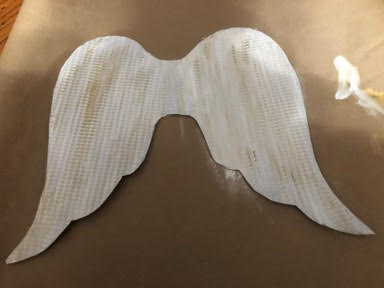
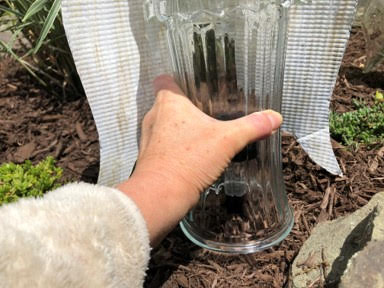
The first thing you will need to do is print out the pattern from the PDF file you’ve just downloaded. Once you have them printed and cut out you will need to decided if you want to use the large or small wings for your angle then lay your two wings pieces onto the foil cookie sheet and trace and cut them out, you will need two sets to make one set of wings, if you are tracing the large wings you will need to flip one wing so the top is at the bottom so the two pieces will fit onto one cookie sheet.
Assemble and Paint wings
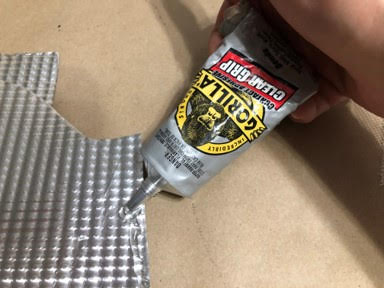
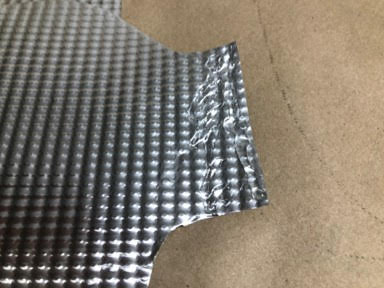
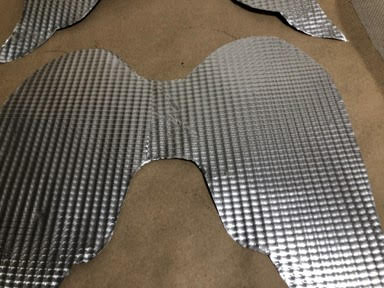
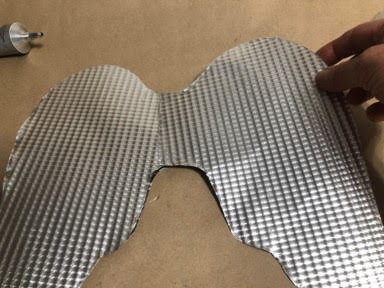
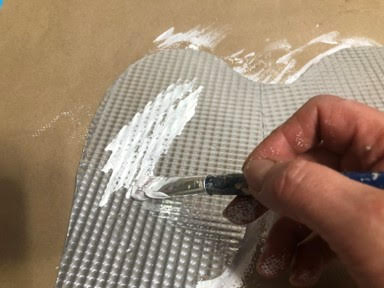
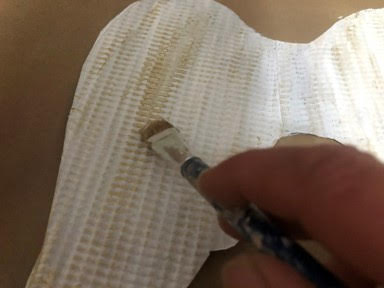
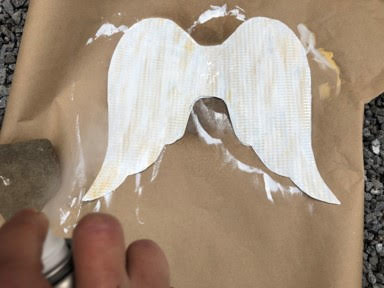
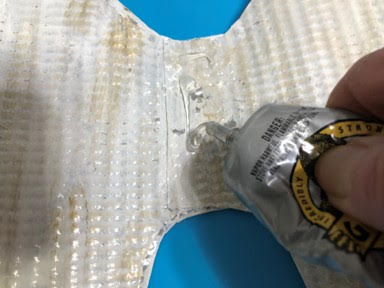
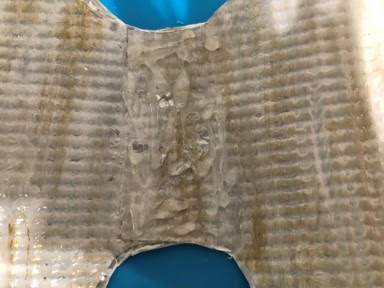
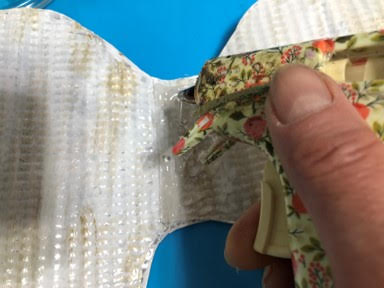
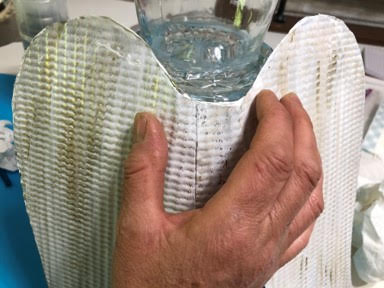
After you have your two sets of wings cut out flip the right wing over and add gorilla glue to the piece where the wings are going to connect in the middle then place the wing on top of the left middle connecting piece lining the two pieces up to form the wing, repeat this step to your other set of wings. Once you have the angel wing pieces glued together add a line of gorilla glue all around the edge of one set of your wings then glue the other set of wings on top lining them up don’t worry if the don’t match perfect you will not notice when they are painted, using a paper towel rub the wings around the edge to seal them together, let them dry for 5 minutes or so. Now that you let the glue dry for a few minutes paint one side of the wings with white craft paint then while the paint is still wet brush them with the gold paint work the gold paint in so it gives them a rusty old look, let them dry, once they are dry flip them over and paint just as you did the first side and let dry. Once your wings are dry take them outside and spray one side at a time with a sealer I used Rust-oleum gloss clear sealer.


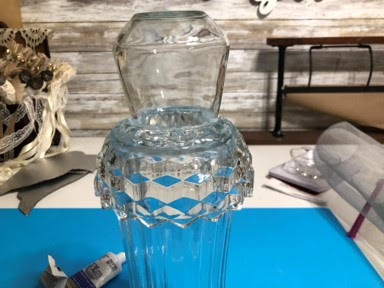
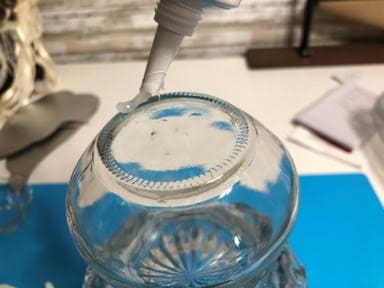
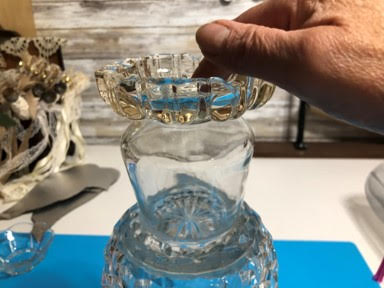
Assemble the Angel
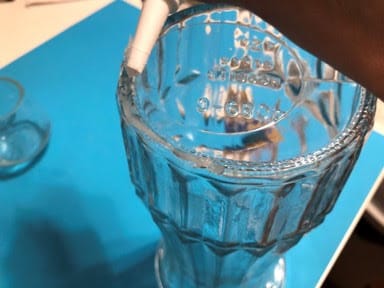
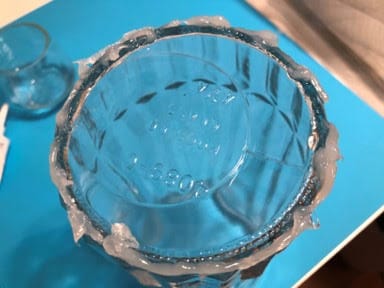
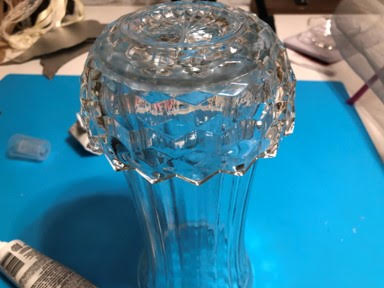
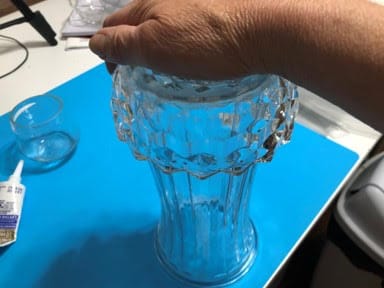
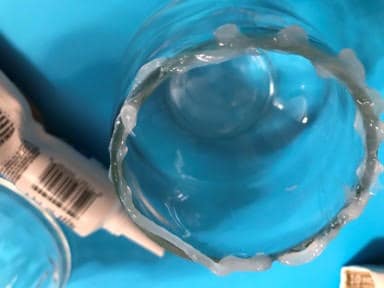
To assemble your glass angle first start by turning your vase upside-down then place your bowl on top of the vase and see where the bowl and vase touch, this is where you are going to add your silicone, I added silicone all around the outer edge of my vase, then placed the bowl back on top of the vase and press down slightly. Next add silicone to the top of the glass piece you are using for the head and glue to the center of the blow then add silicone to the top of the head and attach the glass piece you are using for the halo to the head once all your pieces are glued together let dry for 24hours.
Attaching The Wings
After you have let the angel dry for 24 hours you can now attach the wings, start by holding the wings to the back of the angle so you have an idea where you want the wings to be then add silicone and hot glue to the center of the wings and glue to the back the back of the angle by holding and forming the wings around the angle. You should let the wings dry for a few hours or overnight before putting outside once the wings have dried your can now place your angle over the solar light out in your garden.


Thank you for the wonderful directions and photos! I can’t wait to make my angel!
Absolutely Beautiful!
Oh how I love these angels! I need tin and silicone and I’ll be ready!! Thank you for the wing patterns!
Love this angel, thanks for posting. Going to try it.
My Angel is almost done thank you for getting me back into crafts again
Love your Angel! Your directions make it easy. Thanks so much…….
Beautiful. Can’t wait to venture out shopping. Love this idea! Thanks
Can’t wait to try this angel. The ones you did for you sister are just beautiful.
Can’t wait to try this angel. The ones you did for you sister are just beautiful.
I must make one!
The silicone is it the same as the silicone caulking or different thankyou
Hey Sherry…..finally got all my supplies for 3 angels and was wondering why you did 2 sets of wings. Was it for stability….just wondering?? Also can I use just E000 without silicone??
Thank you for the angel directions. I made two for my garden and they bring me a lot of joy, especially seeing them lit up at night. 🥰
See even I screwed up ,the words angel and angle were swapped .
I absolutely love this angel is pretty and so easy to make thank you so much for sharing this with us
I’m so excited to make the Glass Angel. Now I need to go thrift shopping for 2 more pieces that I didn’t have already. Thank you for the Angel Wing pattern
Igot my things to make onei love 💕 your crafts.
Absolutely beautiful. I got my things to make one . I just love all your crafts
Making my angelS now (I don’t know why lately I work in groups of 2 or 4! LOL). Thank you for your ideas and inspiration!!
I wore myself out today. I just went thrift shopping and found all the goodies to make 2 Angels. One for me and one for my dear friend.
I made one of the Angels, it was my first real craft as a new crafter. It turned out pretty good. Can’t wait to make another one and do some things different.
Hi Victoria,
I am so glad you are making the angels and crafting you are just going to love making things for your home and for gifts. There is nothing better then a homemade gift. Thank you so much for being here.
Getting ready to make my angel. Thanks for great directions.
Yay I a so glad you are making the angel.