Christmas, Home Decor, Winter
DIY Snowman Ornies
Aug
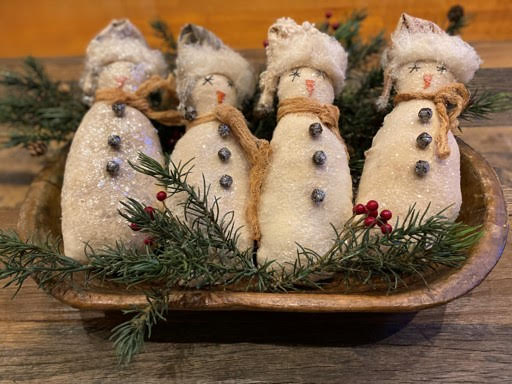
If you love Christmas and snowmen you are going to love these adorable snowmen ornis.I just love decorating with snowmen because they are not just for Christmas you can decorate all winter with them.These snowmen ornies are so simple to make, I use them in my dough bowl and I just love sticking them in my Christmas tree, I hope you enjoy making these adorable snowmen ornis as much as I did.Iseen these snowman at a craft fair and I just feel in love with them and if you have been following me you know I always say I can make that so I bought one and went home and created ones just like him.
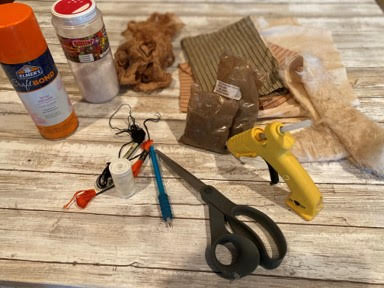
Here is a list of what you will need:
- Snowman Ornie Pattern
- Muslin
- Print Fabric
- Fur Trim
- Cheesecloth
- Black and Orange Embroidery Thread and Needle
- Cream Thread and Needle
- Sewing Machine
- Polyester Fiberfill
- Spray Adhesive
- Crystal Glitter
- 10mm and 13mm Rusty Bells
- Tea Stain Mixture (recipe below)
- Hot Glue Gun and Glue Sticks
- Scissors
- Pencil
Tea Stain Recipe:
- 2 quarts of water
- 8 tea bags
- Vanilla
- Cinnamon
- Cloves
- Bring 2 quarts of water to a boil remove from stove add 8 tea bags let sit for about 2 hours, remove tea bags reheat the tea add vanilla, cinnamon and ground cloves stir until dissolved then remove and let cool.I add about a ¼ cup vanilla, 2 tsp cinnamon and 1tsp ground cloves but you can add as much or as little as you would like.
You can add any spices you would like to this recipe, heat the water on the stove then add all the ingredients simmer for a few minutes so the spices can blend in with the coffee, remove from stove and let cool.
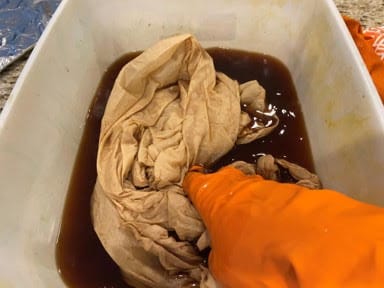
Tea Stain Muslin
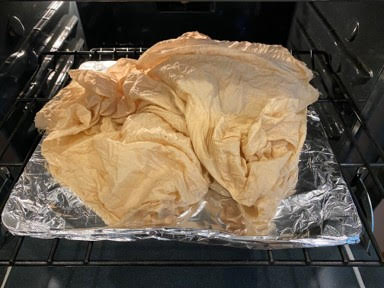
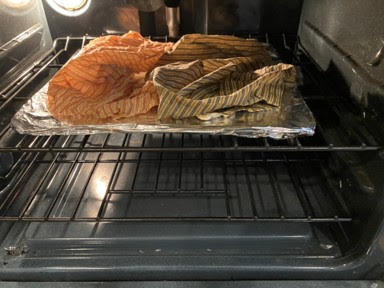
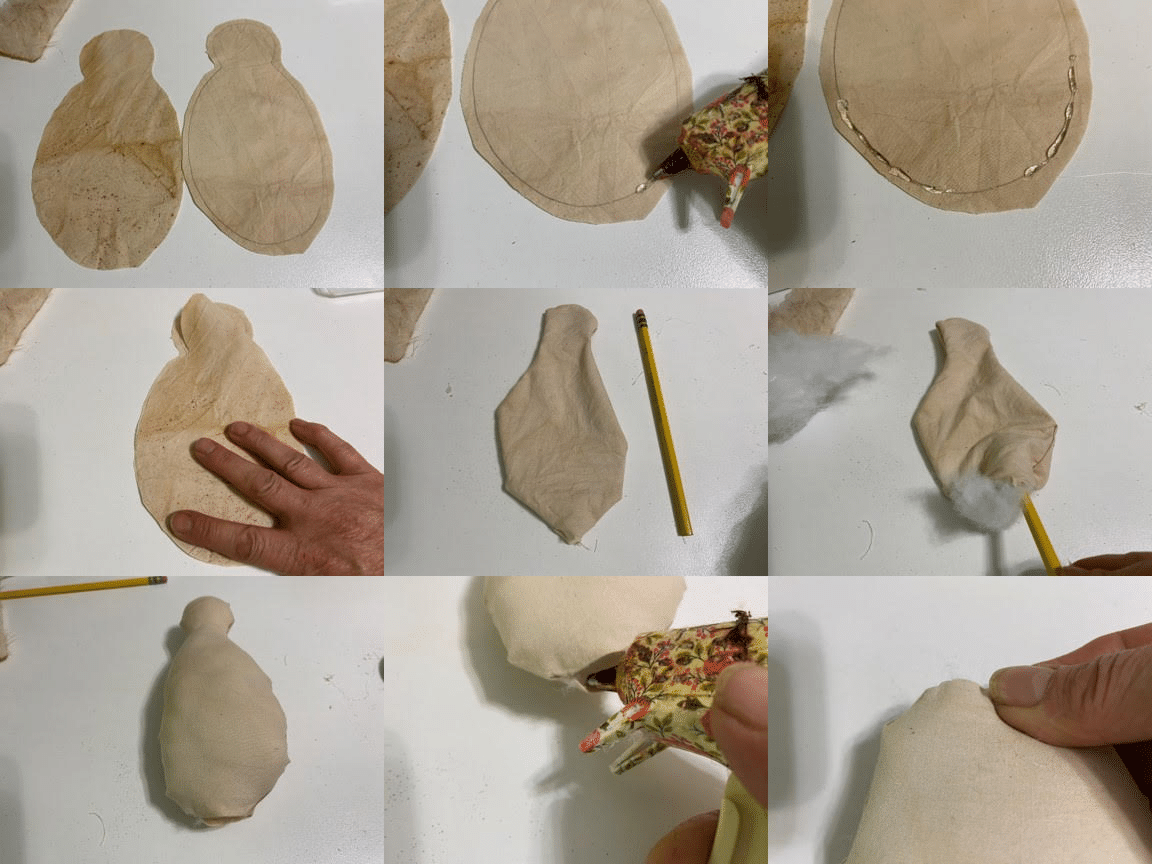
I prefer to tea stain my muslin but you can certainly leave your muslin as is if you would like. To tea stain the muslin place your muslin in a basin put on a pair of rubber gloves so your hands do not get stained and then add enough tea stain mixture to cover the muslin, let the muslin soak in the tea mixture for about 20 minutes or so then ring out your muslin and dry outside in the sun if there is no sun you can dry your fabric in a 210 degree oven on a foil covered cookie sheet just make sure you rearrange your fabric about every 10 minutes until dry. Next repeat this process with your hat fabric. To stain the fur hat trim just place in the tea stain mixture making sure it is completely covered then ring out and dry the same way you are drying your fabric.
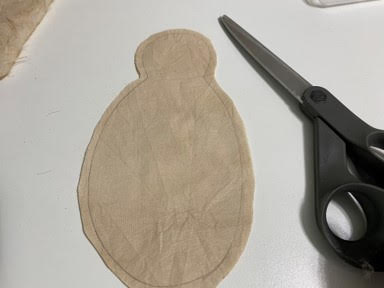
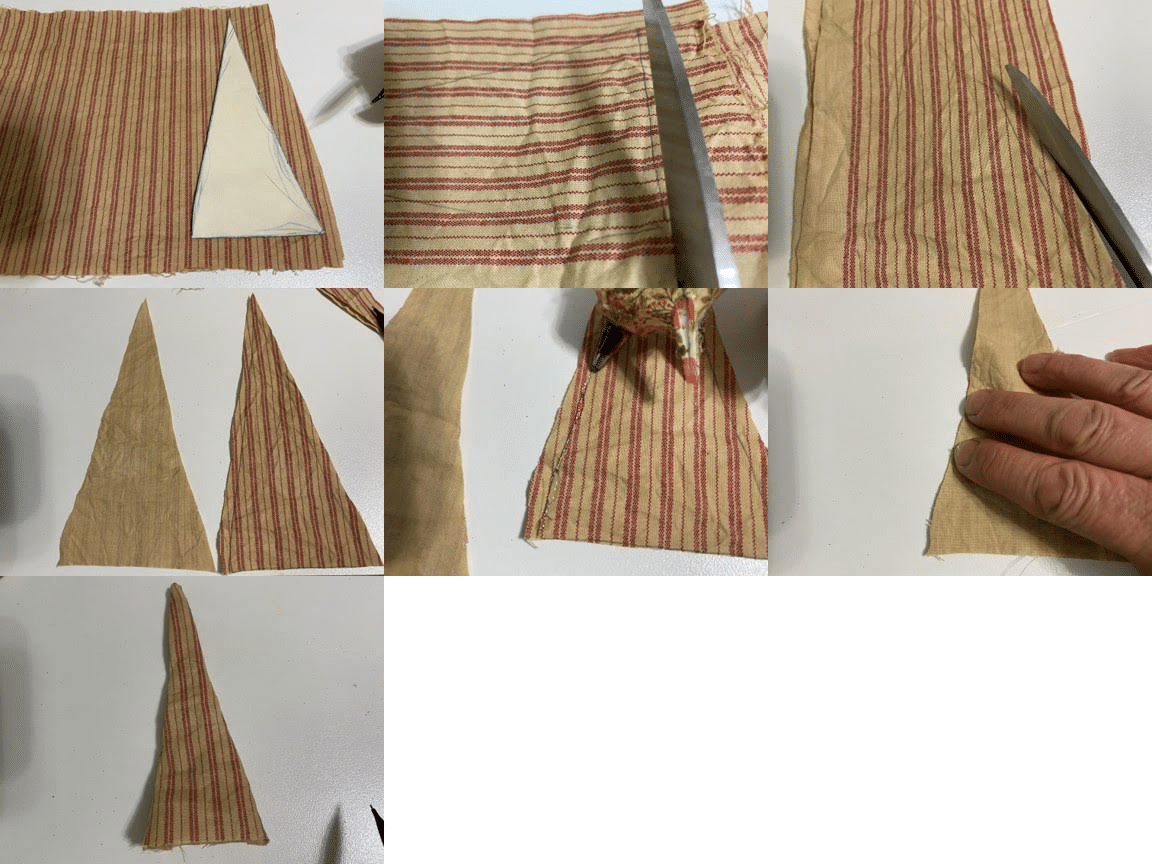
Print Out The Pattern
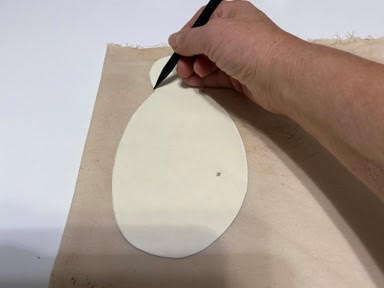
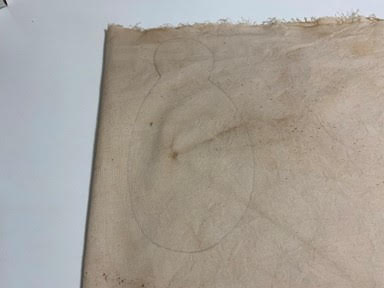
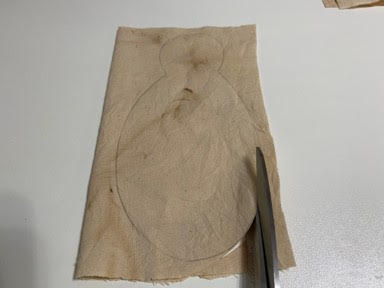
The first thing you will need to do is print and cut out the snowman pattern pieces. Once you have your pattern pieces trace the snowman on a double layer of musling then cut him out about a ¼” away from the trace line. The trace line will be your sew or glue line.
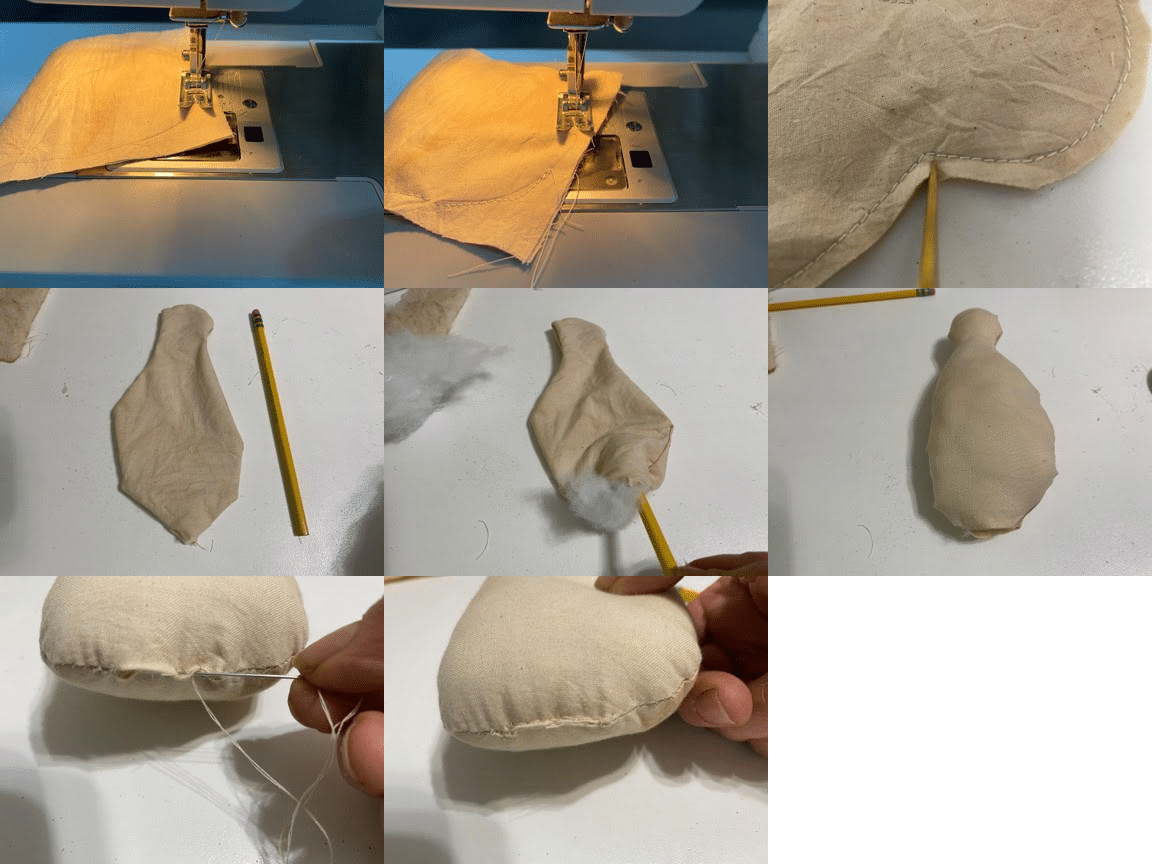
If you are machine sewing your snowman you are going to start sewing on your trace line at the bottom left side (but not in the bottom middle you will need to leave an opening for turning and stuffing ), sew all around the snowman until you reach the bottom again, leave about a 1” to a 1 ½” opening in the bottom middle, next snip the right and left side of his neck area this will stop the fabric from puckering. Turn him Right Side Out and stuff him with your polyester fiberfill, I like to use the eraser end of a pencil to push the stuffing in, once you have him stuffed use cream thread and a needle to sew the opening closed.
If you are gluing the snowman the trace line is going to be your glue line. Start by separating your two snowman pieces of fabric then add a small line of hot glue at the bottom right and left side going upwards, leave about a 1” to 1 ½” inch opening at the middle bottom of the snowman, now place your second piece on top making sure to line up the bottom and sides and glue together. Continue adding hot glue and gluing the two pieces together until the whole snowman is glued together except for the opening at the bottom. Next snip the right and left side of the neck this will stop the fabric from puckering, turn Right Side out. Stuff the snowman with the polyester fiberfill, I like to use the eraser part of a pencil to push the fiberfill into the snowman. Once you have your snowman stuffed add a small line of hot glue to the opening and glue closed.
Making The Hat
If you are going to machine sew your hat start by folding your fabric in two with the print side facing inward, next trace your hat onto the fabric, then machine sew your hat by starting on one side and sewing up and around to the bottom of the other side do not sew across the bottom of the hat. Once your hat is sewn cut out the hat about a ¼” away from your sew line on the sides and cut on the trace line at the bottom of the hat. Turn Right Side Out.
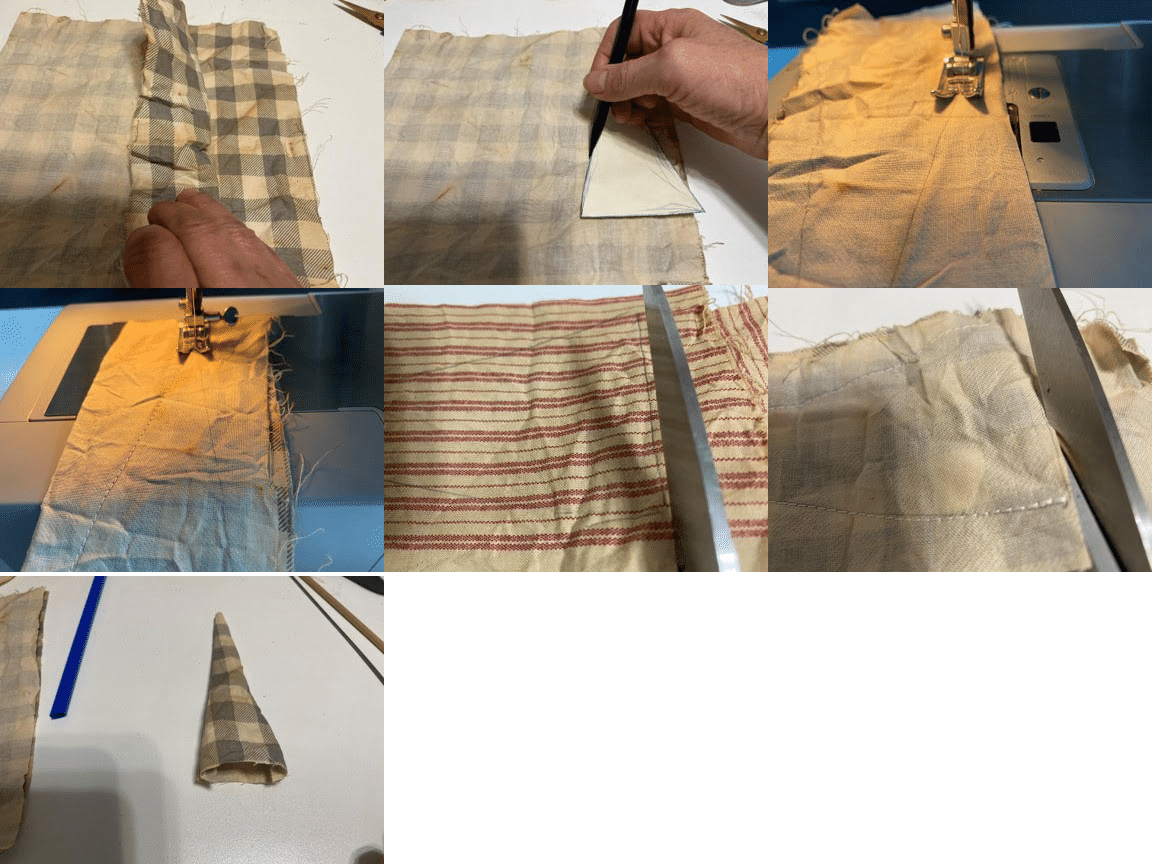
If you are going to glue your hat the trace line is going to be your glue line. First fold your fabric in two with the print facing out, next trace your hat onto your fabric. Cut your hat out about a ¼” away from your trace line on the sides and cut on out on the trace line at the bottom of the hat. Next separate your two hat pieces of fabric then add a line of hot glue to your trace line on one side of the hat then place your second piece on top making sure the print side is facing in and that you line up the sides so they are even, glue down, glue the other side of the hat the same way. Turn Right Side Out.
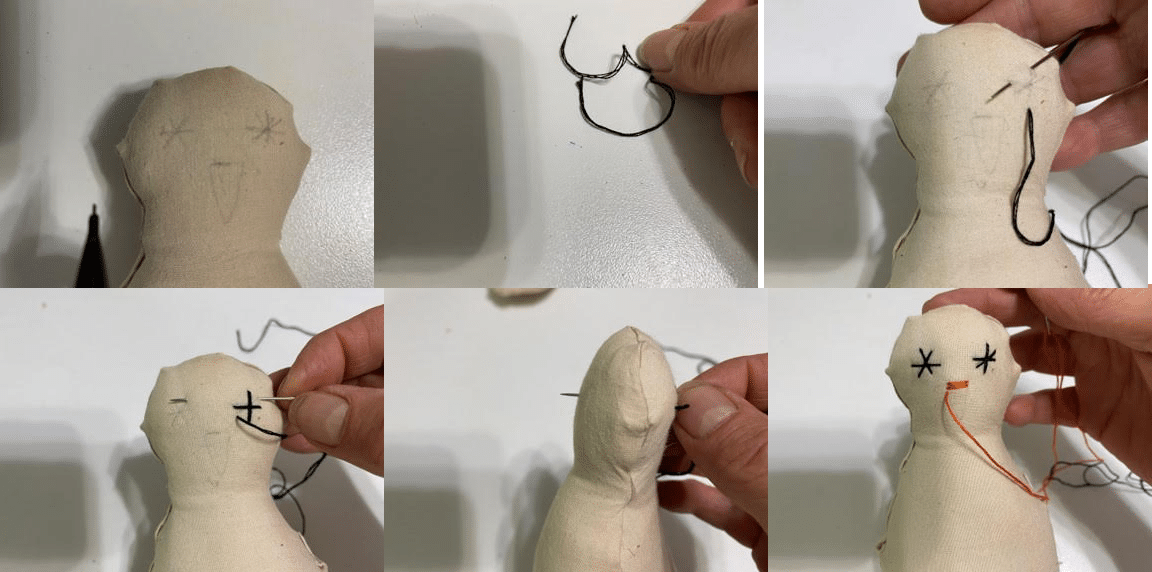
Stitching On The Face
Start by drawing your face onto your snowman with a pencil. I made my eyes like a snowflake and the nose in a carrot shape you can make them any way you would like. Start by separating your embroidery tread from 6 strands into 3 strands. Using the black embroidery thread and a needle stitch on your eyes, when I finish one eye I bring the needle and tread across to the other eye I do not tie off the first eye I think this is just easier, after you finish the second eyey bring your needle and thread to the top back of his head and tie a knot. Next stitch on your nose using the orange embroidery thread then bring the thread and needle to the top back of the head and tie a knot.
Attaching The Hat
To sew the hat onto the snowman place the hat on his head just above his eyes then using cream thread and a needle sew the hat onto his head all the way around. Next cut a 1” by 6” piece of your hat trim center the trim on the hat making sure you cover the end of your hat and then sew onto your hat all the way around. Sew a 13 mm rusty bell on the tip of the hat and then bring down the top of the hat to the side of the hat and tack into place.

To glue the hat to your snowman place the hat on his head just above his eyes then lift the front of his hat add a line of hot glue and glue the heat down continue gluing around the hat, next cut a 1” by 6” piece of your hat trim center the trim on the front of the hat, making sure to cover the bottom of the hat, lift the front piece of trim add hot glue to the hat and glue the trim down continue glue the trim around the hat until it is all glue down. Using cream thread and a needle sew a 13mm rusty bell to the tip of the hat then bring the top of the hat down the side of his head and tack to the side of his head.
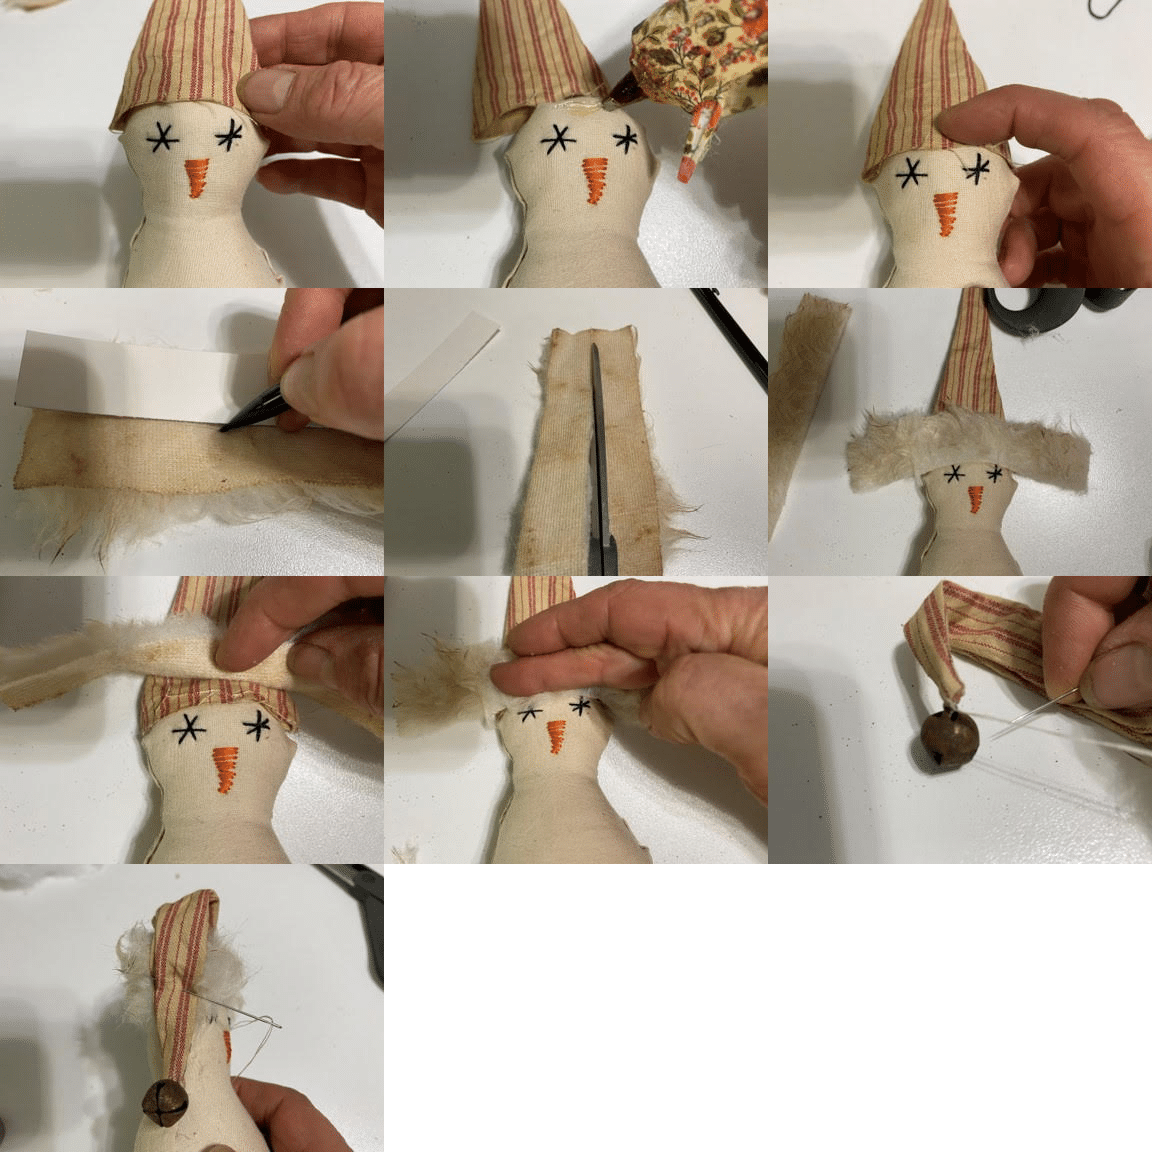
Adding The Finishing Touches
All that is left is to add three 10mm rusty bells down the front of the snowman and give him some glitter. First take a 10mm rusty bell and sew on the upper front of the snowman, bring your thread and needle up through where you want the second 10mm rusty bell to be and sew on the bell then bring your needle and thread up where you want the third rusty bell sew on and knot. Next spray part of your snowman with the adhesive spray then add the crystal glitter keep spraying and adding glitter until you are happy with how much glitter is on the snowman, I also use mica flakes instead of glitter I just love the look of mica flakes.

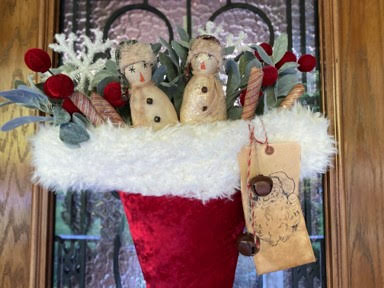
I hope you enjoyed making the snowmen they will make a beautiful addition to your winter decorating. I have used them in my Christmas tree, in a dough bowl and inside a Santa hat I made for my front door, if you like the Santa hat you can also find the blog for the Santa hat on my web page.

Where can I find the pattern to print out?
Thanks for all you do for us!
Hi Judy!! The pattern is right above the second picture in the instructions above… look for an orange block that says snowman ornie pattern 🙂
Love all you do…
Love these ornies! Thank you! 😊 Where can I get the mica flakes?
I’m making these snowman’s this weekend I love them
Sherry thank you for all the great crafts you share with us. I watch you all the time and follow you.
I am recovering from colon cancer and lung cancer. I had 6 months of chemo and I’m recovering from that. Say hi when you see Oat from Connecticut…thanks.
Praying for you, God bless you!
How big in the body of snowman?? There are only size on hat trim
These are so cute. plan to make several.
I love the layout of your blogs. I’m browsing through, but will return to try a few projects.
I love these have the santa hat made and the snowman is ready for glitter. I’m excited to get it finished. I think this is my favorite project.
Sherrie love your blog can’t wait to try these.
Thank you so much and you will love them