Christmas, Home Decor
DIY Wood Bead Angel Shelf Sitters

Aug
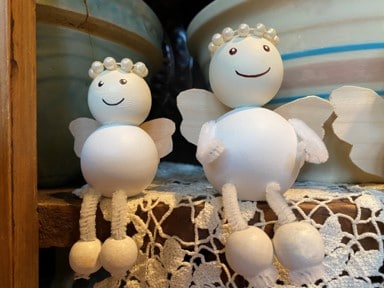
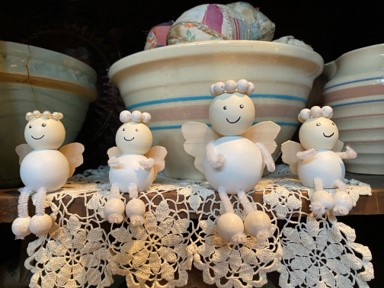
If you love angels you are just going to love these adorable wood bead angel shelf sitters. I am just loving how they turned out. They just look adorable sitting on my cabinet and I can’t wait to use them on tiered trays. The possibilities are endless what else we can create with these wood bead bodies besides angels. My mind is going a mile a minute with ideas lol. Make sure you check back to see what other adorable shelf sitters we create here at The Crafty Decorator using these wood beads.
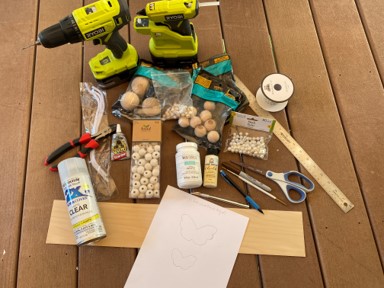
Materials you will need for one large and one small angel shelf sitter
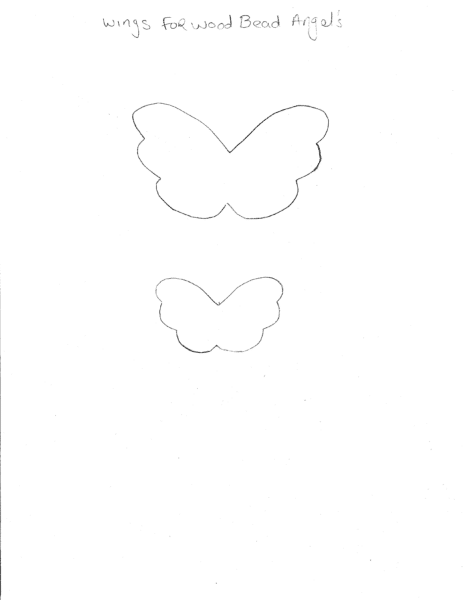
- Wood Bead Angel Wings Pattern
- 1 – 2” Wood Ball Knob
- 1 – 1 ½” Wood Dowel Cap
- 1 – 1 ½” Wood Ball Knob
- 1 – 1 ¼” Wood Dowel Cap
- 15 – 10mm wood beads
- White Wash Wood Bead Mix by Bead & Design for feet (Hobby Lobby)
- 1 – 32 x 4 x 24 piece of Basswood (Hobby Lobby)
- 2 – White Chenille Pipe Cleaners
- Brown fine tip Sharpie Permanent Marker
- Chalk Paint in the colors White and Sheepskin
- Rust – Oleum Matt Spray Sealer
- Paint Brush
- Detail Paint Brush
- Gorilla Clear Grip Adhesive
- X – Acto Knife
- Ruler
- Wire Cutters
- Pencil
- Drill and a 3/32 Drill Bit
Painting And Drilling The Wood Beads
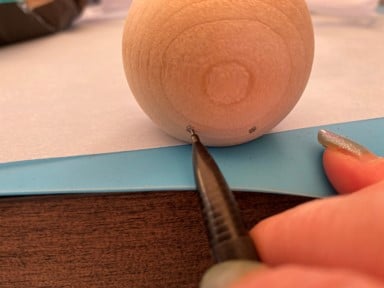
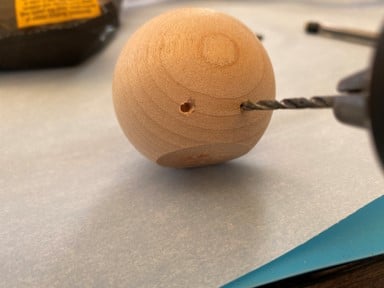
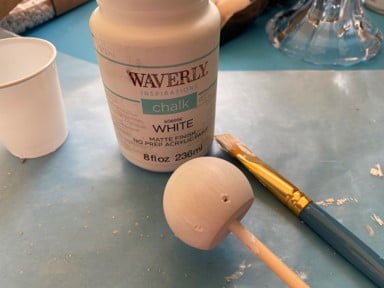
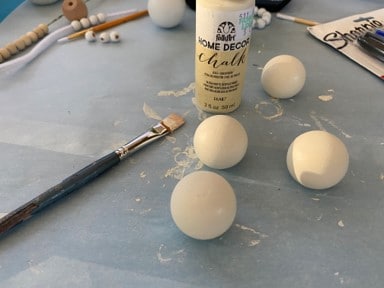
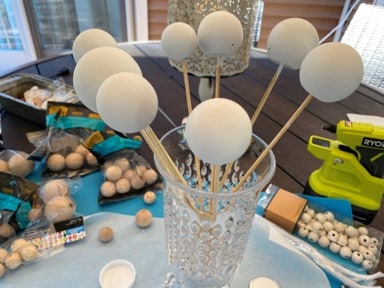
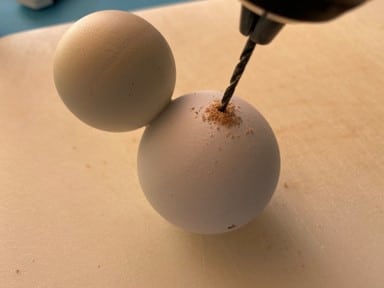
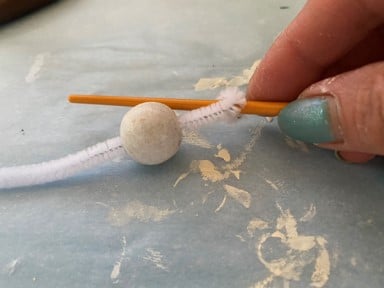
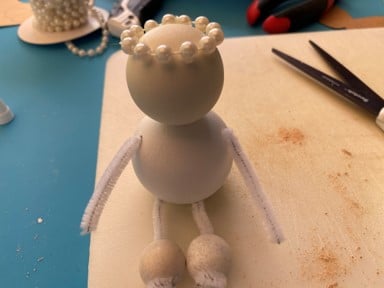
The first thing you will need to do is mark where you are going to drill you holes for your legs. I marked my legs about a ¼” up from the bottom. Using a drill and a 3/32 drill bit drill your two holes for the legs, make sure you go deep enough so your pipe cleaner will go in far enough, test the depth of the whole with a pipe cleaner to make sure you made them deep enough. You are going to paint the 2” Ball knob, the 1 ½” Ball knob and the 15 10mm beads white. Then you are going to paint the 1 ½” dowel cap and the 1 ¼” dowel cap sheepskin. I found the easiest way to paint and seal the knobs and caps was to place each one on a meat skewer or dowel then stand them in a vase to dry. The 10mm beads I placed on a floral wire to paint and seal. Give each piece two coats of paint letting dry in-between coats. After they are dry spray them with a sealer.
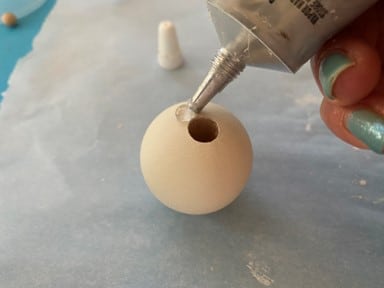
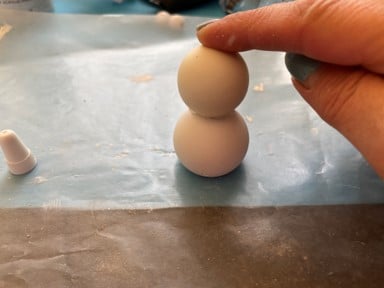
Gluing The Body Pieces
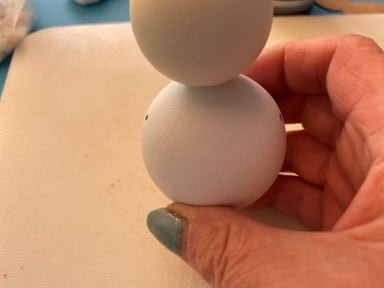
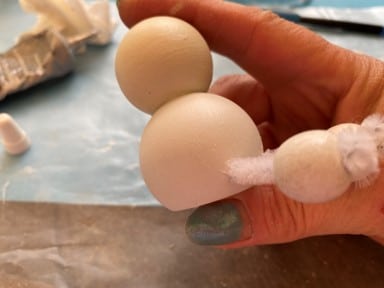
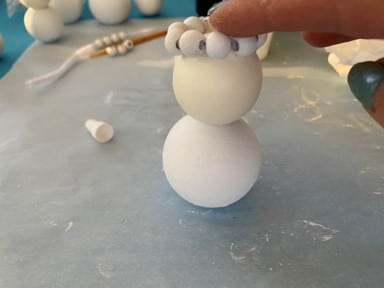
For the large angel add gorilla clear grip adhesive around the hole of the 1 ½” dowel cap then glue to the top of the 2” ball knob. Make sure the head is centered in the middle. For the small angel add the gorilla clear grip adhesive around the hole of the 1 ¼” dowel cap then glue to the top of the 1 ½” ball knob making sure it is centered. Let them set for about 15 or 20 minutes.

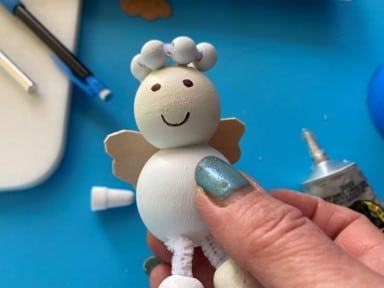
Adding The Arms And Legs
When I first made the angels I didn’t add arms then after looking at them I though I would try giving them arms. You can see them both ways in the above photo under the heading. I you would like to add arms using a pencil mark where you would like the arms to be. I placed them on the side of the body down from the side middle of the head. After you have them marked drill your holes making sure they are deep enough for the pipe cleaner. Check the depth by inserting a pipe cleaner to see if they are deep enough.
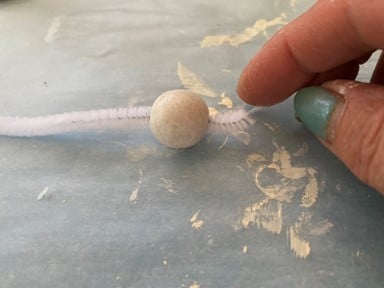
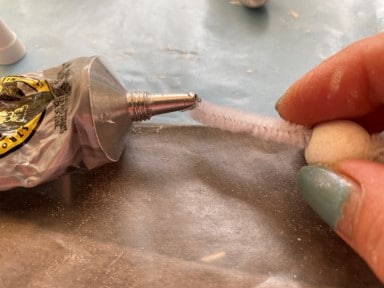
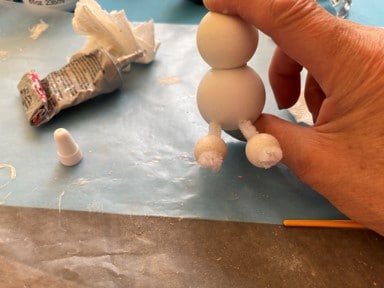
For the large angel cut two pieces of the white pipe cleaner 3” long and two pieces 2 ¾” long. Take one of the 3” pieces slide one of the larger white washed beads onto the pipe cleaner then using the handle end of a paintbrush wrap the end of the pipe cleaner around once, this will stop the bead from falling off. Repeat these steps to the other 3” piece of pipe cleaner. These will be the legs for the large angel. Next add a small amount of adhesive around the other end of the 3” pipe cleaner and insert into one of the leg holes. Using a paper towel wipe off any excess adhesive. Repeat this step to the other leg. For the small angel cut two 2 ½” long pieces of white pipe cleaner and two pieces 1 ¾” long. Using two small white washed bead and the two 2 ½” long piece of pipe cleaner repeat the same steps used for the large angel legs.
To add the arms take the two 2 ¾” pieces of pipe cleaner and add the adhesive to one end of each piece then glue into the arm holes of the large angel. Wipe of any excess adhesive. Bend the ends of the pipe cleaners a little this will be the hands. Repeat these steps with the two pieces of 1 ¾” pipe cleaners gluing them into the small angel.
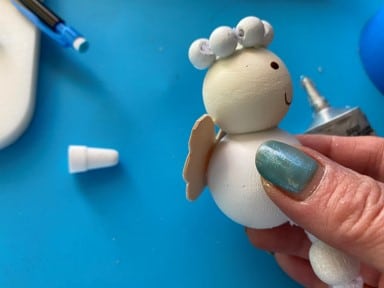
Adding The Halo and Face
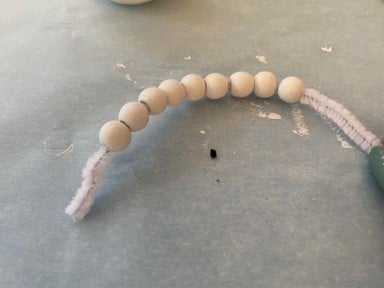
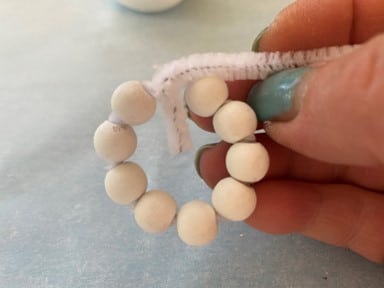
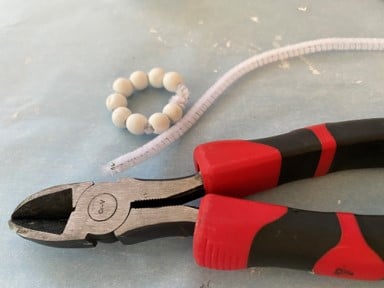
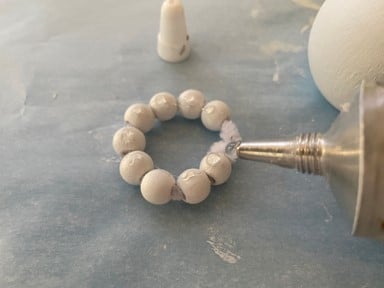
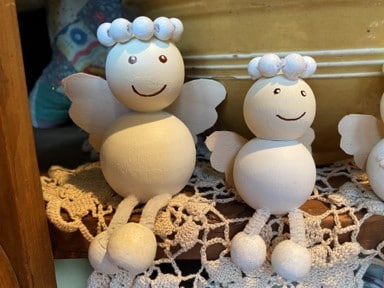
Slide 9 of the 10mm white painted beads onto a pipe cleaner leaving about a ½” of the pipe cleaner at one end. Bend the beads to for a halo then wrap the ½” piece of pipe cleaner around the other end of the pipe cleaner to form the halo. Cut off the excess with your wire cutters. This will be the halo for the l large angel. For the small angel repeat the above steps using six 10mm white painted beads. If you don’t want to use wood beads for the halo you can also use a string of pearls like in the above photo.
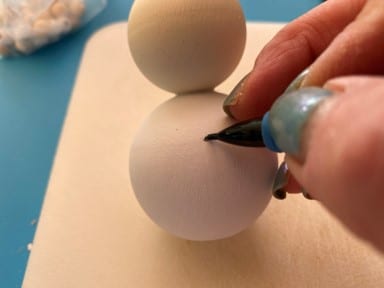
To add the face place the halo on top of the large angels head and hold in place. Using a pencil lightly mark where the eyes and mouth are going to go. Next take the brown fine tip sharpie and make your circle eyes and your mouth. Using a detail paintbrush place a dot of white paint into the brown of the eyes. Repeat these steps to the small angel.

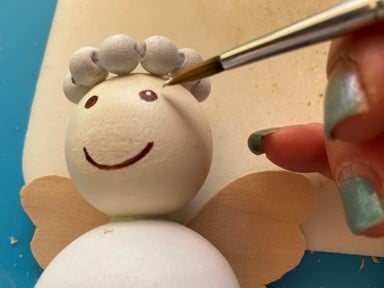
Add adhesive to a few of the beads of the crown and glue to the top of the head. Do this for both the small and large angel crowns. You can also use hot glue if you prefer. I started by adding the halo before adding the arms, legs and face but it keep sliding off so I decided to wait until the end.
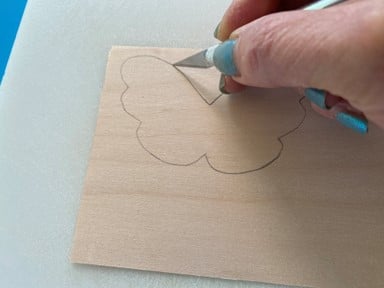
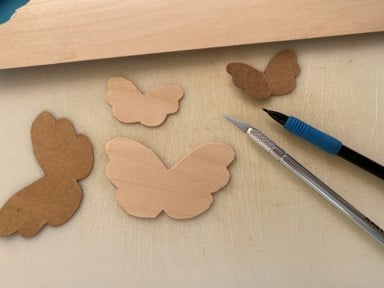
Adding The Wings
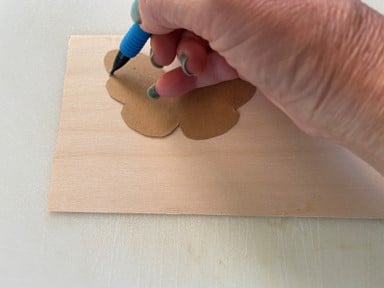
The first thing you will need to do is print and cut out the wing pattern for the small and large wings. Next using a pencil trace each wing onto the Basswood then cut them out with the X-Acto knife. Add a line of the gorilla clear grip adhesive down the middle of the large wings and glue to the back of the large angel. Make sure they are centered. Let dry. Repeat this step to the small wings and the small angel.

I hope you like these adorable wood bead shelf sitter angels and decide to make some to add to your home décor.
The print is very light and hard to see .
Love the happy angels!
I am sorry
These are so adorable, I will definitely be making these!!!❤
I am so glad you will be making them
I wish you could pin these ideas so I could save them and not print them
When I do a blog for them I do put them on my Pinterest Page