Christmas, Home Decor, Winter
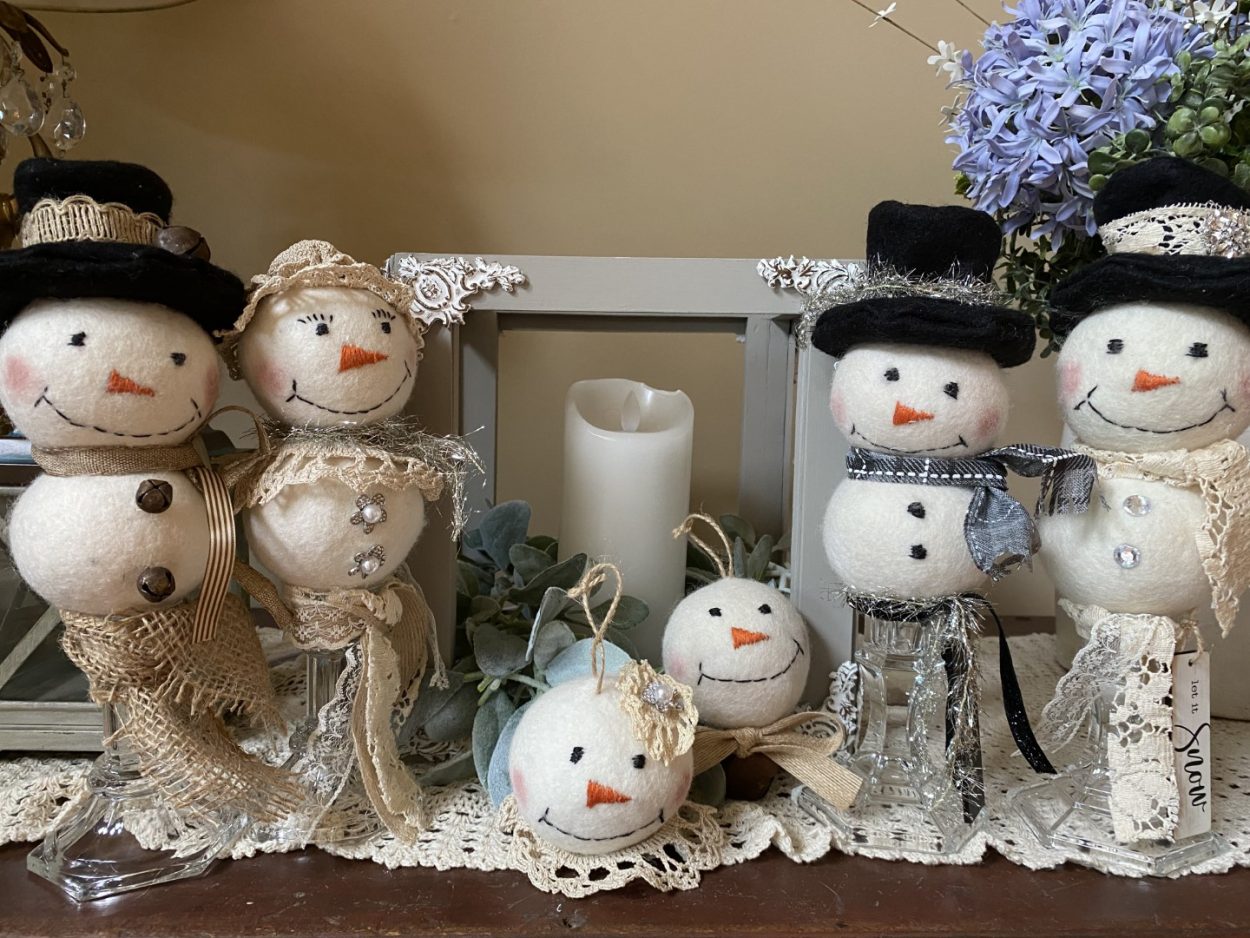
DIY Wool Dryer Ball Snowmen
Sep
Hello everyone, I can’t believe how fast the Christmas season is approaching, I just love decorating with snowmen not only are they beautiful for Christmas but you can leave them up all winter long.I was shopping in Walmart one day and came across packages of wool dryer balls I have never used them but my mind instantly seen a snowman, they come 2 in a pack for $4 so I bought to packs to take home to see if I can turn them into a snowman and let me tell you they were so simple and they came out just adorable.I loved how they came out so I knew I needed to make a few more plus I wanted to make some snowman ornaments for my tree out of them, I was going to go back to Walmart but I thought I would see if I can find them cheaper so I checked Amazon and I found a bag of six wool dryer balls for $6.99 which is much cheaper then Walmart so I ordered them (if you would like to see which ones I used you check my recommended products page) and made more adorable snowmen and the cutest snowmen head ornaments.
Here is a list of what you will need:
- Wool Dryer Balls (Amazon)
- Embroidery Thread In The Colors Black and Orange
- Embroider Needle
- Candle Stick
- Ribbon or Strips Of Fabric
- Embellishments of Your Choice
- Blush For The Rosy Checks
- Hot Glue Gun and Glue Sticks
- Scissors
- Pencil
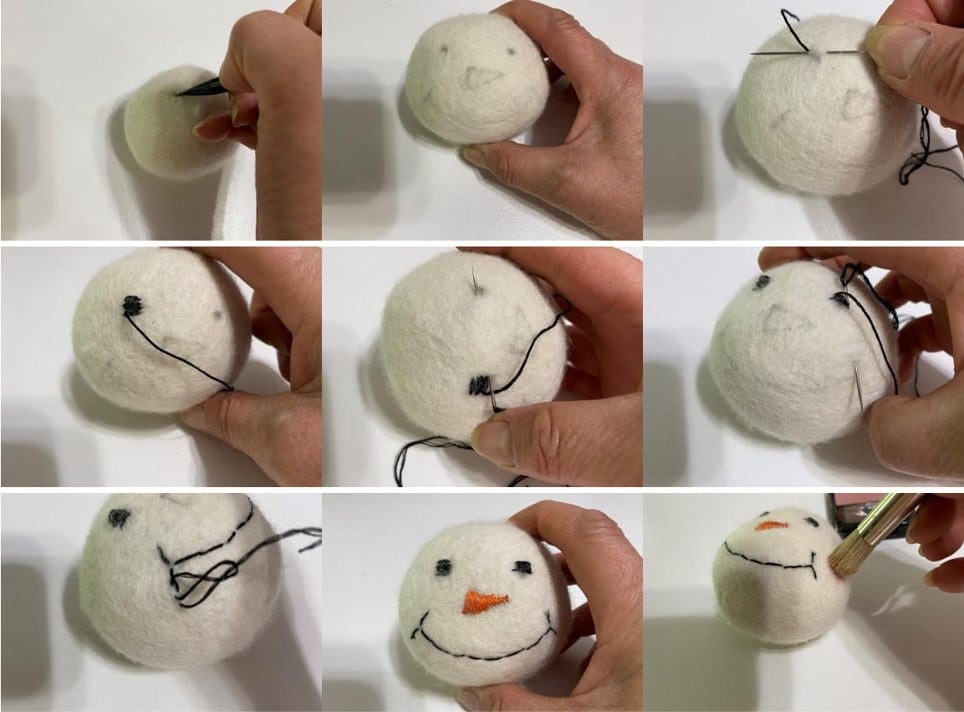
Creating the face
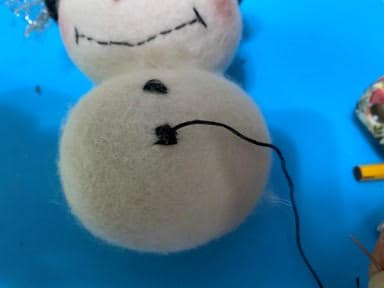
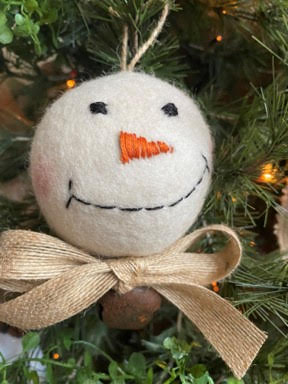
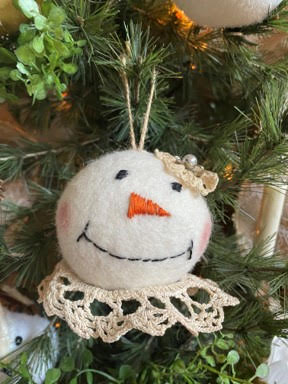
To create the face on your wool dryer ball you are going to use a pencil to first lightly draw on the face you would like, you can use the one I did as in the photo’s or you can make your own. After you have drawn on your face take three strands of black embroidery thread and thread your needle then tie a knot at one end next start stitching one of the eyes it is just like sewing you are going to keep going back and forth when you are done with one eye insert your needle at the end of the eye and bring the needle back up at the top of the other eye, I find this much easier then tying a knot and ending the eye then restarting on the other eye. Once you have the second eye done insert you needle again at the end of the eye and this time come back up at the end of the mouth, after you have finished stitching on your mouth end by tying a knot and cutting off the excess thread. Next take three strands of orange embroidery floss and stitch on your nose ending with a knot. Once you have embroidered the face onto your wool ball next take some blush and brush on at both ends of his mouth for rosy checks..
Making the Snowman Head Ornament
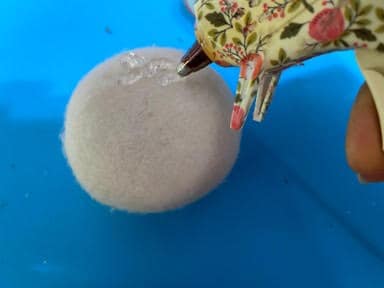
Now that you have your snowman faced embroidered on you can just add a twine or jute hanger to him buy threading a piece of twine through the top of his head and tying the ends into a knot or you can also give him a bow under his neck and a rusty bell. If you would like to add a snowman hat, (you can find the directions and pattern for the snowman hat on my blog called DIY Small Felt Snowman Hat), to attach the snowman hat just add some hot glue to the bottom of the hat and glue to the top of the snowman head then add your hanger to the top of the hat. If you would like to make a snow girl I added some hot glue to a small doily then glued to the bottom of the her head next I took a tiny doily added a little hot glue then attached to the top side of her head and then glued a small bling button on top, these are just a few suggestions you make them your own.

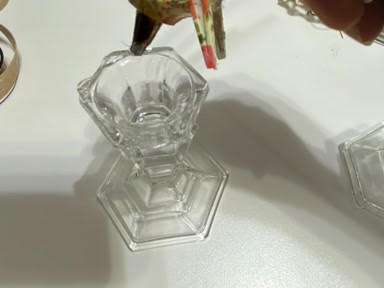
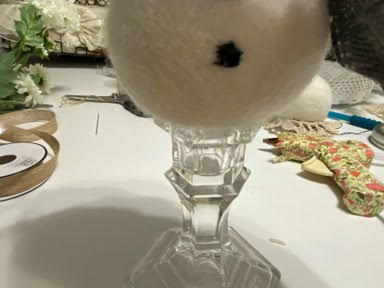
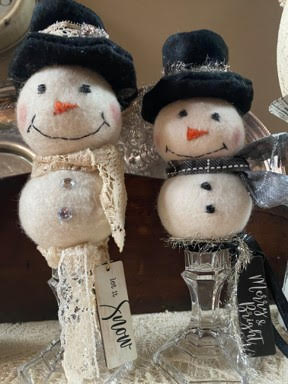
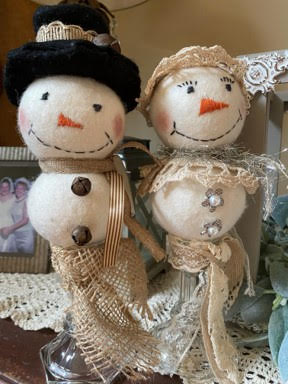
Making The Snowman On A Candlestick
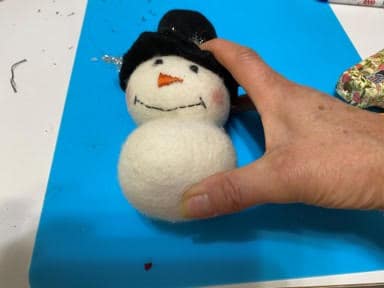
After you have completed steps one and two, (do not add the hanger as in step two because we are making a whole snowman and attaching him to a candlestick), take another wool dryer ball add some hot glue to the middle center on top and glue to the bottom of your snowman head. For the next step you can add buttons down the front or I used black embroidery thread and embroidered small black circles to look like buttons that is up to you and if you would like to make her a snow girl you might want to glue some little gems down the front. To attach your snowman to the candlestick add hot glue to the top of the candlestick and attach your snowman or snow girl. Now it is time for the fun part adding ribbons or strips of fabric for the scarf and I also added some around the base of the snowman. If you would like to make the snow girl hat I have shown in the photo’s below take a small doily add some hot glue in the middle and glue to the top of her head next take another small doily then using a needle and thread do a running stitch around the middle of the doily add a small piece of poly fiber fill in the center and lightly pull your thread tight make a knot and trim off excess thread, add a little hot glue and glue in the middle of the first doily. You can also add lashes to your snow girl by embroidering them on with black embroidery thread. Let your imagination run wild on creating your snowman or snow girl.
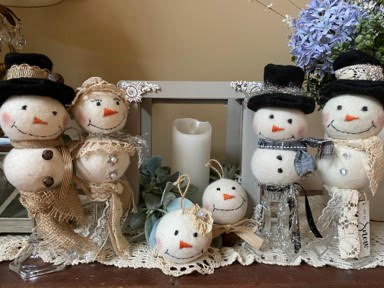
I hope you think these snowmen are as adorable as I do and give them a try they really are so simple to make.
Love these! made 1 today. Thank you