Christmas, Home Decor, Ornaments
Snowman Bag Ornament
Aug
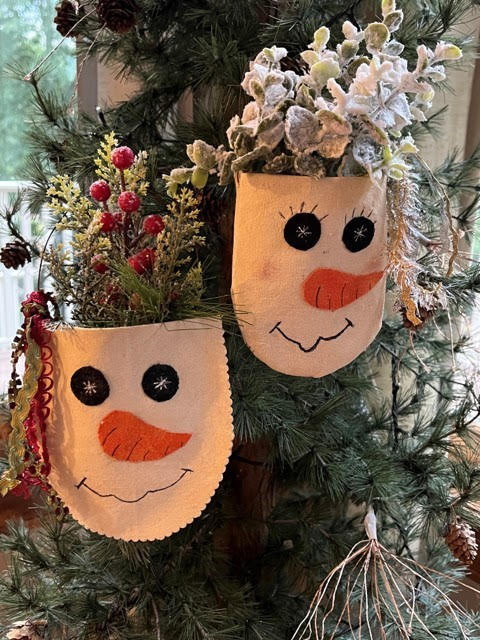
Summer is coming to an end so quickly so it is time to start crafting for Christmas! I had made a Jack O Lantern Bag ornament for Fall and Halloween so I thought I would make a snowman ornament bag for Winter and Christmas. I think they came out so cute. The snowman would make great little gifts for Christmas and you can also use them for your table setting to place the silverware in.
Materials You Will Need
- Snowman Bag Ornament Pattern
- Painters drop cloth or fabric of choice
- Craft paint in the colors ivory, orange, black, and white
- Fine grit sandpaper
- 20 gauge rusty wire
- Sewing Machine
- Hot glue gun and glue sticks
- Fine tip black sharpie marker
- Scissors
- Pinking Shears if you are gluing together the snowman bag
- Wire cutters
- Pencil
- Toothpick
- Christmas greenery of choice
- Ribbons of choice
- Blush and a Q-tip
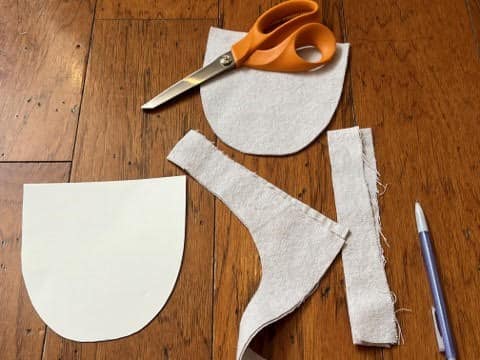
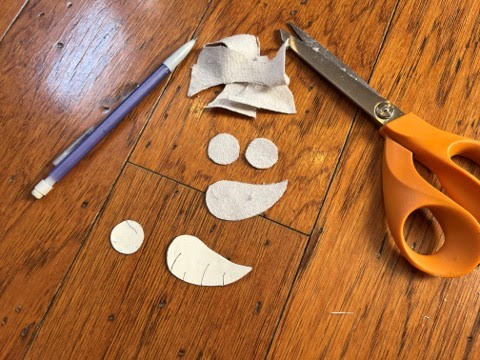
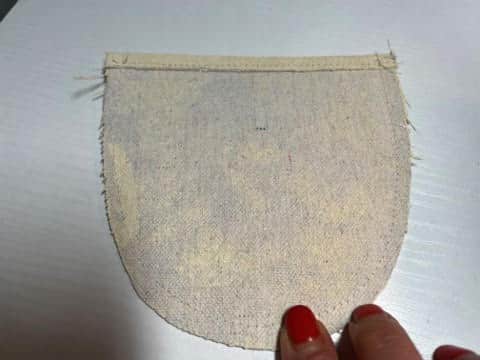
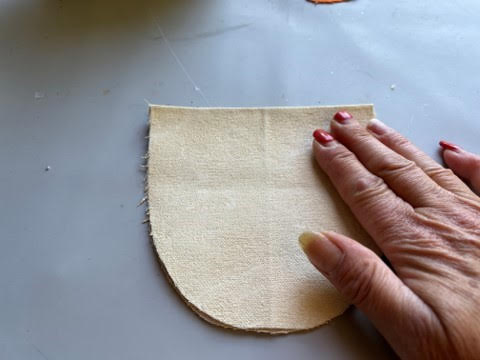
Tracing & Cutting Out The Pieces
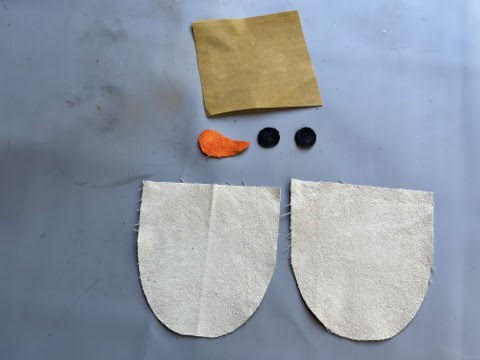
The first thing you will need to do is print and cut out the pattern pieces. On a double layer of painters drop cloth using a pencil trace and cut out the bag on the trace line. Next trace and cut out 2 eyes and 1 carrot nose (cut them out on the trace lines).

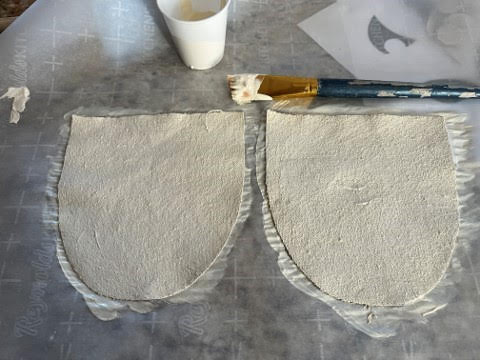
Painting & Sanding
Separate the bag pieces then paint one side of each bag piece ivory. Next paint the eyes black and the carrot nose orange. Let dry, they will dry quick if you put them out in the sun. After the pieces have dried give them a light sanding, this will give them a worn look.

Sewing The Bag
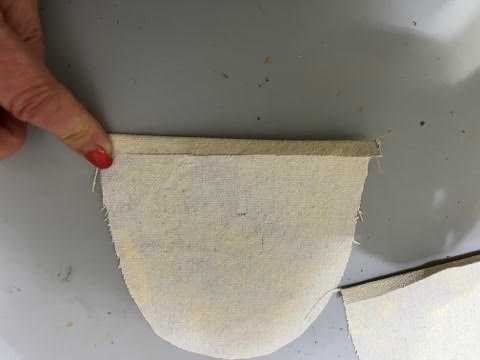
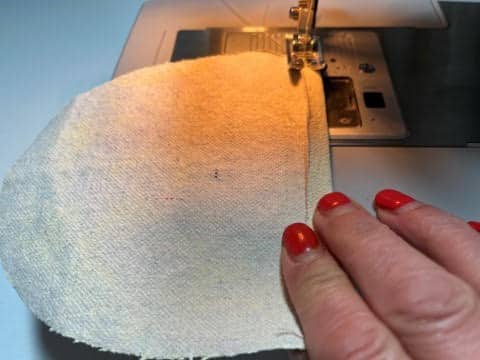
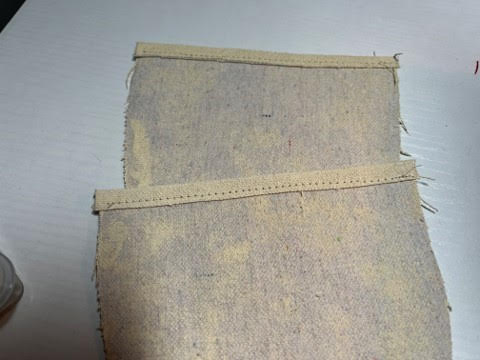
If you are sewing the Snowman Bag with the back side of the bag pieces facing up fold down the top of each bag about a ½”. To make the folds even I found it easier to fold one then place the second piece on top of the first one then fold. On a sewing machine sew each of the folds. Next put the two pieces together so the painted sides are facing in. Sew around the bag leaving the top of the bag open. Turn right side out.


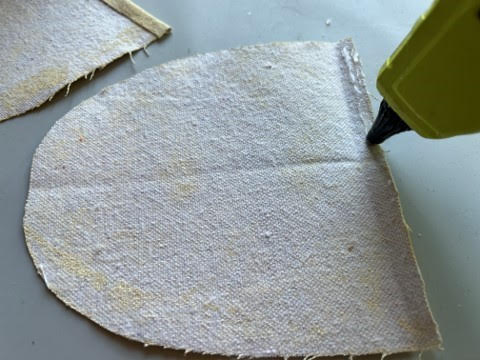
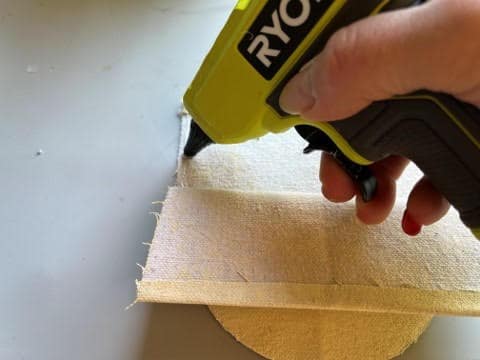
Gluing The Bag
After following the steps on cutting out the pieces and painting them you are now ready to glue the snowman bag together.
Lay down the two bag pieces with the painted sides facing down. Fold back the tops of the bag about a ½”. I found folding one bag piece top down then placing the second bag piece on top and fold down helps to make the folds even. Next take one page piece open up the fold add a line of hot glue and glue fold down. Repeat this step to the second bag piece.

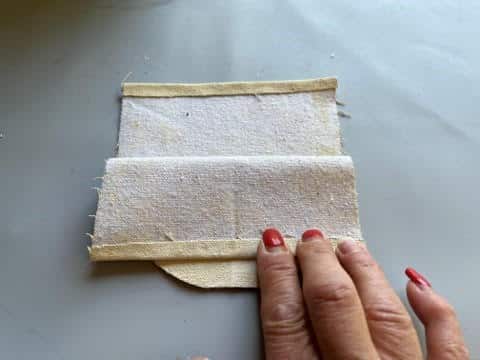
Next put the two bag pieces together with the folds facing in. Fold down the top layer half way then add a line of hot glue to each side about a ¼” in from the edge then glue down the top layer. Fold back the bottom of the top layer add a line of hot glue to the sides and bottom of the bag then glue down. You are leaving the top of the bag open.
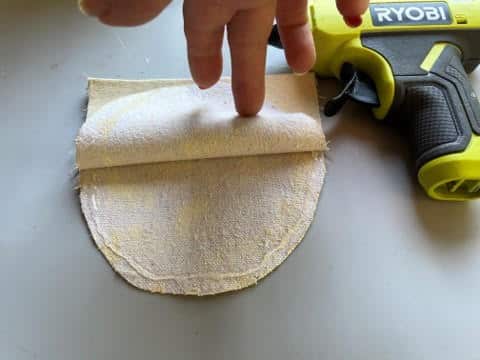
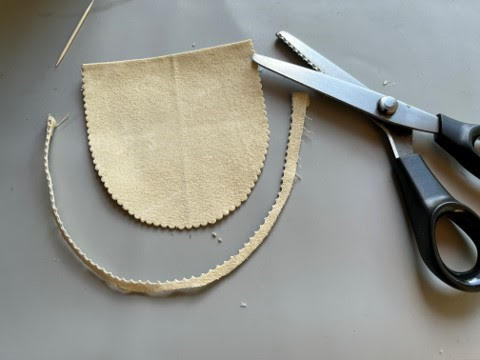
Using a pair of pinking shears trim around the sides and bottom of the bag.
Adding The Face
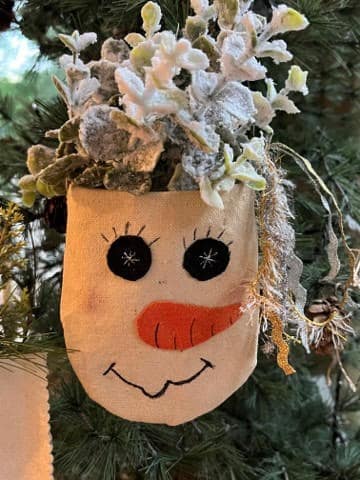
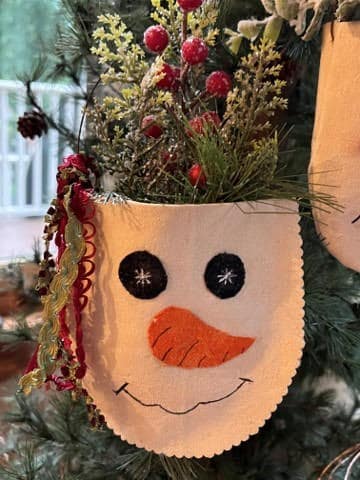
Adding the mouth, eyes, and nose is done the same way no matter if you sewed or glued the bag. Lay your face pieces onto the bag then take one piece at a time add hot glue to the back and glue back in place.
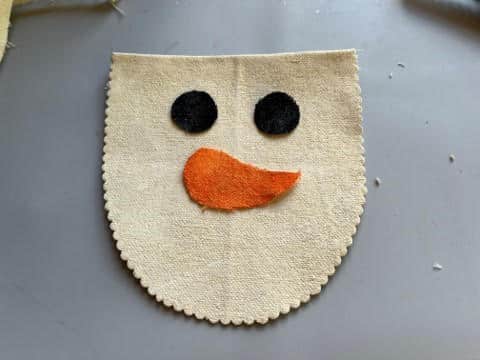
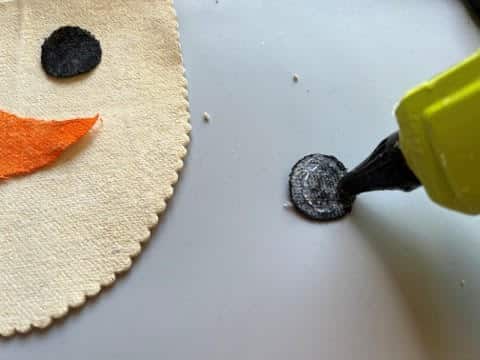
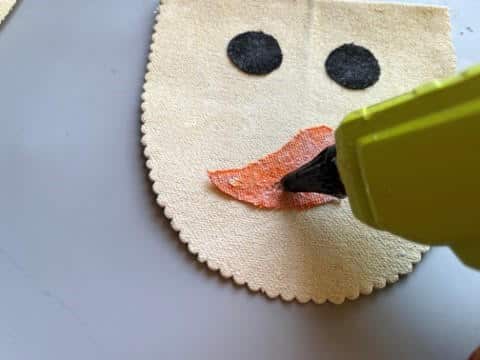
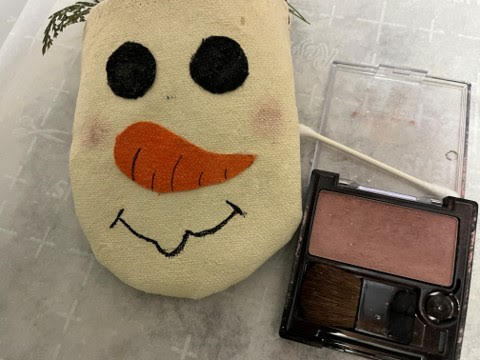
Using a fine tip sharpie marker draw lines on the carrot nose as show in the photo below. Next use the sharpie to draw on the snowman mouth of your choice.
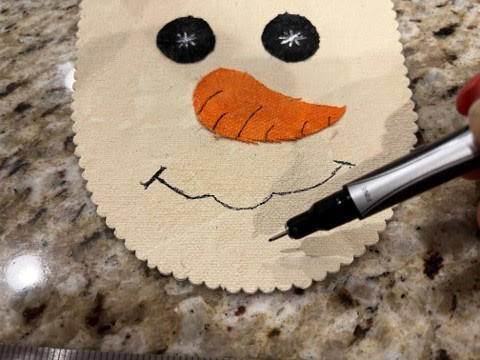
Next dip the tip of a toothpick into white craft paint and make a small snowflake in the middle of each eye. If you would like your snowman bag to look like a girl snowman use the sharpie to draw on some eyelashes.
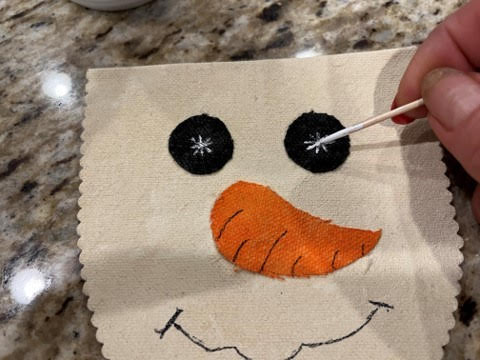
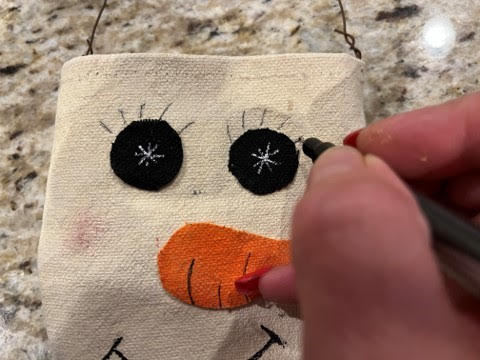
Rub one end of a Q-tip into the blush then apply to the snowman face, this will give him rosy cheeks.\
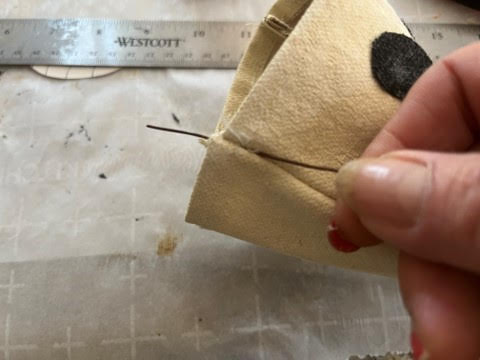
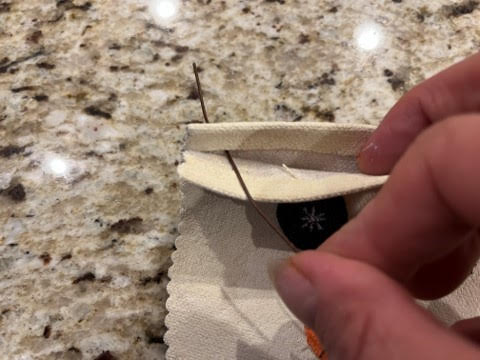
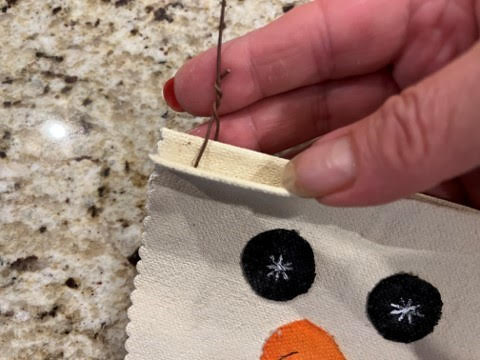
Adding The Wire Hanger
Measure and cut a 13” piece of the 20 gauge rusty wire. If you sewed the bag insert one end of the wire into one side of the bag just below the fold and in-between the side seam, bring the end of the wire up the inside of the bag and twist the end around the wire. Next bring the other end of the wire over to the other side of the bag and repeat steps.
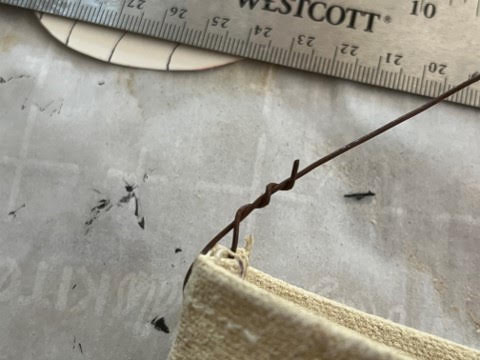
If you glued your page cut a 13” piece of 20 gauge rusty wire insert one end of the wire through the back of one side just under the fold bring up in the bag and twist the end around the wire. Next bring the other end of the wire over to the other side of the bag and repeat the steps.
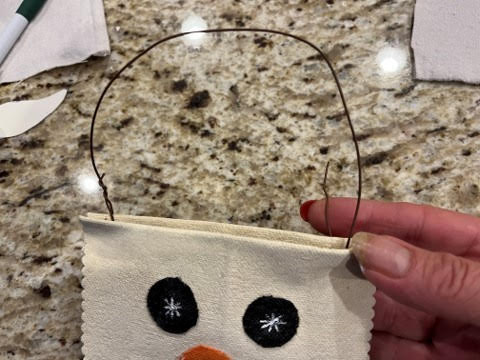
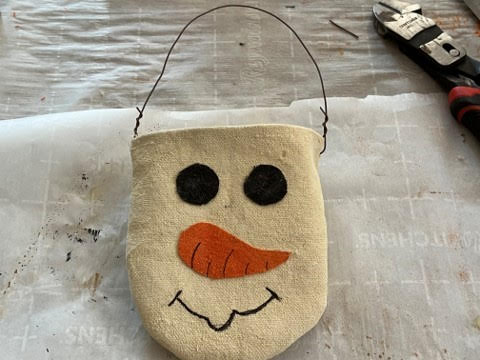
Fill your snowman pocket ornament with greenery or florals of your choice. Cut a few pieces of ribbon and tie around the wire hanger on one side. Hang it on your tree, add to a garland, or wreath.
I just love you and your family. I love love your DIY’S you are so fun to watch. I don’t have a website yet. I love to craft and make beautiful items with vintage pieces I do everything. It’s in my dna mother grandmother aunts. Thanks
I did this backwards that’s how I roll these days. I absolutely love the snowman I going to make some for next year. Or presents for Christmas