Home Decor, Spring
Wood Beaded Mushroom Garland
Apr
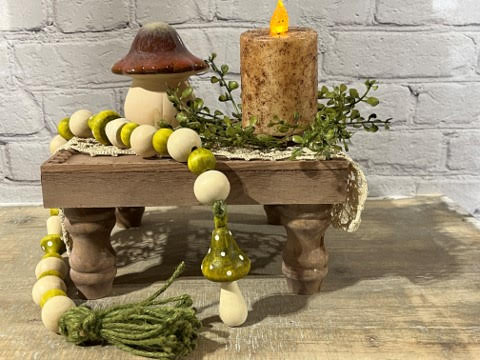
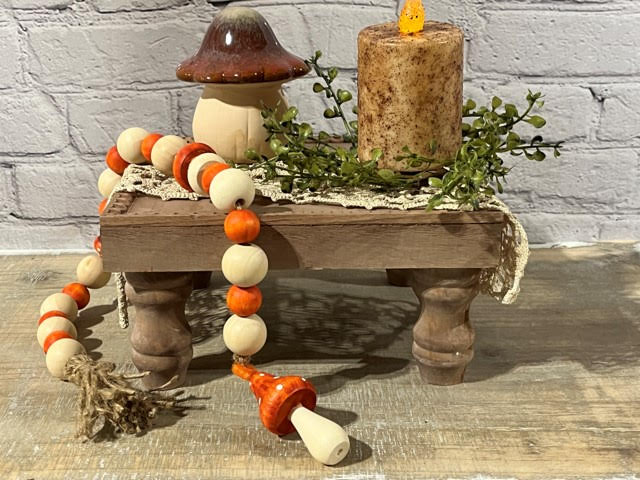
Mushrooms seem to be the one of items of choice for decorating for summer this year. When I was shopping in Hobby Lobby I came across a package of wooden bead mushrooms in the Jewelry making department I guess they are supposed to be used in making jewelry but as soon as I seen them I knew I wanted to make a wooden beaded garland out of them and I think it just turned out so cute. I made my garland to display on my risers and tiered tray but you could certainly make a long garland to use on a mantle.
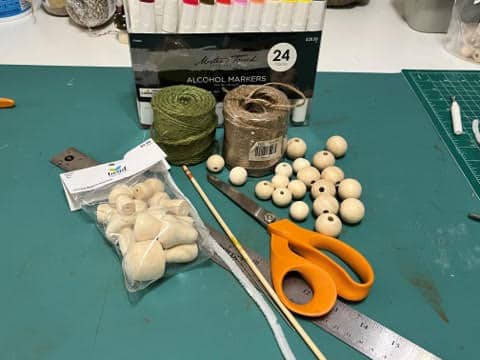
Materials I Used:
- Wood bead mushrooms from Hobby Lobby, Item #2265445
- Ten 1” wooden beads
- Nine ¾” wooden beads
- Master Touch Alcohol markers from Hobby Lobby but you can certainly use any craft paints in your choice of colors.
- White craft paint
- Paintbrush
- Jute twine and a large eye needle to thread your jute through
- Painters tape or masking tape
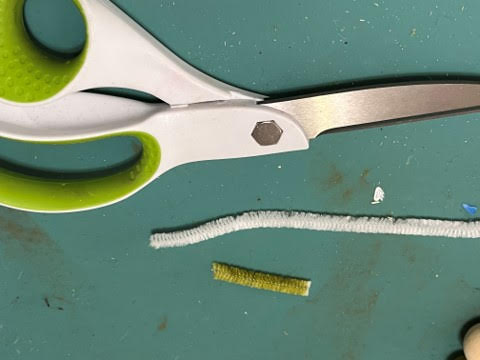
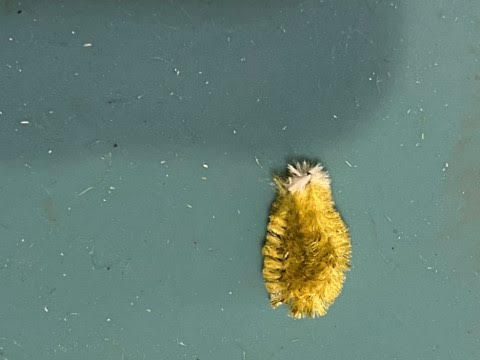
- White pipe cleaner
- Pencil
- Scissors
- Wood Skewers
- Hot glue gun and glue sticks
- Ruler
Painting The Mushrooms and Wood Beads
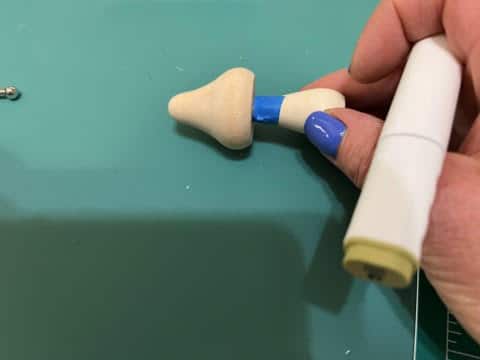
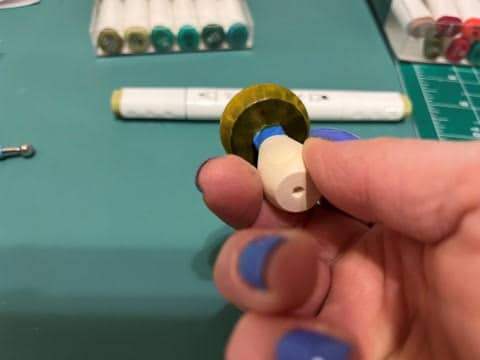
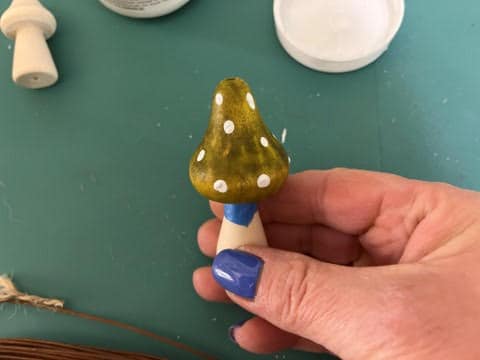
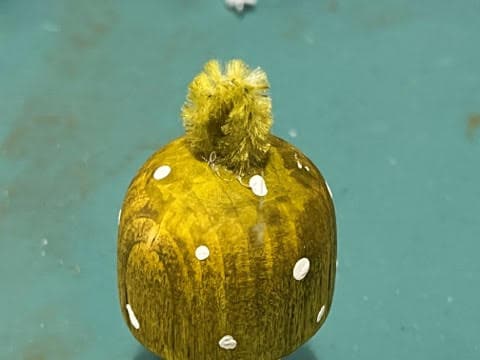
The first thing is to decide which shape mushroom you are going to use then gather the three sizes in that mushroom. Next cut small pieces of painters tape and wrap them around the top of the mushroom stems. You are going to paint the bottom of the mushroom caps and you don’t want to get the paint on the stem. To paint my mushrooms and wood beads I used Master Touch alcohol markers from Hobby Lobby you can use any craft paint in the color choices you would like I just liked the look of the alcohol markers. Paint the three mushroom caps, don’t forget the underneath let dry.
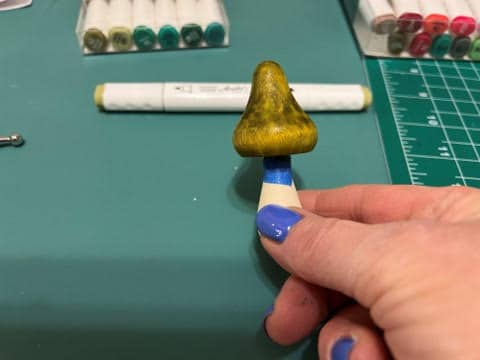
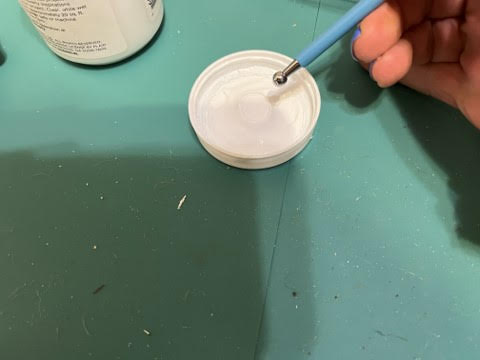
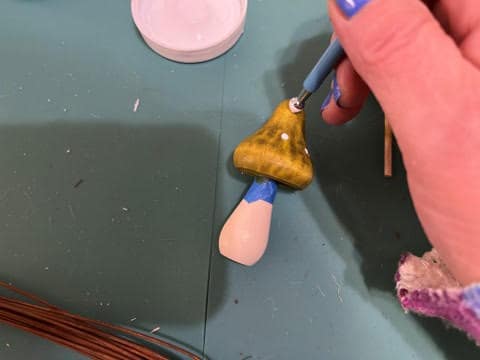
Once they are dry remove the tape. To add the dots dip the tip of the end of the handle on a paintbrush into white craft paint and dab onto the mushroom cap, repeat until you achieve your desired look. I used a ball styluses to add my white dots to my mushrooms.
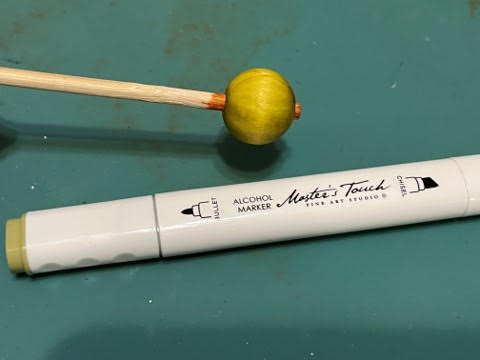
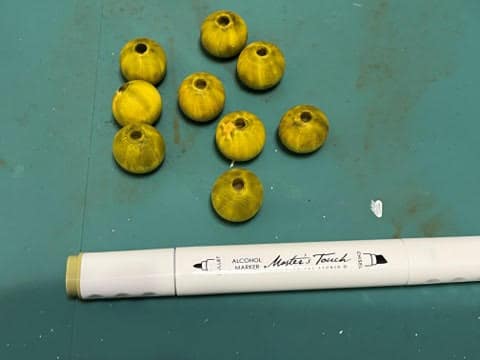
For the wooden beads I leave the ten 1” beads natural I do not paint them. To paint the ¾” wooden beads I found it easier to place a bead on the end of a wooden sewer then paint the bead. Paint all nine wooden beads. If you are using the alcohol markers they dry very fast but if you are using craft paint you can pleaandse your skewers into a tall container to let the beads dry.
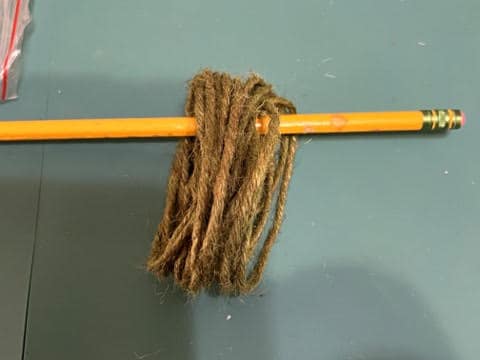
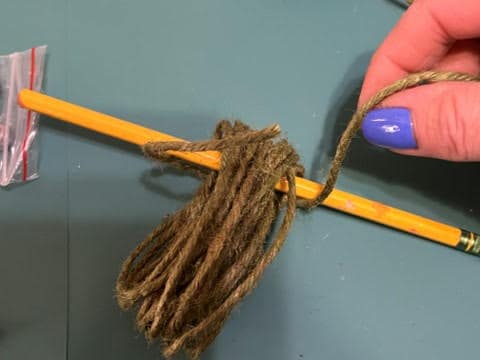
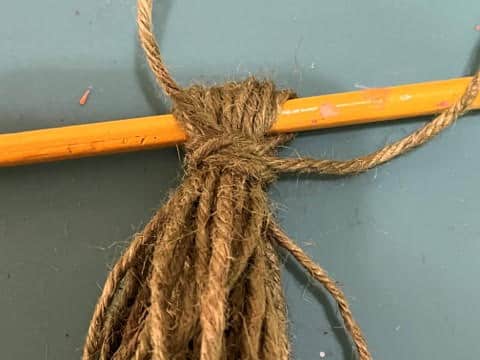
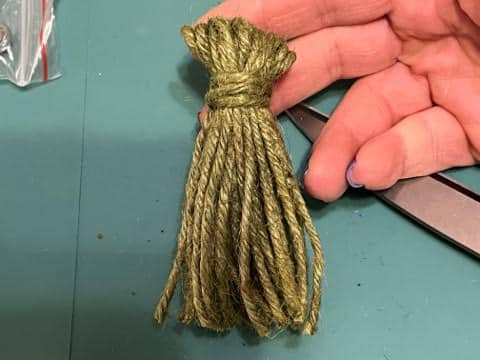
Making the Tassel
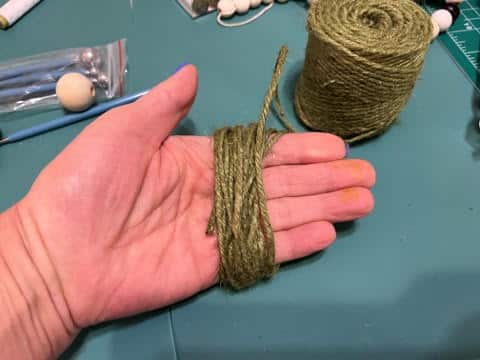
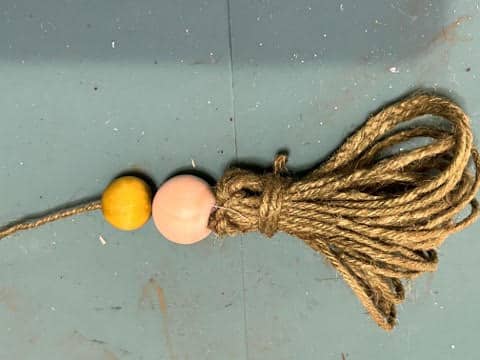
To make the tassel wrap the jute twine around your hand about 20 times. The thicker the twine the less times you will wrap around your hand. Once you have wrapped the twine around cut the twine from the roll then carefully slide off your hand and place a pencil in-between at the top then wrap jute around 2 times tie a double knot and trim off excess. Using scissors cut the bottom loop of the twine to make the tassel you may want to trim all the pieces of jute so it looks even.

Making the Garland
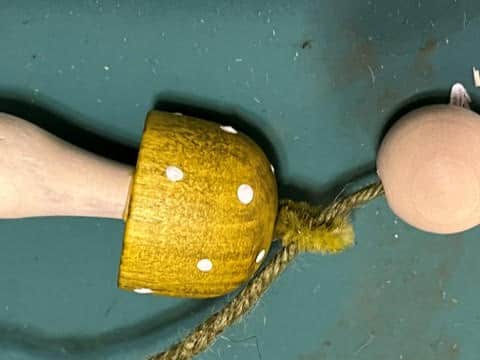
Cut about a 1 ½” piece of the white pipe cleaner and paint to match the top of your mushroom. Let dry. Bend the pipe cleaner in half pinch the ends together. Add a little hot glue into the top hole of the largest mushroom and glue in the pipe cleaner.

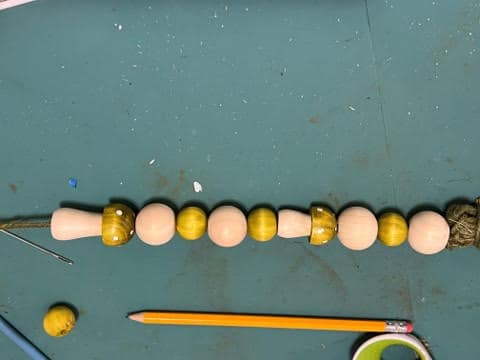
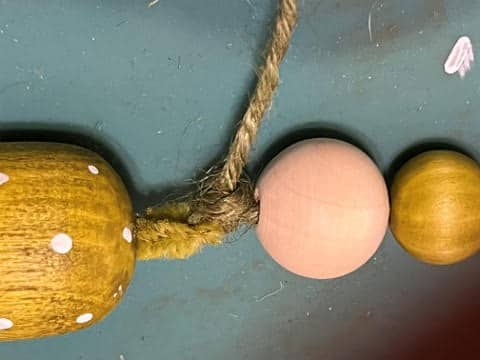
To assemble the beaded garland start by cutting a 32” piece of jute twine then thread one end through your needle. Feed the needle through the loop of the tassel tie a double knot at the top of tassel trim off the excess on the end do not cut the jute that the needle is on. Start threading your wooden beads on by starting with one 1” bead then one ¾” bead then another 1” bead next add the smallest wooden mushroom on then continue with the three wood bead rotation as before then the middle size mushroom. Add another 3 beads then add the large mushroom on by threading the jute through the pipe cleaner loop of the mushroom. Tie a double knot and trim off excess.

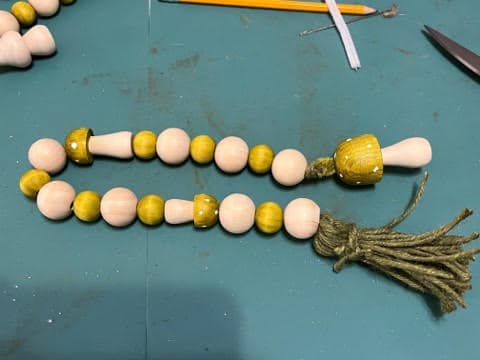
You are now finished with your wood beaded mushroom garland. I hope you enjoy using this garland in your home. I just love how you can make any color to go with your home décor. This wood beaded mushroom garland would also make a wonderful gift.