Home Decor, Ornaments, Valentines Day
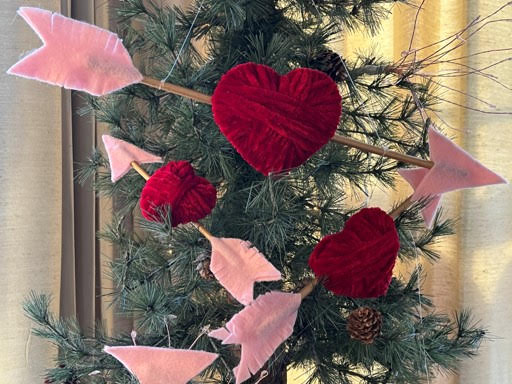
DIY Cupid Arrow
Jan
I recently made some yarn wrapped hearts for my daughter in law and I have become addicted to making them lol so I knew I needed to come up with another way to use them.
After thinking and thinking I decided to make some cupid arrow’s with some of the wrapped hearts and I just think they turned out adorable. These cupid arrow’s are so simple to make and you probably have everything you need to make them on hand in your craft supplies. I am including the pattern’s for all three sizes, I think the smallest one would be beautiful in a dough bowl with some yarn wrapped hearts.
Materials You Will Need
- Cupid Arrow Pattern
- Cardboard
- 12” Dowels
- Felt of Your Choice
- Yarn of Your Choice
- Fishing Line
- Metallic Gold Craft Paint
- Paintbrush
- Pencil
- Scissors
- Ruler
- Wire Cutters
- Hot Glue Gun and Glue Sticks
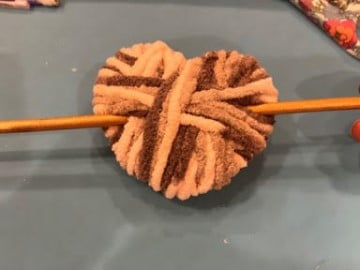
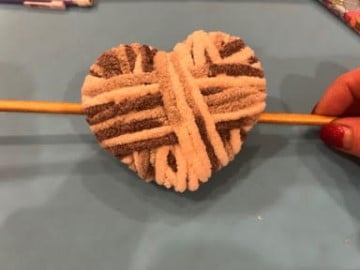
Cutting Out And Wrapping The Hearts
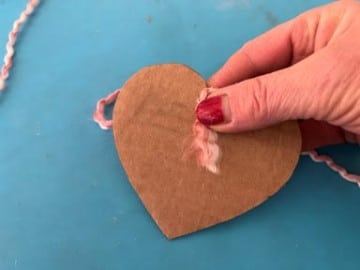
The first thing you will need to do is print and cut out the pattern pieces. You will see there are three different size hearts, arrow tips and I guess the end piece is called a fletching. Trace the size hearts you would like to make onto cardboard then cut them out with scissors. Sorry I forgot to take a photo of this step but I am sure you know how to trace the pattern and cut it out.
To wrap the hearts take the beginning of your yarn place over the top center of the heart. Hold the yarn in place with your finger then start wrapping the yarn around the heart to hold down your beginning piece.
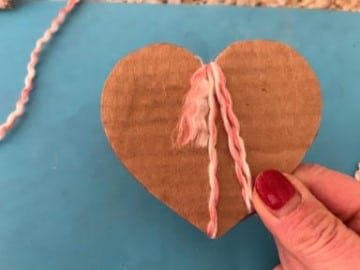
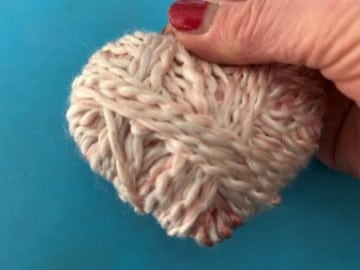
Next continue wrapping the yarn keep changing the way you wrap until the whole heart is covered and you do not see any cardboard. It doesn’t matter how you wrap just hold the yarn a little tight while you wrap so it doesn’t slip off the cardboard heart and you can’t see any cardboard. I like to wrap a little extra around so it gives the heart a fuller look.
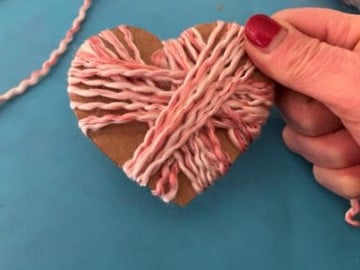
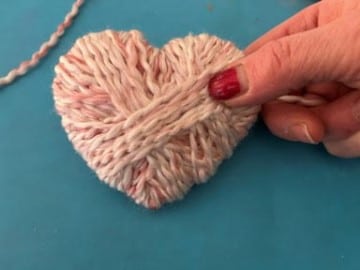
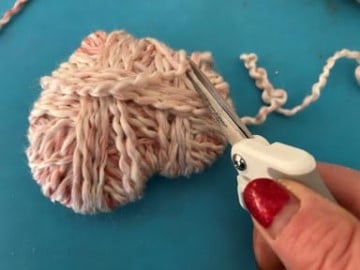
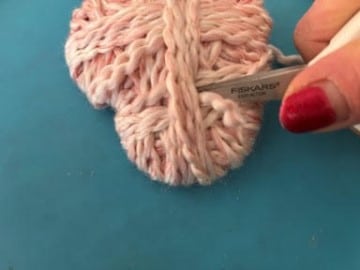
Once your heart is wrapped cut the end of the yarn and using the tip of your scissors push the end of the yarn in and under the yarn of the heart, this will hold it in place.
Cutting and Painting The Dowel
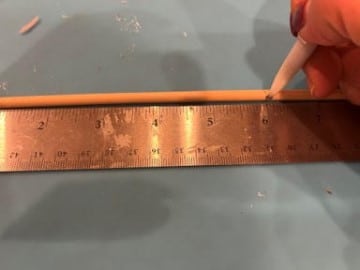
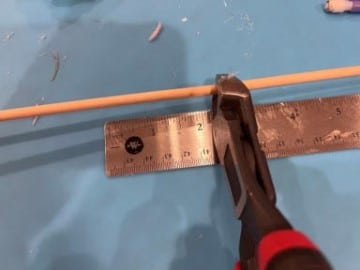
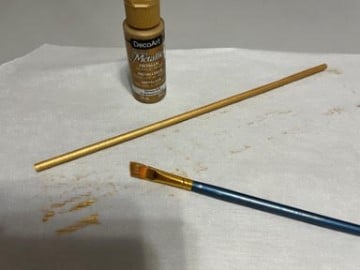
Depending on what size heart you wrapped will depend on what size dowel you will use. If you wrapped the 4” heart you are going to use the 12” dowel. If you wrapped the 3” heart you are going to need a 8” dowel so measure and mark 8” on your 12” dowel and cut with a pair of wire cutters. If you wrapped the 2.5” heart you are going to need a 6” dowel so mark 6” on the 12” dowel and cut with your wire cutters. Next paint your dowel or dowels depending how many arrow’s you are making with a metallic gold craft paint and let dry.
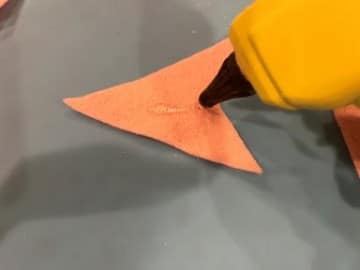
Making The Arrow and Fletching
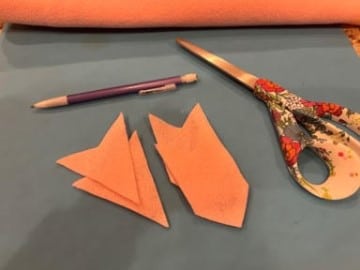
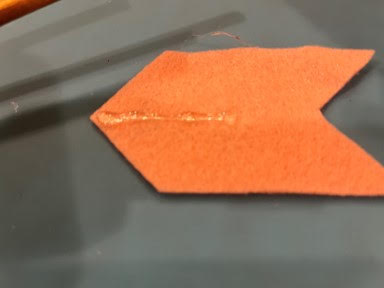
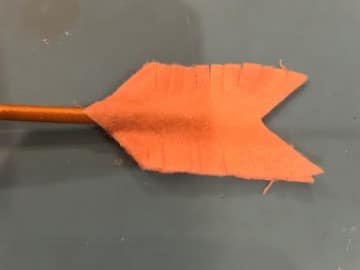
To make the arrow and fletching trace each pattern piece onto a double layer of felt and cut out.
Assembling The Cupid Arrow
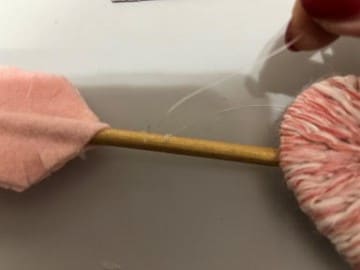
Now that your dowel is dry insert the dowel under and through the yarn on one side of the heart.
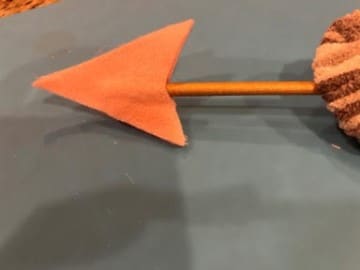
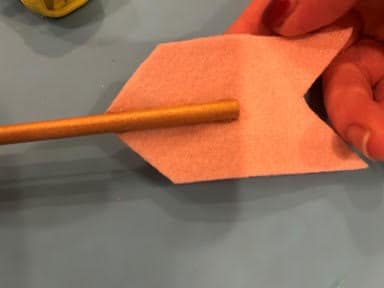
Next take your two felt arrow pieces and separate them add a small line of hot glue halfway up the arrow tip from the bottom and glue onto one end of the dowel. Next add hot glue on top of the dowel end and glue the second arrow piece on, making sure you line up the two arrow head pieces.
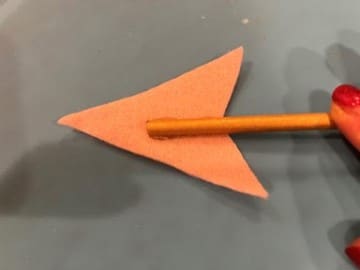
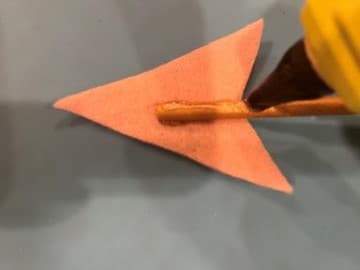
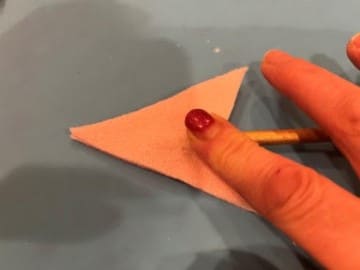
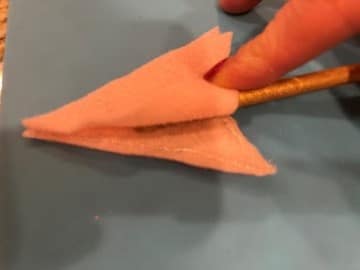
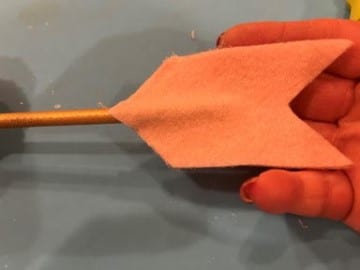
Fold back one side of the arrow head add hot glue around the edge and glue the two pieces together. Repeat this step to the other side of the arrow.
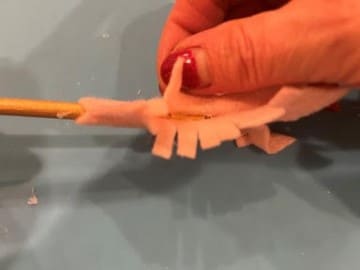
To add the fletching separate the two pieces add a small line of hot glue starting at the bottom and going half way up. Glue down the end of the dowel. Next add hot glue on top of the end of the dowel and glue the second felt piece on top of the dowel lining up the two felt fletching pieces.

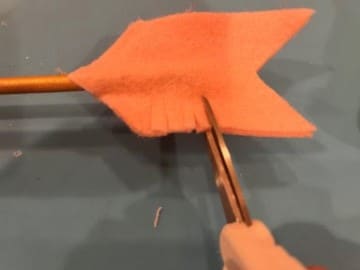
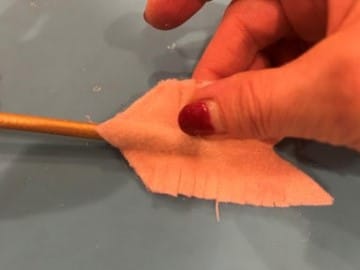
Using scissors make small cuts around both sides of fletching this will give it a feather look. In the photo’s I didn’t make cuts on the two sides by the dowel but later I decided to make feather cuts there also.
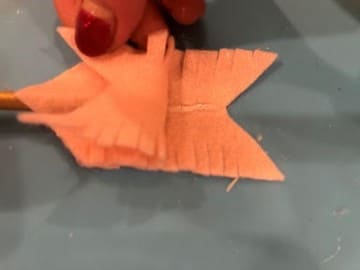
Fold back the top layer of fletching add a line of hot glue down the center and glue the two pieces together. Next fold back one side add a line of hot glue alongside the dowel then glue the two pieces together. Repeat this step of the other side.

Adding The Hanger
If you would like to use the cupid arrows to hang on your tree tie one end of fishing line to the dowel between the heart and fletching, I like to tie about two or three knots to make sure the fishing line stays tight. Next decide how big you want your hanger then cut the fishing line leaving extra to be able to tie the second end to the dowel on the other side of the heart, between the heart and the arrow.
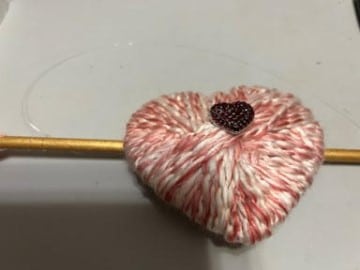
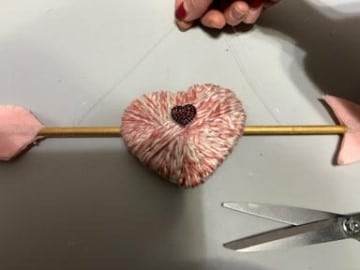
You are now finished making your cupid arrow! I hope you had fun making them. I love the 4” and 3” heart cupid arrows to use on my trees for Valentine’s Day and the 3” and 2.5” heart cupid arrows look so cute in a dough bowl with some yarn wrapped hearts. You can also add some bling to the center of the heart by just hot gluing your bling on.
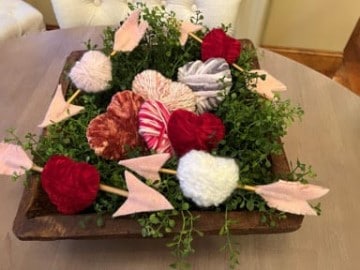

The hearts and arrows are adorable! Your arrangement in your dough bowl is so pretty! So happy I found you on Facebook!
You are so sweet thank you.
Thank you so much and I am so glad you found me also
Lovely!
I like easy peasey . I’m not a crafter but I like to do easy things. Thanks
Thank you so much
Love these Sherry, your so inspiring. Love watching your lives too.
Thank you so much
The hearts and arrows are so cute. You always have the cutest crafts. I enjoy seeing what you are making next. I enjoyed watching your daughter in law with Scarlett and Jack making the hearts they made too on her new page. You have a lovely family.
You are so sweet thank you
Love the cupid hearts with the greenery absolutely beautiful just as you are Sherry