Christmas, Home Decor, Ornaments, Winter
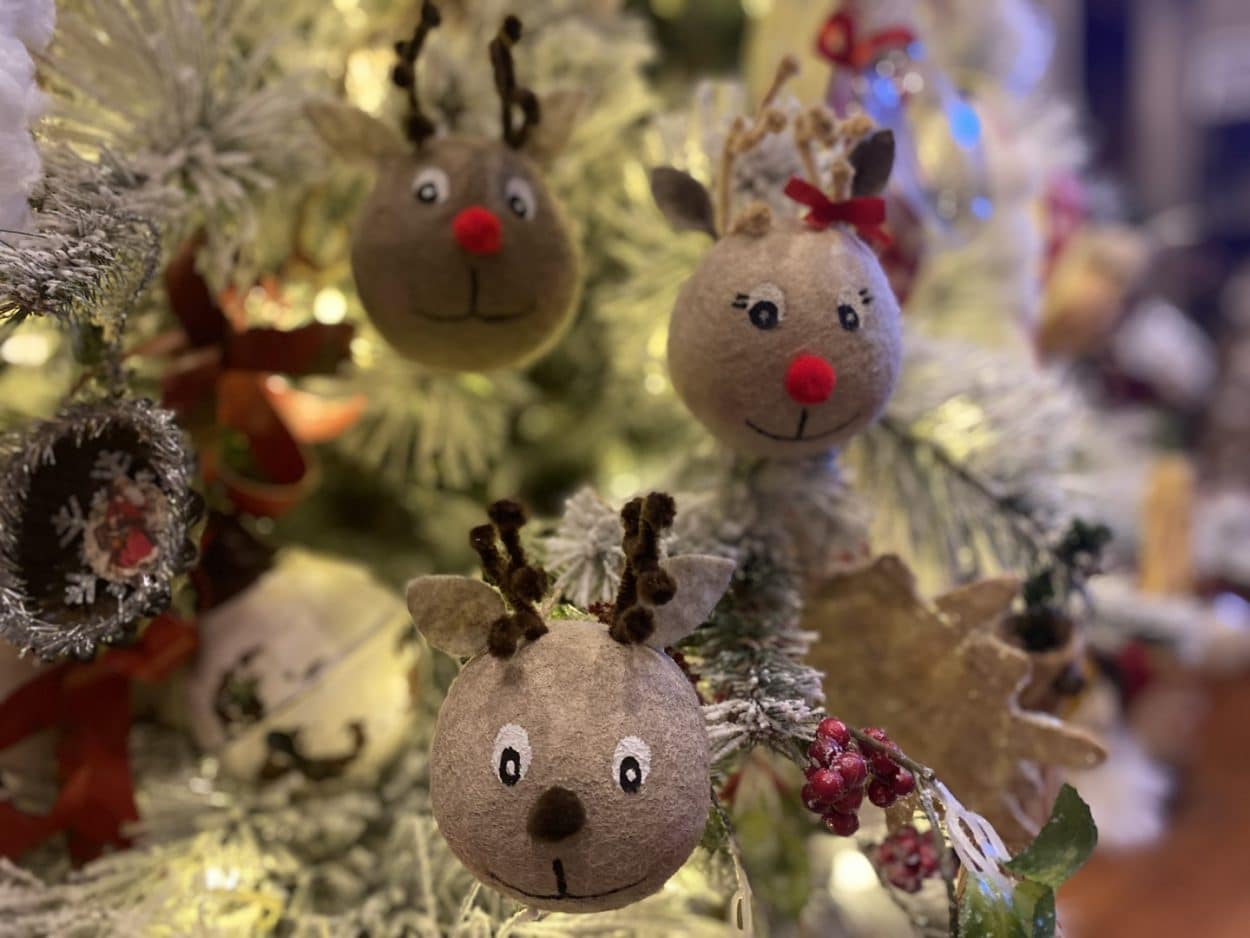
DIY Wool Ball Reindeer Ornament
Dec
I just have to tell you I can’t stop making ornaments using the Wool Dryer Balls.We have made a snowman, elf and now a reindeer out of the wool dryer ball ornaments.In the fall we made pumpkins and a wool ball garland for the fireplace.I seen the wool balls one day at Walmart and instantly seen a snowman now I can’t stop using them to make so many different things.If you want to make any of the wool ball items we have made here at The Crafty Decorator I suggest you order them from Amazon they are much cheaper then Walmart, you can find the ones I use on my recommend products page.
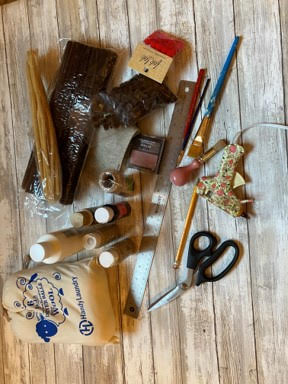
Here is a list of what you will need:
- Reindeer Ear and Eye Pattern
- Wool Dryer Balls (Amazon)
- Brown and Tan Chenille Pipe Cleaners (Hobby Lobby)
- ½” Red and Brown Pom Pom’s (Hobby Lobby)
- Folkart Craft Paint In The Colors Country Twill and Linen (Hobby Lobby)
- White and Black Craft Paint
- Brown and Tan Chenille Pipe Cleaners (Hobby Lobby)
- Piece of Felt In The Color Sandstone (Hobby Lobby)
- Blush
- Paintbrush
- Detail Paintbrush
- Pencil
- Big Nail
- Scissors
- Ruler
- Hot Glue Gun and Glue Sticks
Making the Head
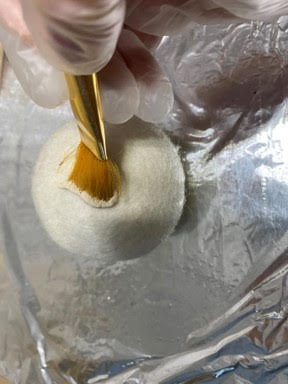
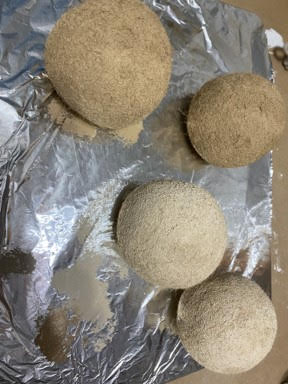
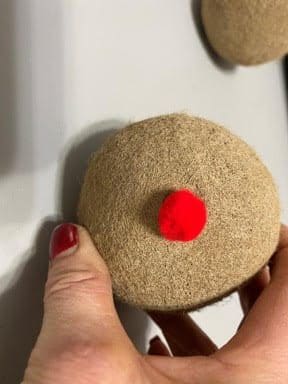
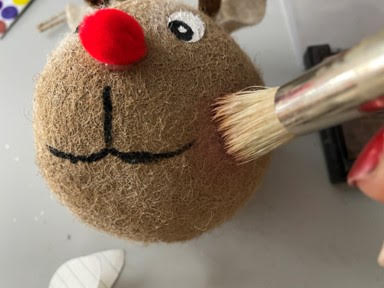
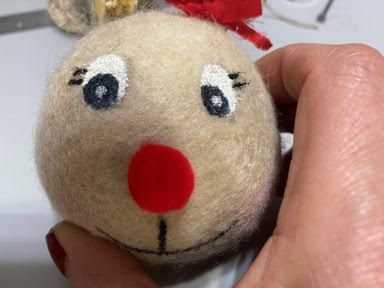
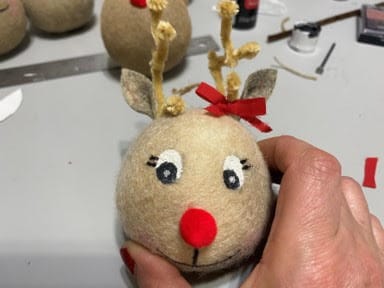
The first thing you will need to do is print and cut out the ear and eye pattern. I painted my reindeer heads in the colors country twill and linen, you can paint them in any color you would like. Paint the whole dryer ball with the color acrylic paint you choose. Set the head aside to dry or if you are impatient like me you can put them on a foil lined cookie sheet and place them in a 215 degree oven for a few minutes. Make sure you keep checking them about every 5 minutes until dry. After the head has dried place a pom pom a little more then half way down the head in the middle, if you like the placement add a small drop of hot glue and glue into place.
If you are not good at doing faces like me you can use the eye pattern and trace your eyes on lightly using a pencil. I placed the eyes a little higher then the nose. Next paint the whole eye white. You can let the eye dry on its own or you can use a hairdryer to dry it faster. After the white has dried use black craft paint to paint the iris of the eye you can either paint it in the middle or I liked the way it looked painted to the side of the eye, you can see the photo’s below for placement. Once the black has dried use white paint to paint a dot in the middle of the black iris, let dry. To make the mouth use a pencil to lightly draw a straight line down from the nose then a smile with the straight line in the center. See photo’s below. Paint the mouth with black craft paint.
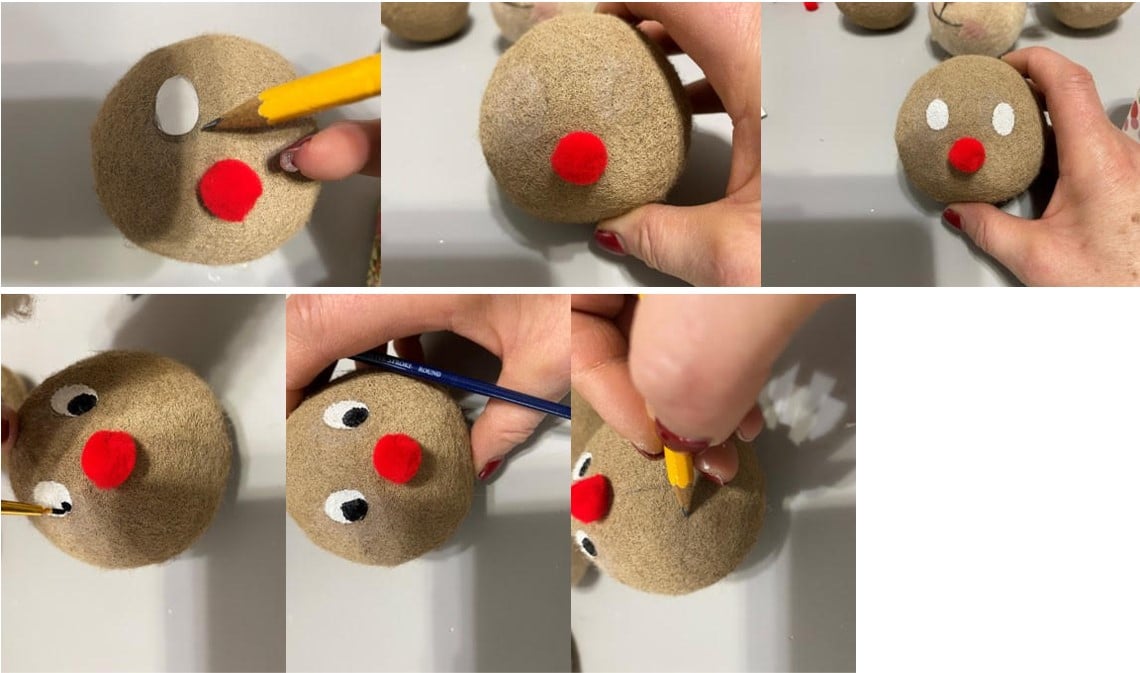
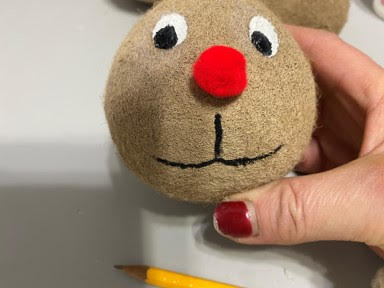
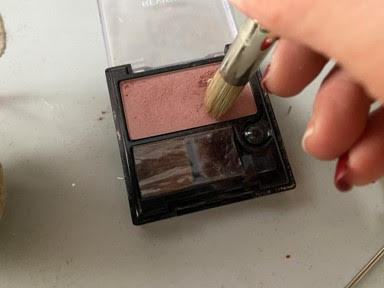
Using a stiff paintbrush add blush at each end of the mouth.
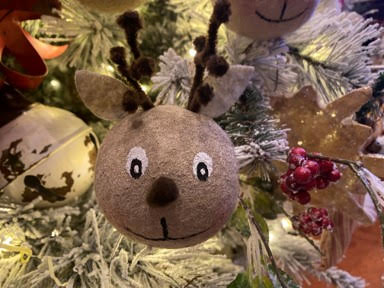
Making the Antlers
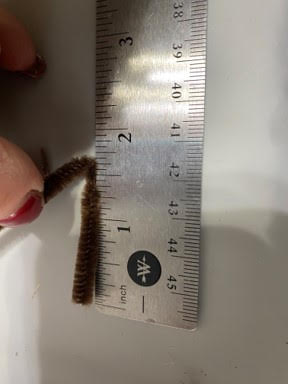
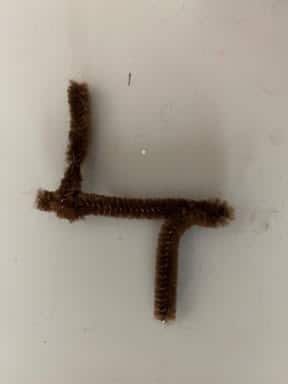
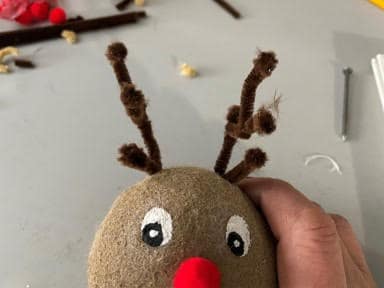
To make the antlers start by cutting two 3 ½” pieces of your pipe cleaner then cut four 1 ¾” inch pieces. Take one of the 3 ½” pipe cleaner pieces and bend one end of the pipe cleaner about 1 ¼” from the end upwards and pinch the bend closed. You are now going to add one of the 1 ¾’ pieces to the longer end of the piece we just made the bend on twist on about a ¼” or so down. See Photo’s below.
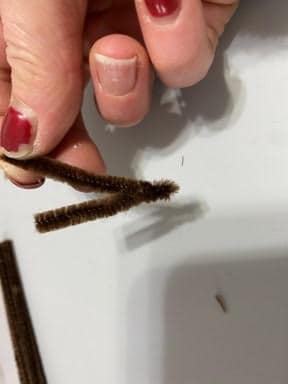
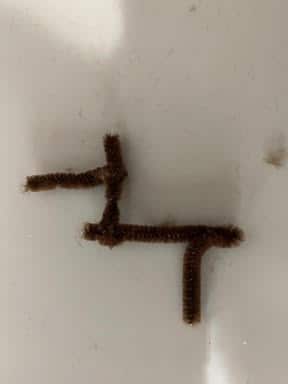
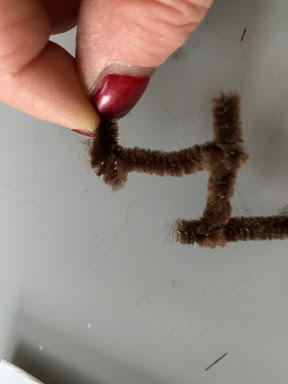
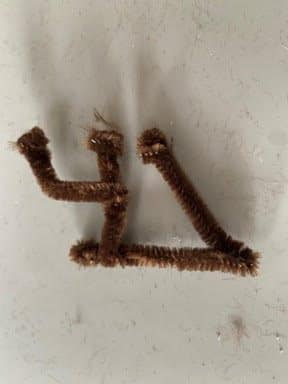
Take the second 1 ¾” piece and twist onto the center of the piece you have just added. Now you are going to take a pipe cleaner and twist it around each end of the pipe cleaners on the antler, except for the bend end, twist around 2 or 3 times and trim off excess. See the photo’s below on how your antler should look. You will need to make another antler following the same steps for the first antler.
Adding the Antlers
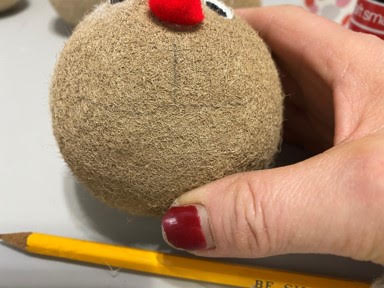
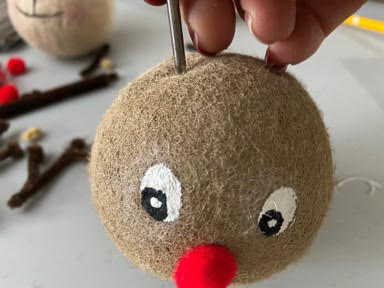
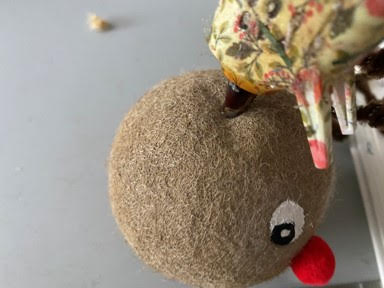
To add the antlers take a large nail and make a hole above each eye at the top middle of the head. Insert the bend part of the antlers into the holes to make sure they look right to you, if they do remove them then add a small amount of hot glue in each hole and glue the antlers in place.
Adding the Ears
Trace and cut out two ears from a single layer of felt. Add a small drop of hot glue in the bottom center of the ear and pinch together. Next add a small line of hot glue to the bottom of the ear and glue about an 1/8” away from the side of the antler repeat this step to the ear.

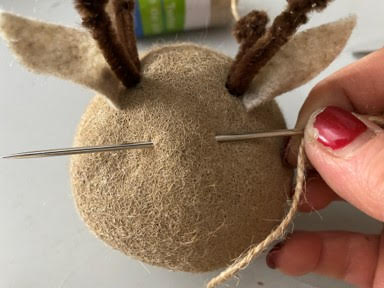
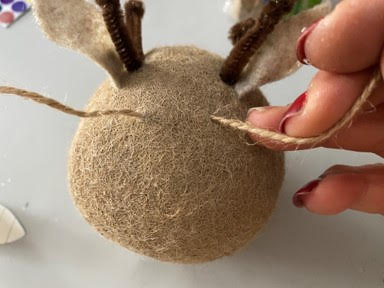
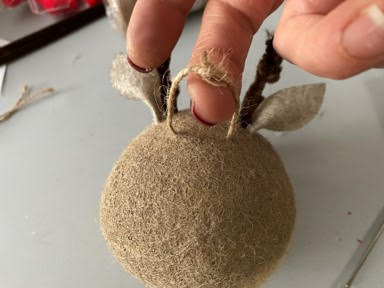
Adding the Hanger
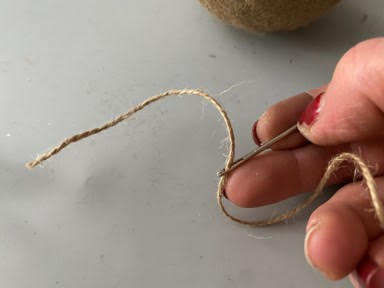
To add a hanger cut a piece of thin jute twine thread through a large eye needle. Insert the needle below the antlers at the back of the head. Pull the needle through removing from the twine. Make a loop and tie a double knot and trim off excess.
If you would like to make a little girl reindeer, I gave her the tan or camel color antlers and I also gave her two little lashes on the side of each eye. I also hot glued a cute little red bow to her antler. See the photo’s below. You will also see below the reindeer I painted in the color linen and used the brown pom pom for the nose.
Love your work. And have bought several, things to make Santa hat,elf,snowman.