Home Decor, Ornaments, Spring
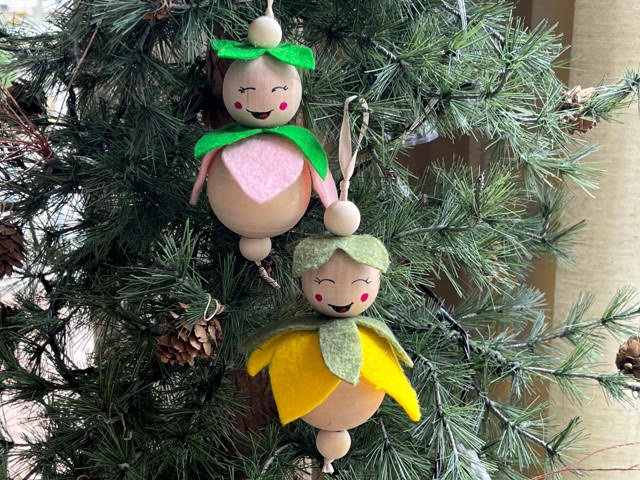
Wood Bead Garden Girl
May
They say April showers bring May flowers so I have recreated these adorable wood bead garden flower girls I seen online. You can make them as an ornament that you can add to a garland, wreath, or if you are like me and leave trees up all year you can decorate your tree with them for summer. If you would like you an also make them as a shelf sitter which I will also explain below.
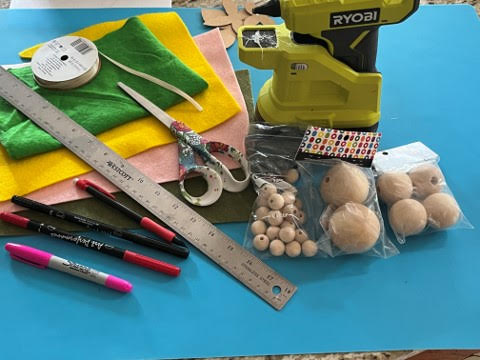
Materials you will need:
- Garden flower girl pattern
- Green felt and felt in color of your choice for petals
- 51mm wood bead (Hobby Lobby Tree house beads item #1540673)
- 38mm wood bead (Hobby Lobby Tree house beads item #1540665)
- Two 15mm wood beads
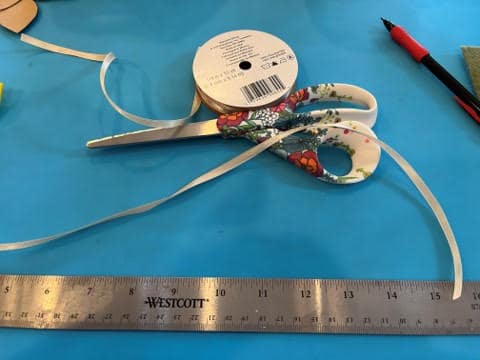
- 22” long piece of ¼” ribbon your color choice
- Ruler or measuring tape
- Scissors
- Pencil
- Hot glue gun and glue stick
- Permanent fine tip markers in the colors black, red, and pink. You can also you craft paint if you prefer
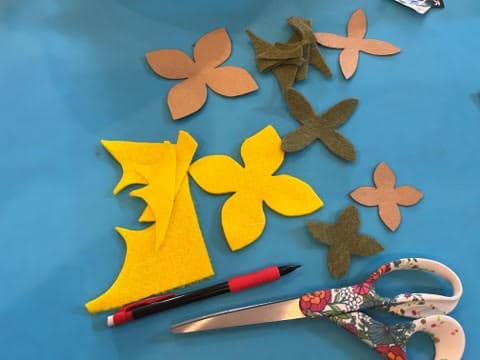
Making The Flower Petals, Leaves, & Leaf Headpiece
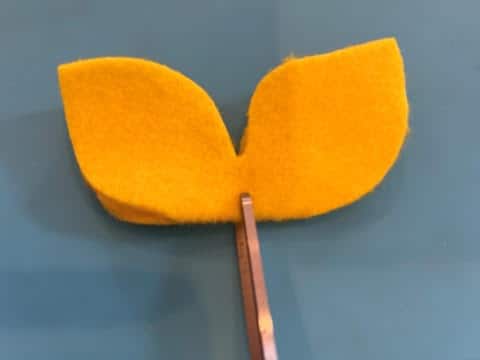
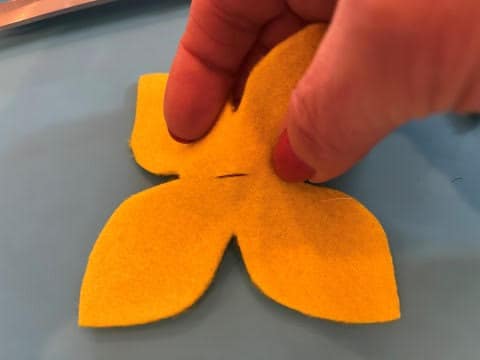
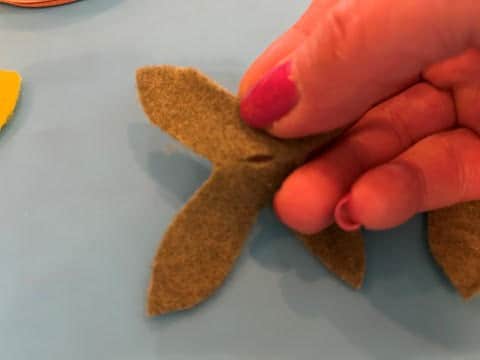
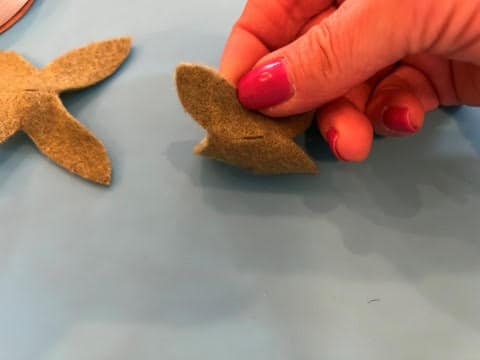
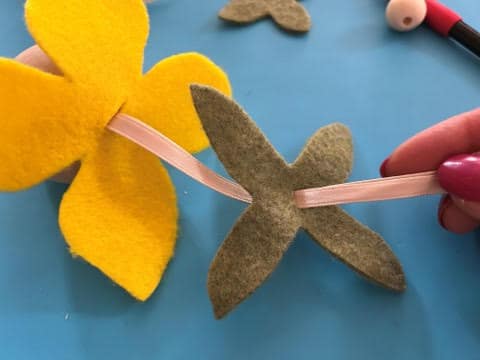
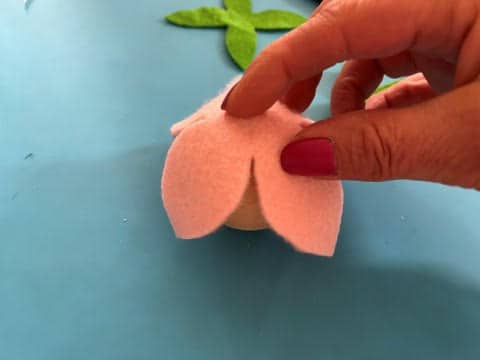
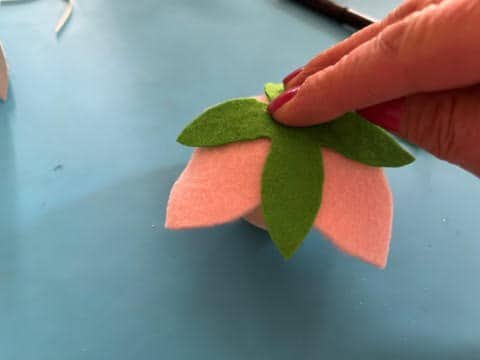
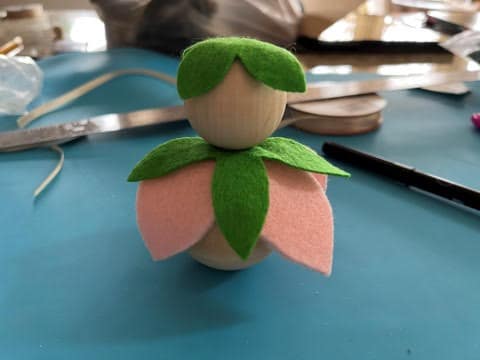
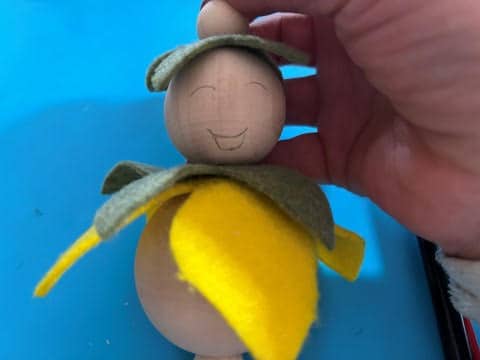
The first thing you will need to do is print and cut out your pattern pieces. On a single layer of green felt trace and cut out 1 each of the leaves and leaf headpiece. Next trace and cut out 1 flower petal from a single layer of felt in your choice of colors. After cutting out the flower petals fold it in half then using the tip of your scissors make a small cut this will give you a small opening in the center of your flower petals. Repeat this step to the leaves and the leaf headpiece. If you are making the shelf sitter garden flower girl do not make the cuts into your felt pieces.
Assembling The Hanging Wood Bead Garden Flower Girl
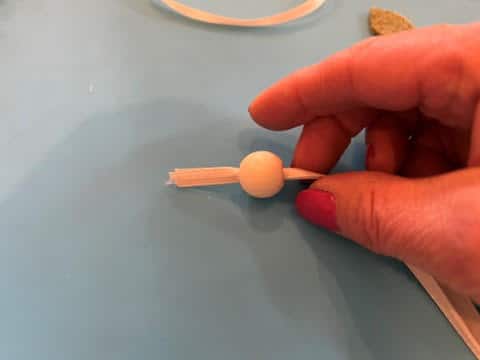
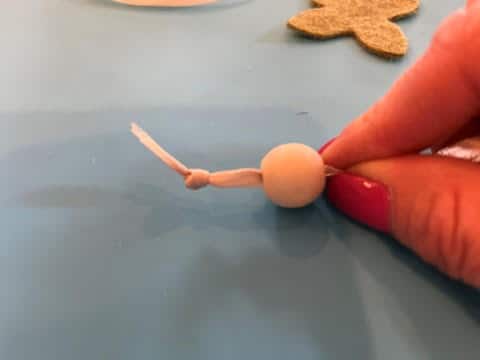
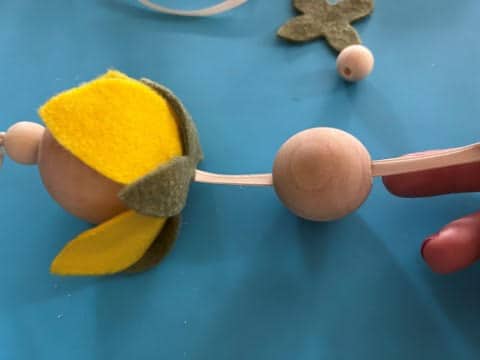
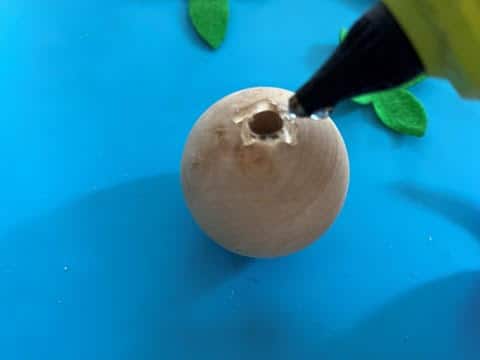
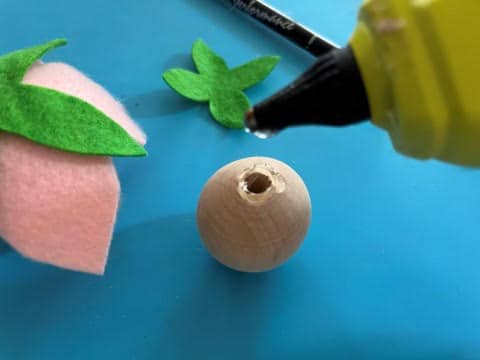
Cut a 22” long piece of your ¼” ribbon, fold in half. Slide the ends of your ribbon through one 15mm wood bead then tie a triple overhand knot at the bottom of the ribbon. Next hold the ribbon at the bottom of the bead where the knot is to one side add a drop of hot glue into the wood bead then slide down to the knot.


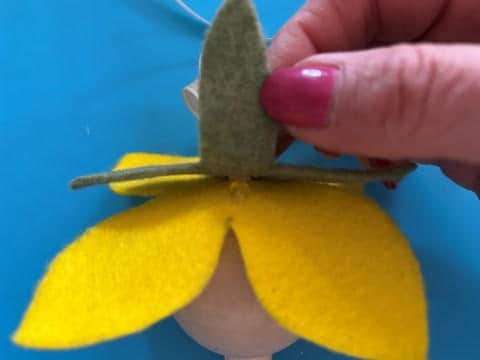
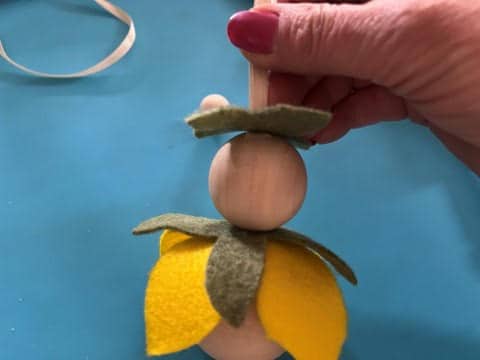
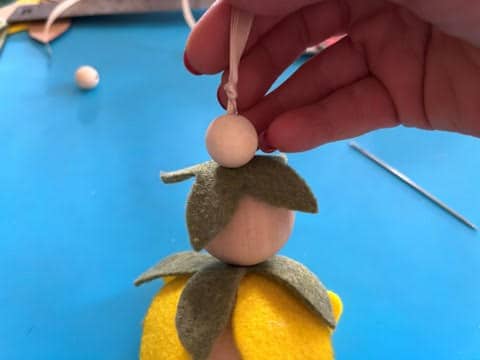
Next slide the loop part of the ribbon through a 51mm wood bead then slide the ribbon through the flower petals and the leaves.
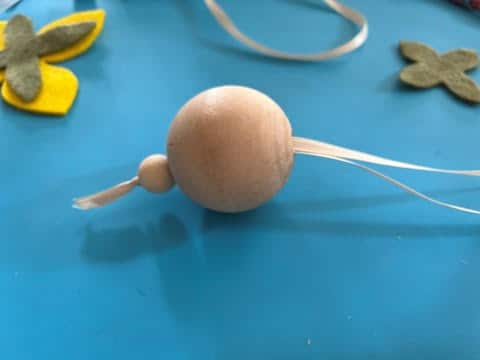
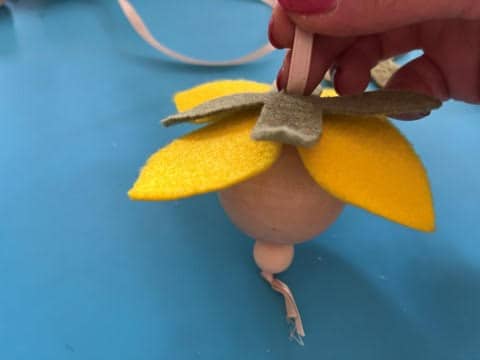
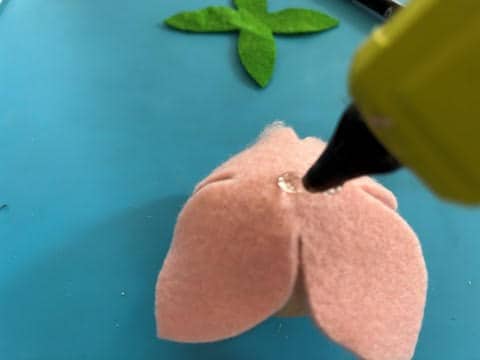
Lift up one side of the petals add a little hot glue around the top of the bead and glue down. Repeat this step to the other side. Next center the leaves between the flower petals then lift up one leaf and a small drop of hot glue towards the ribbon and glue the leaf down. Repeat this step to the leaf on the opposite side, this while hold them in place.
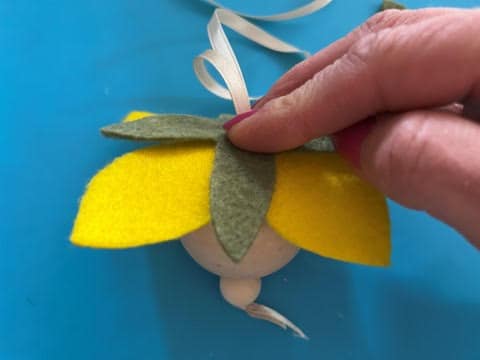
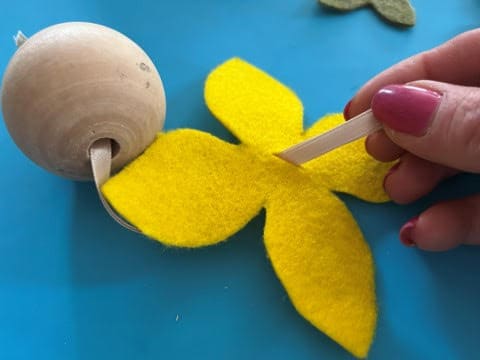
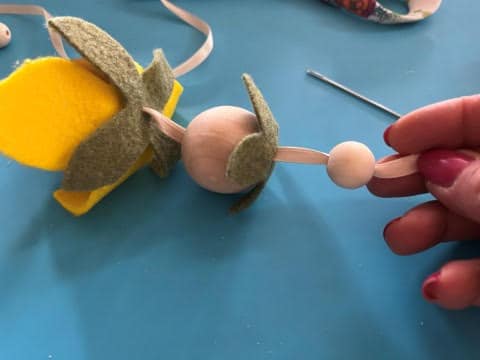
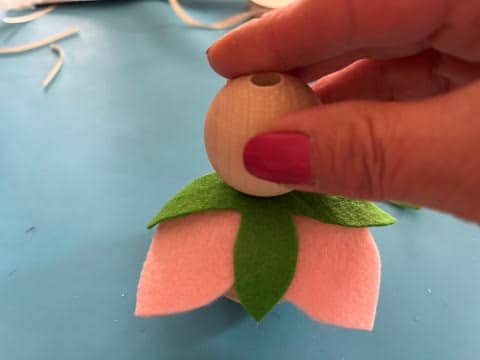
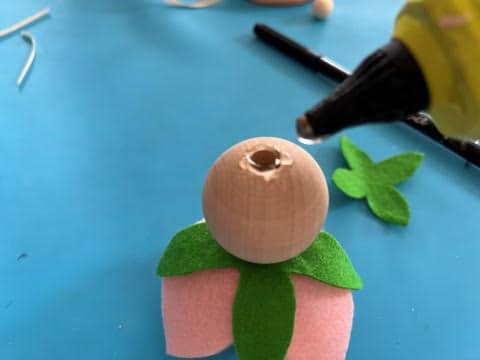
Slide the loop part of the ribbon through a 38mm wood bead then slide the ribbon through the leaf headpiece. Lift up one side of the flower headpiece add hot glue at the top of the wood bead and glue down. Repeat this step to the opposite side.
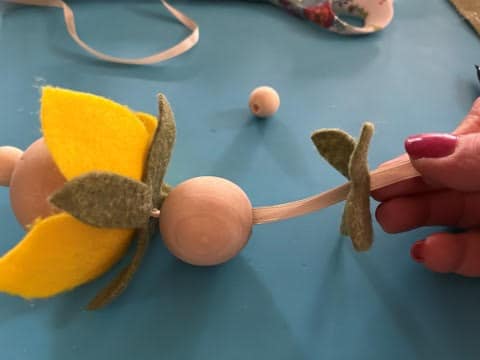

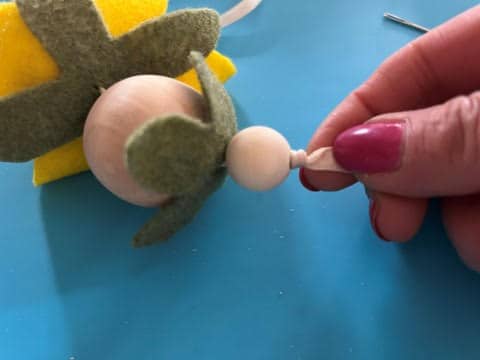
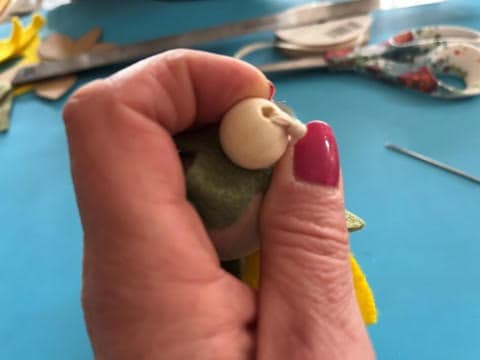
Now slide the loop part of the ribbon through a 15mm bead, if you have trouble getting the ribbon through you can push it through with a needle. Tie a triple overhand knot close to the head, if you can not get the knot close to the head as I couldn’t hold the ribbon to one side of the bead add a drop of hot glue in the bead then hold ribbon in the center of the bead. This will hold the bead in place.
Assembling The Shelf Sitter Garden Flower Girl
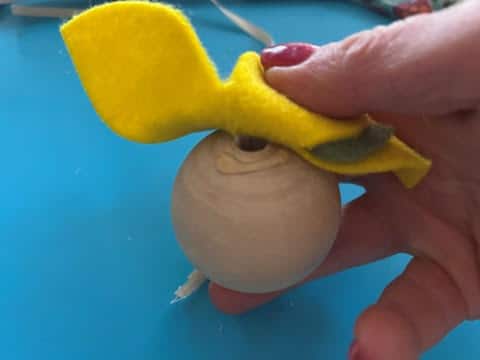
If you are making the shelf sitter wood bead garden flower girl you should have not cut the centers of your felt pieces when you traced and cut them out. To start add hot glue around the opening of one side of a 51mm wood bead then glue on your flower petals next add hot glue to the center of the flower petals then glue the leaves on top making sure the leaves are in-between the flower petals.
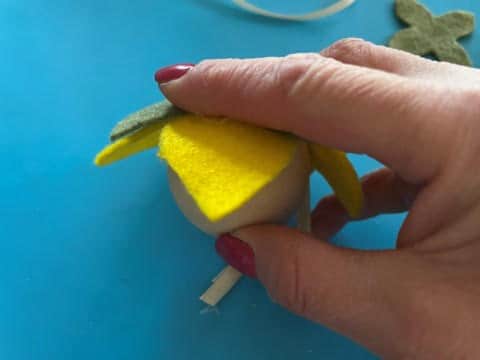
Now add hot glue around one opening of a 38mm wood bead then glue on top of the felt leaves. Next add hot glue around the opening at the top of the bead and glue on the leaf headpiece.
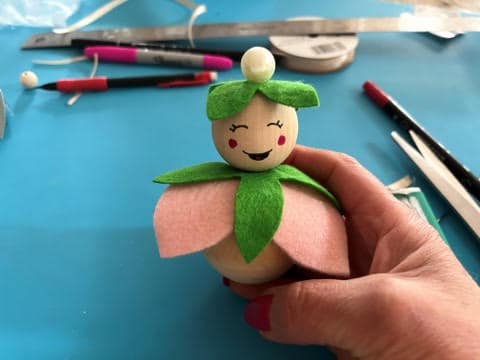
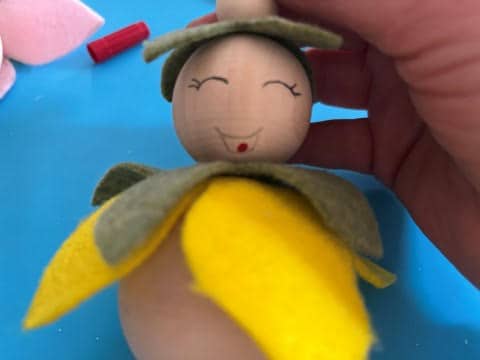
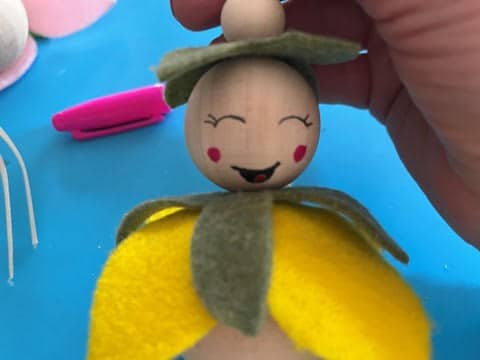
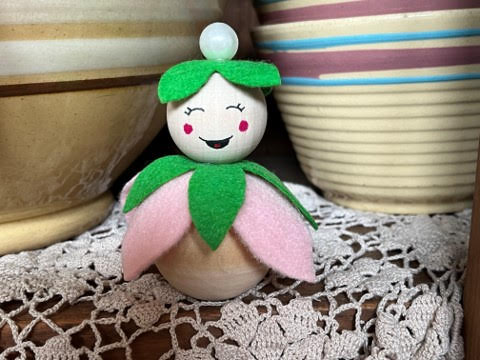
You can leave her as is on the top or you can add a 15mm wood bead, or a bead of your choice. I added a 14mm pearl that I had from the Dollar Tree. To add a bead to the top of the head add hot glue to the bottom of the bead and glue to the center of the head.
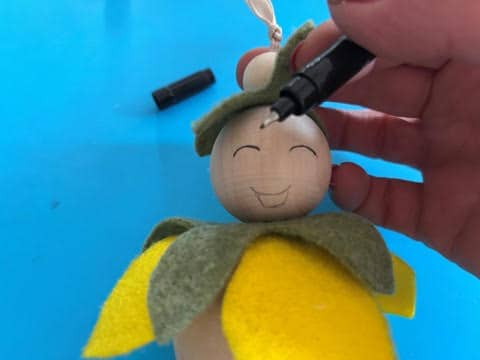
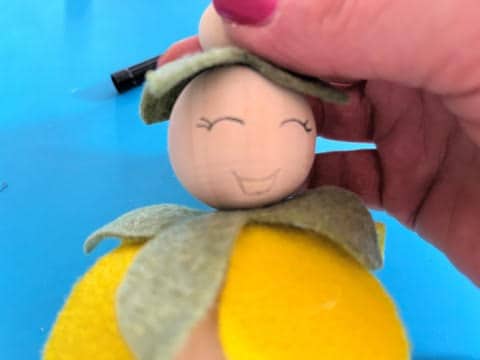
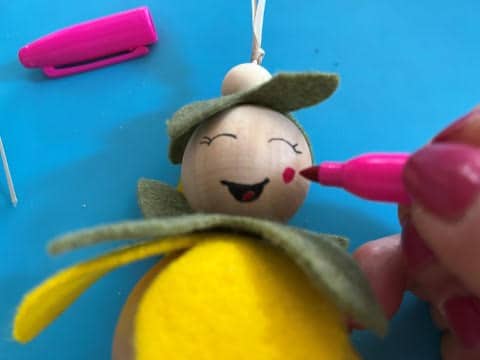
Adding The Eyes, Mouth, & Rosy Cheeks
I have to tell you I am not very good at adding the facial features but I think I did ok on her lol. You can do any eyes and mouth you would like if you want you can look at my photo’s below to see how I did mine. Start by lightly drawing on the eyes and mouth with a pencil then take a fine tip permanent red marker and make a small solid circle in the middle of the mouth, see photo below. Next take a black fine tip permanent black marker and go over your pencil lines for the eyes and mouth then fill in the mouth and add a few eyelashes. To add the rosy cheeks use a pink permanent marker and make a small solid circle on both sides of her face.
I hope you enjoy making these adorable wood bead garden girls. The girls are so simple to make you will be able to whip out a bunch in no time.

Sherry
I am going to make these; great idea. How do I look at your shop to see the new items instead of looking through all the pages?
Have a great day